Configuring Settings for Individual Spaces
- 29 Aug 2023
- Print
- DarkLight
- PDF
Configuring Settings for Individual Spaces
- Updated on 29 Aug 2023
- Print
- DarkLight
- PDF
Article summary
Did you find this summary helpful?
Thank you for your feedback!
After you've configured global settings for your spaces, you can configure settings specific to individual spaces.
Room Space Settings
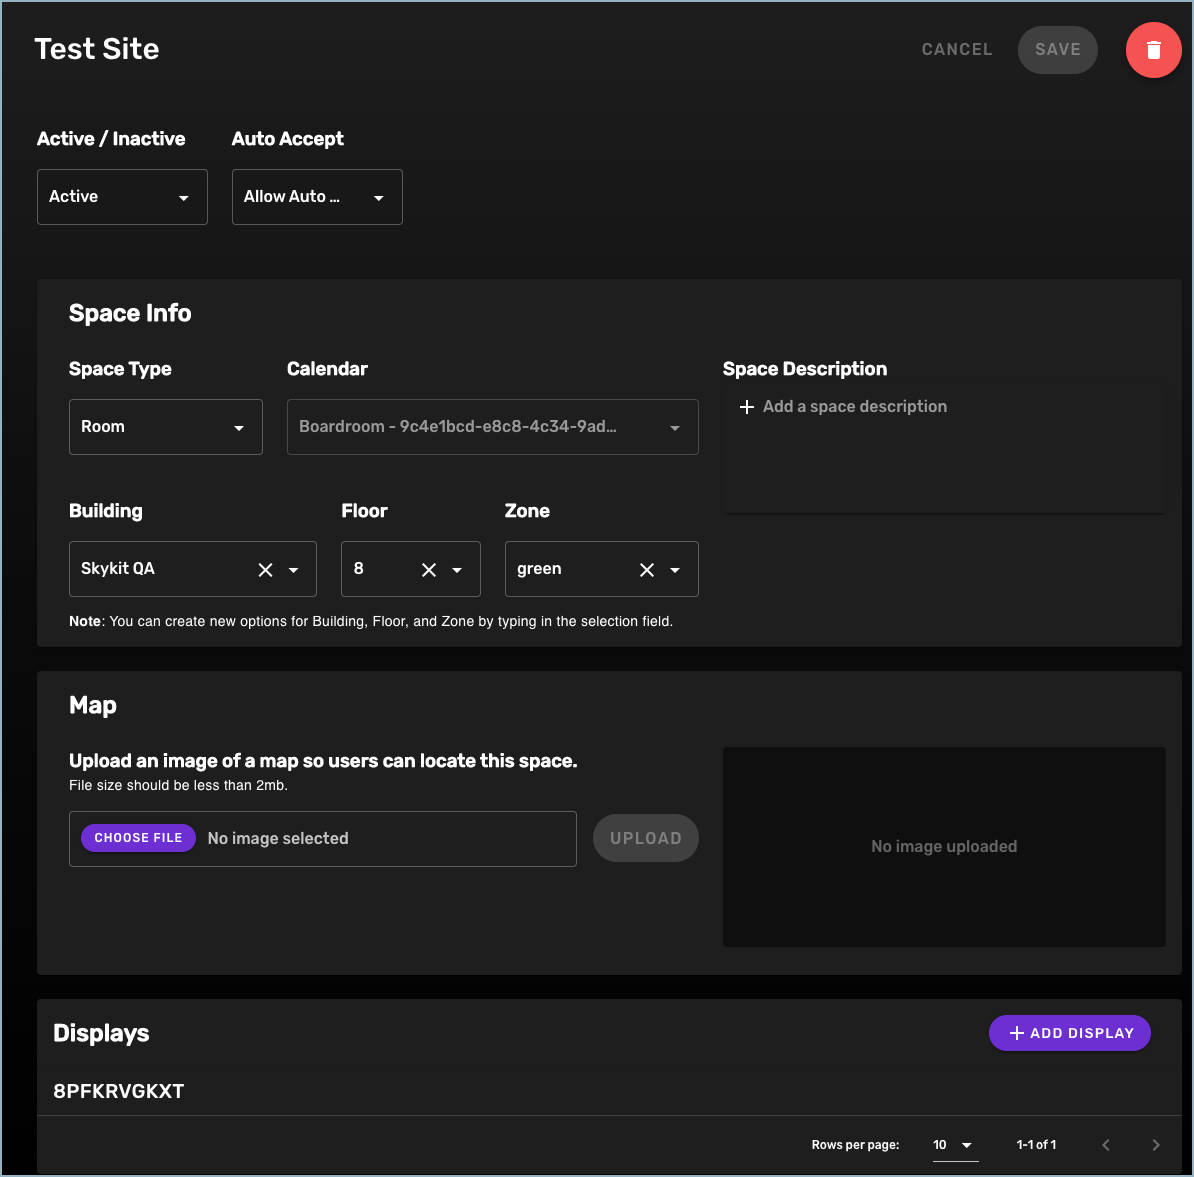
- To configure settings for an individual room space, select the space from the Spaces window. The detail window opens.

- To set the space as Active or Inactive, select the appropriate option from the Active/Inactive list.
- By default, Skykit Turf automatically accepts all events booked from the space display regardless of the rules set up for your resource calendar. If you would prefer to maintain your resource calendar's booking rules, select Don't Allow Auto Accept under Auto Accept.
- Add an optional description of the space (for example, "boardroom" or "conference room") to help identify the space more easily. If a description was pulled from the resource calendar, you can change it by typing over the old description.
- If you want to create new options for the Building, Floor, or Zone, type your text in the fields.
- To upload a map to help users find the space, select Choose File, choose the map image file you want to use, and then select Upload.
- To add a display to the space, select +Add Display. In the Available Displays window, check the display(s) you want to add to the space and then select +Add Display.
The calendar is not editable.
Desk Space Settings
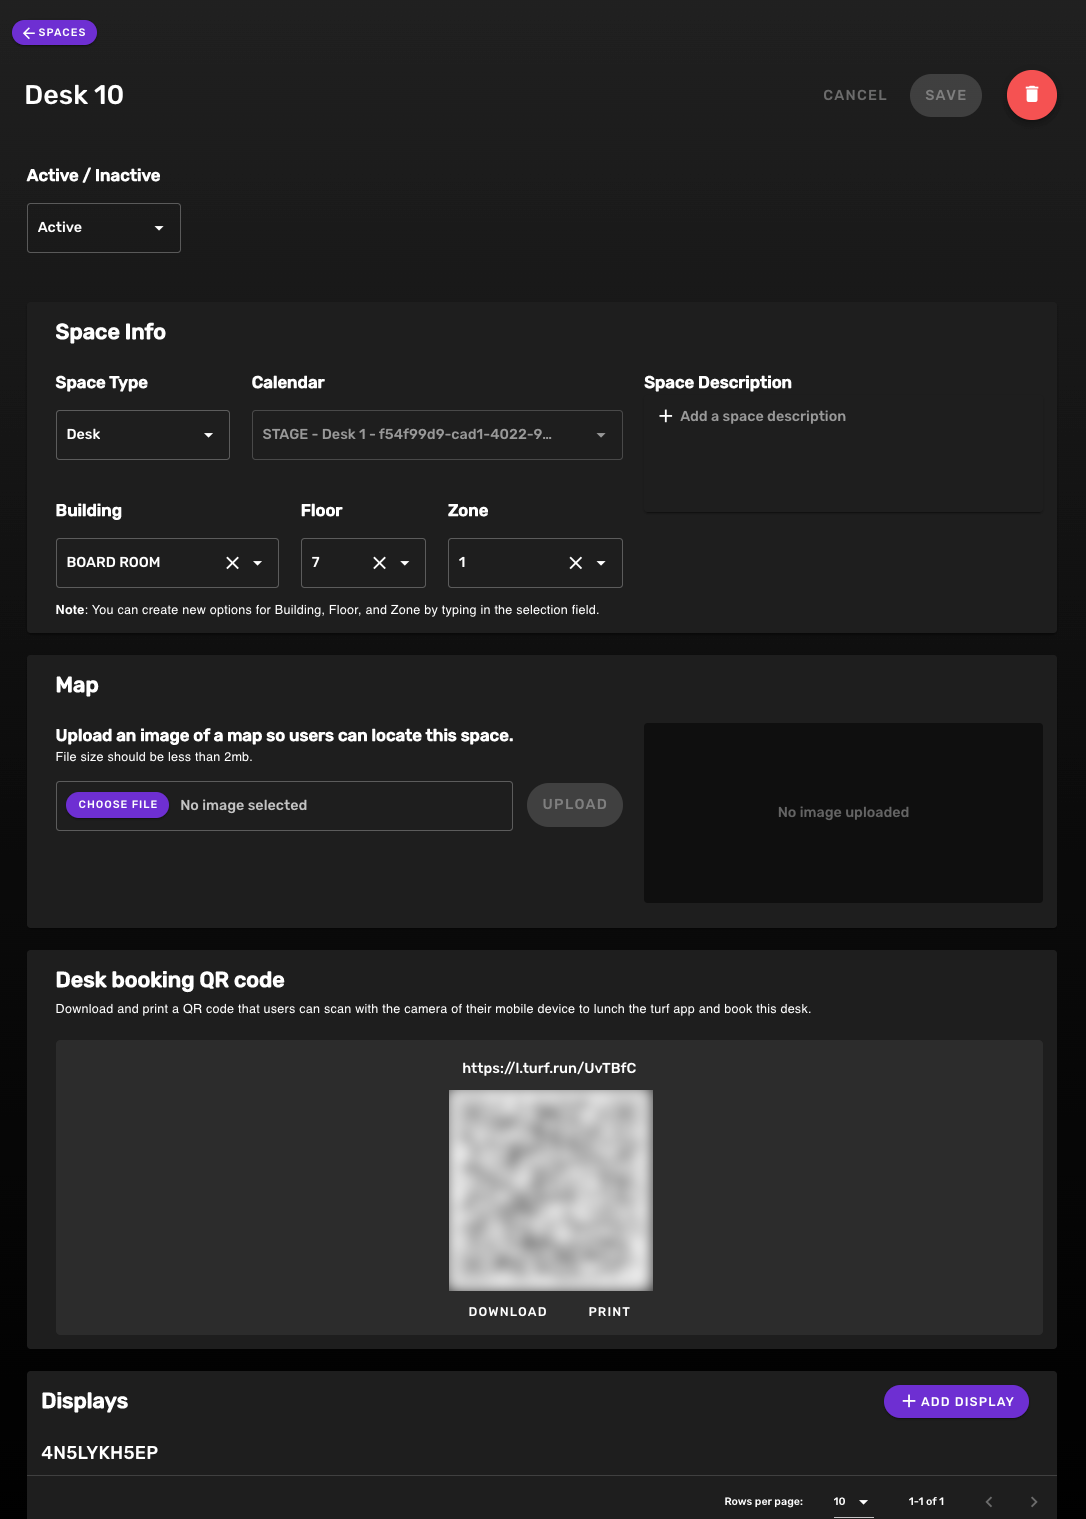
- To configure settings for an individual desk space, select the desk space from the Spaces window. The detail window opens.

- To make the space Active or Inactive, select the appropriate option from the Active/Inactive drop-down list.
- Add an optional description of the space (for example, "next to break room" or "booth space") to help identify it more easily. If a description was pulled from the resource calendar, you can change it by typing over the old description.
- If you want to create new options for the Building, Floor, or Zone, type your text in the fields.
- To upload a map to help users find the space, select Choose File under Map, choose the map image file you want to use, and then select Upload.
- Select Download under Desk booking QR code to download the code as a .png image file that you can insert into a message to your users so they can install the Turf mobile web app. Select Print if you want to print a hard copy of the code that you can place in the desk space or provide to users.
- To add a display to the space, select +Add Display. In the Available Displays window, check the display(s) you want to add to the space and then select +Add Display.
The calendar is not editable.
Check-In Space Settings
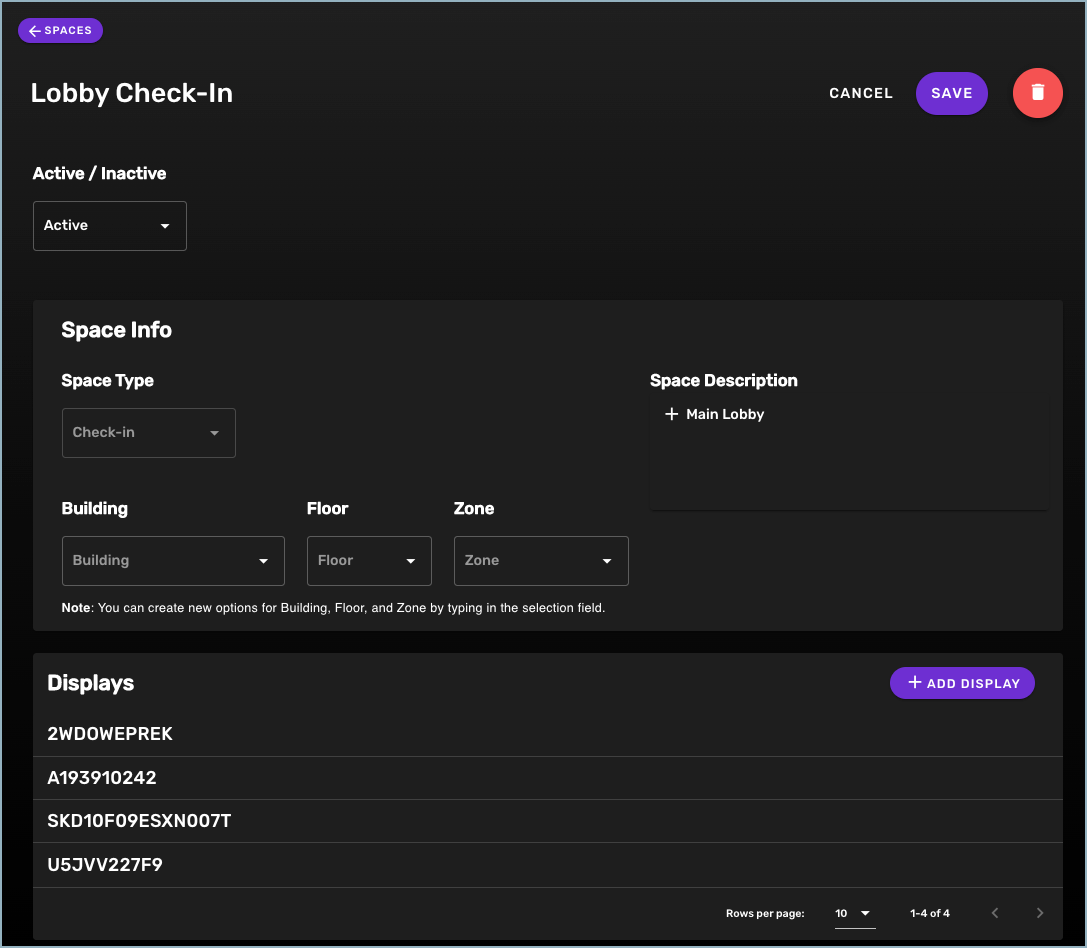
- To configure settings for an individual check-in space, select the space from the Spaces window. The detail window opens.

- To make the space Active or Inactive, select the appropriate option from the Active/Inactive drop-down list.
- Add a description of the space (for example, "lobby check-in" or "conference room check-in") to make it easier to identify. If a description was pulled from the resource calendar, you can change it by typing over the old description.
- If you want to create new options for the Building, Floor, or Zone, type your text in the fields.
- To add a display to the space, select +Add Display. In the Available Displays window, check the display(s) you want to add to the space and then select +Add Display.
The space type is not editable.
Was this article helpful?
