A step-by-step guide to creating dynamic, multi-zone displays with flexible scheduling.
All new customers will automatically be given Collections & Layouts (New Edition) from May 2026 onwards. For existing customers we are planning a migration from Collections Classic by July-August 2026. We will be proactively reaching out to you to ensure a seamless transition, no action is currently required.
What You'll Create
Collections & Layouts (New Edition) lets you build visual, multi-zone displays with powerful scheduling controls. You can combine static content with dynamic playlists, control exactly when different layouts appear on your screens, and use portrait or landscape orientations. This latest version adds portrait layout support, lead zone designation for precise content control, and play rules on collection entries for advanced scheduling, and new Unified View layouts specifically designed for E500 devices.
Who Uses Collections & Layouts?
Ideal for:
Content Curators - Managing complex, multi-zone displays
Corporate Communications Managers - Distributing branded content across locations
IT Administrators - Overseeing enterprise digital signage deployments
Common Industries:
Corporate communications and internal displays
Retail environments and store displays
Healthcare facilities and patient information
Manufacturing plants and safety communications
Before You Begin
What you'll need:
Access to Collections & Layouts (enabled in your account)
Content items or playlists ready to use
Understanding of where and when you want content to display
Knowledge of your display orientation (landscape or portrait)
Helpful to know:
How playlists work (if you plan to use them)
Basic play rules concepts (optional, for scheduling)
Your display labels (if targeting specific screens)
Step 1: Create a New Collection
Navigate to Collections in the main menu
.png)
Click + Collection button

Give your collection a descriptive name
Example: "Lobby Display - Q1 2026" or "Cafeteria Menu Rotation"
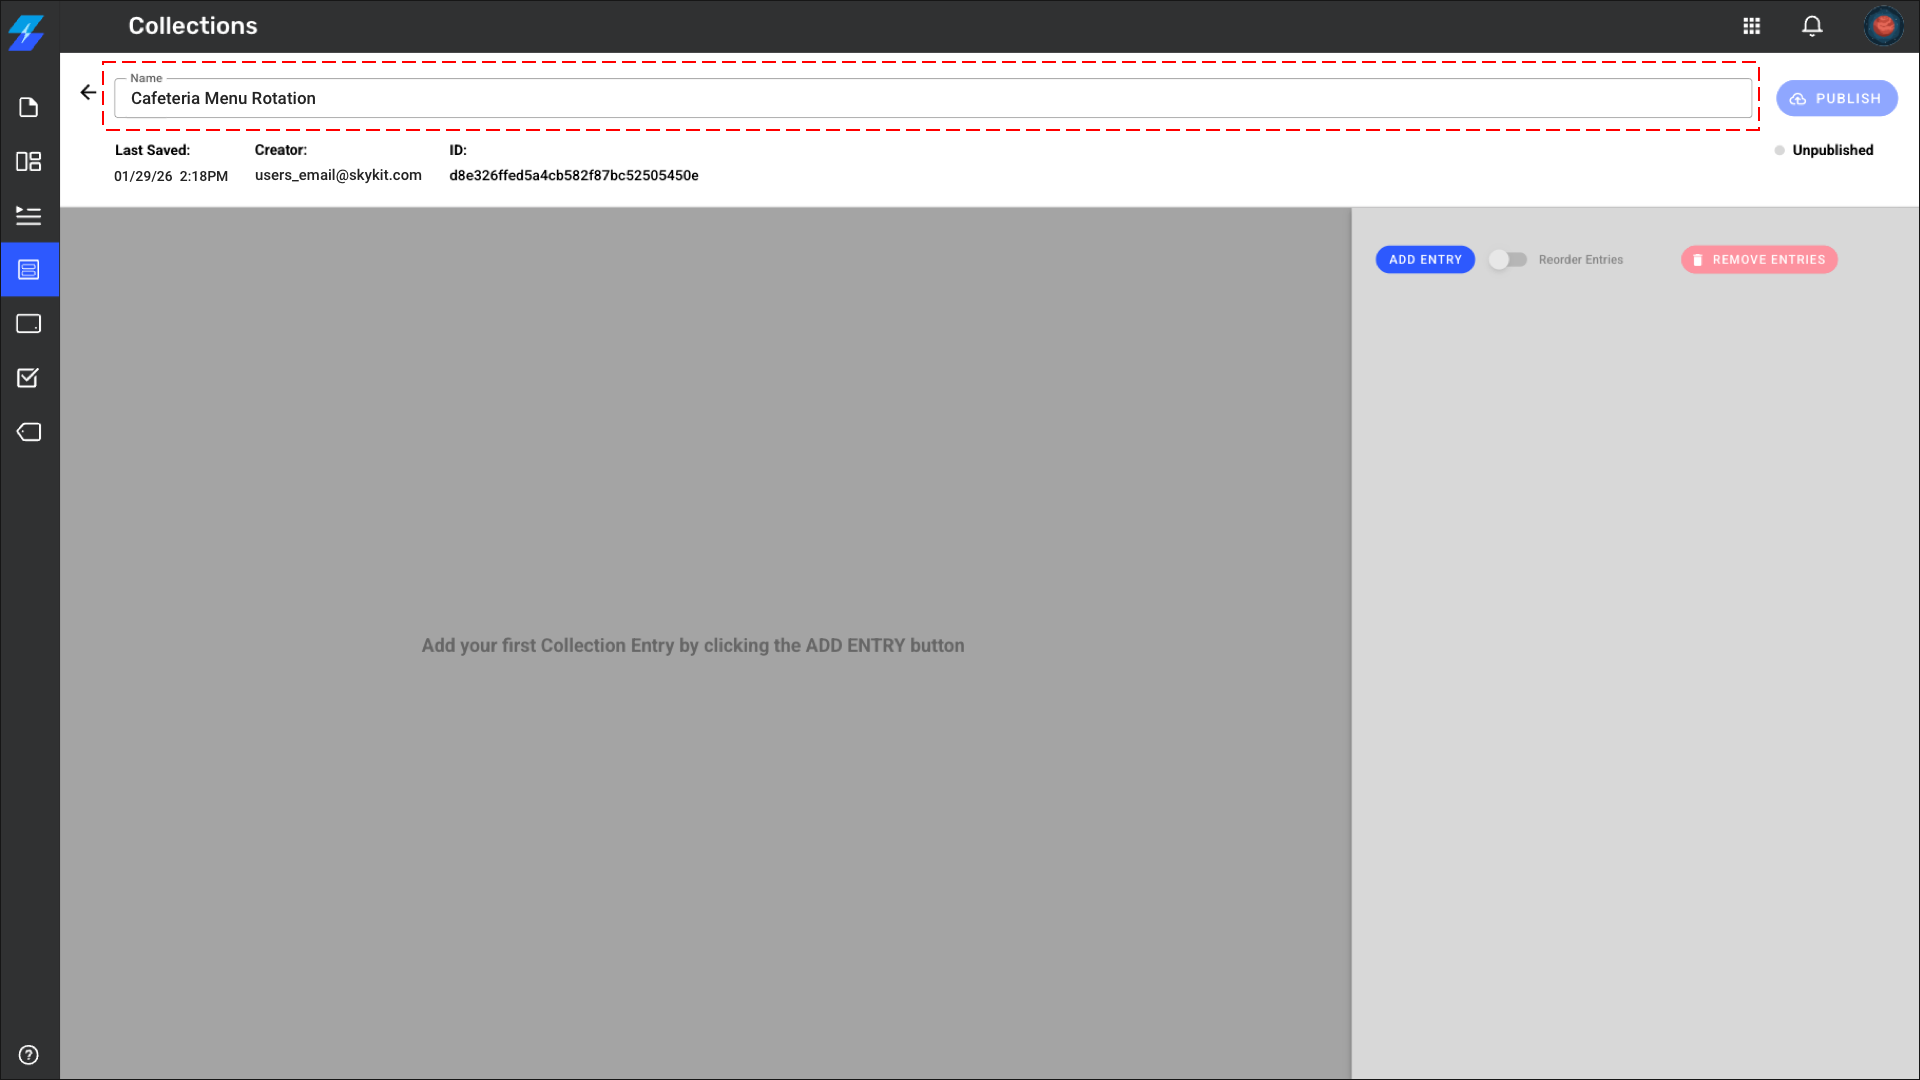
Click Add Entry

Step 2: Add Your First Collection Entry (Layout)
Click the dropdown in Select Orientation:
.png)
Landscape - For horizontal displays (standard)
Portrait - For vertical displays
Unified View - Landscape - For horizontal video wall layouts spanning multiple connected displays (requires E500)
Unified View - Portrait - For horizontal video wall layouts spanning multiple connected displays (requires E500)
Note: Unified View layouts are designed for video wall configurations using E500 devices. These layouts span acoess multiple connected displays in grid arrangements such as 2x1, 2x2, 3x1, and 4x1.
Click your chosen layout to add it to your collection
Click Create Entry
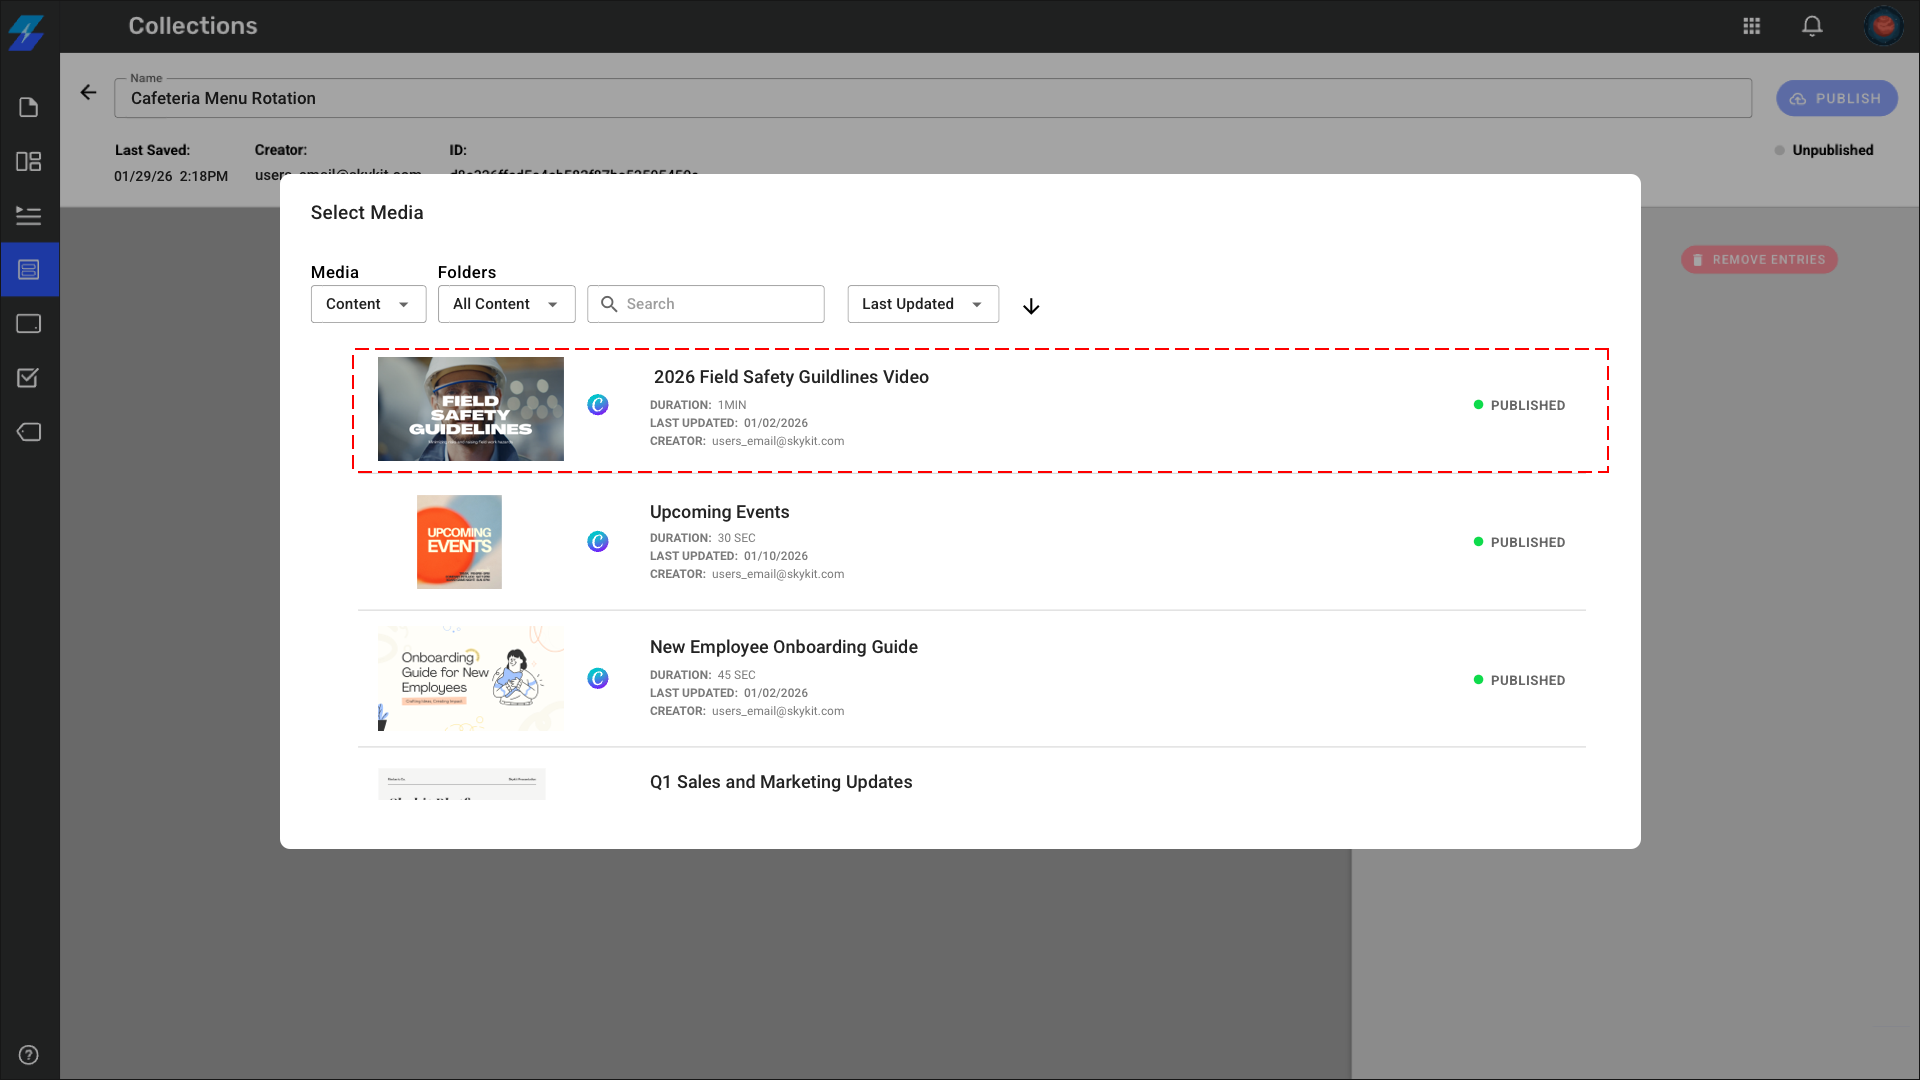
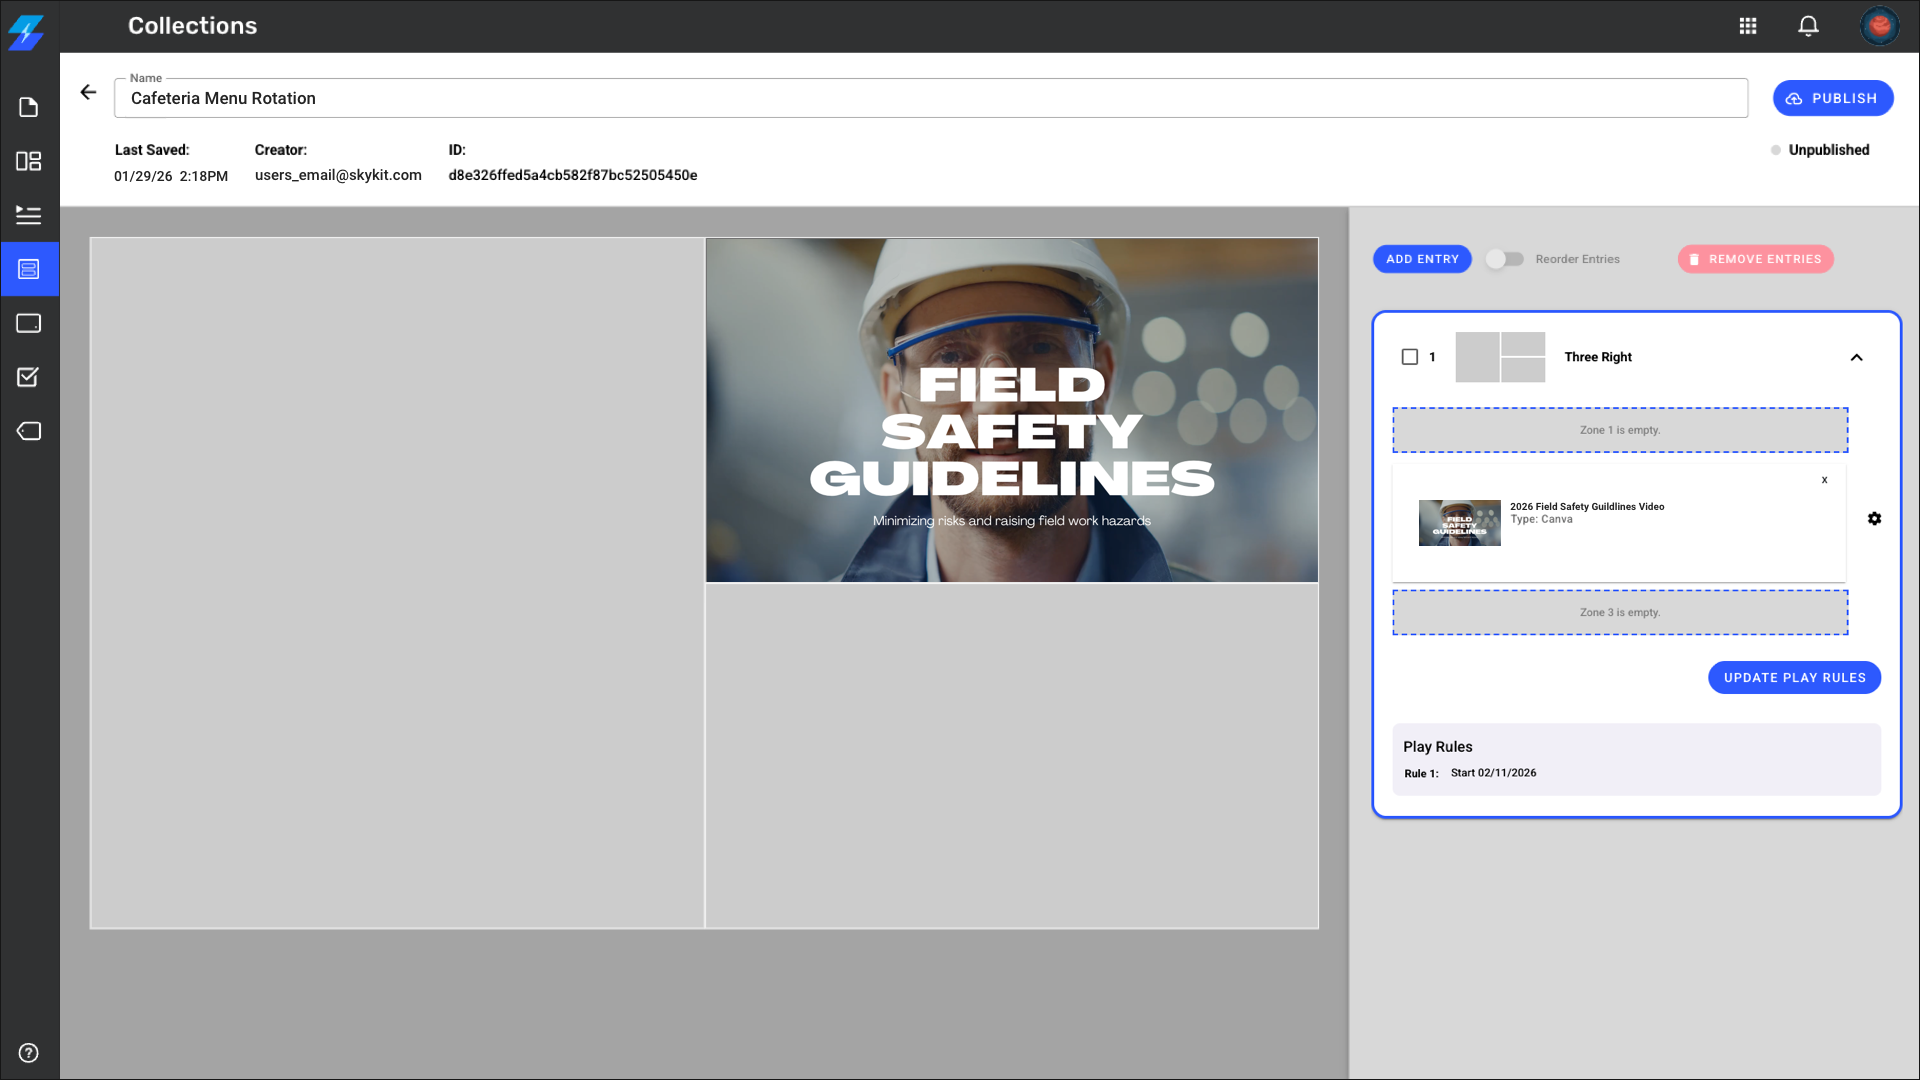
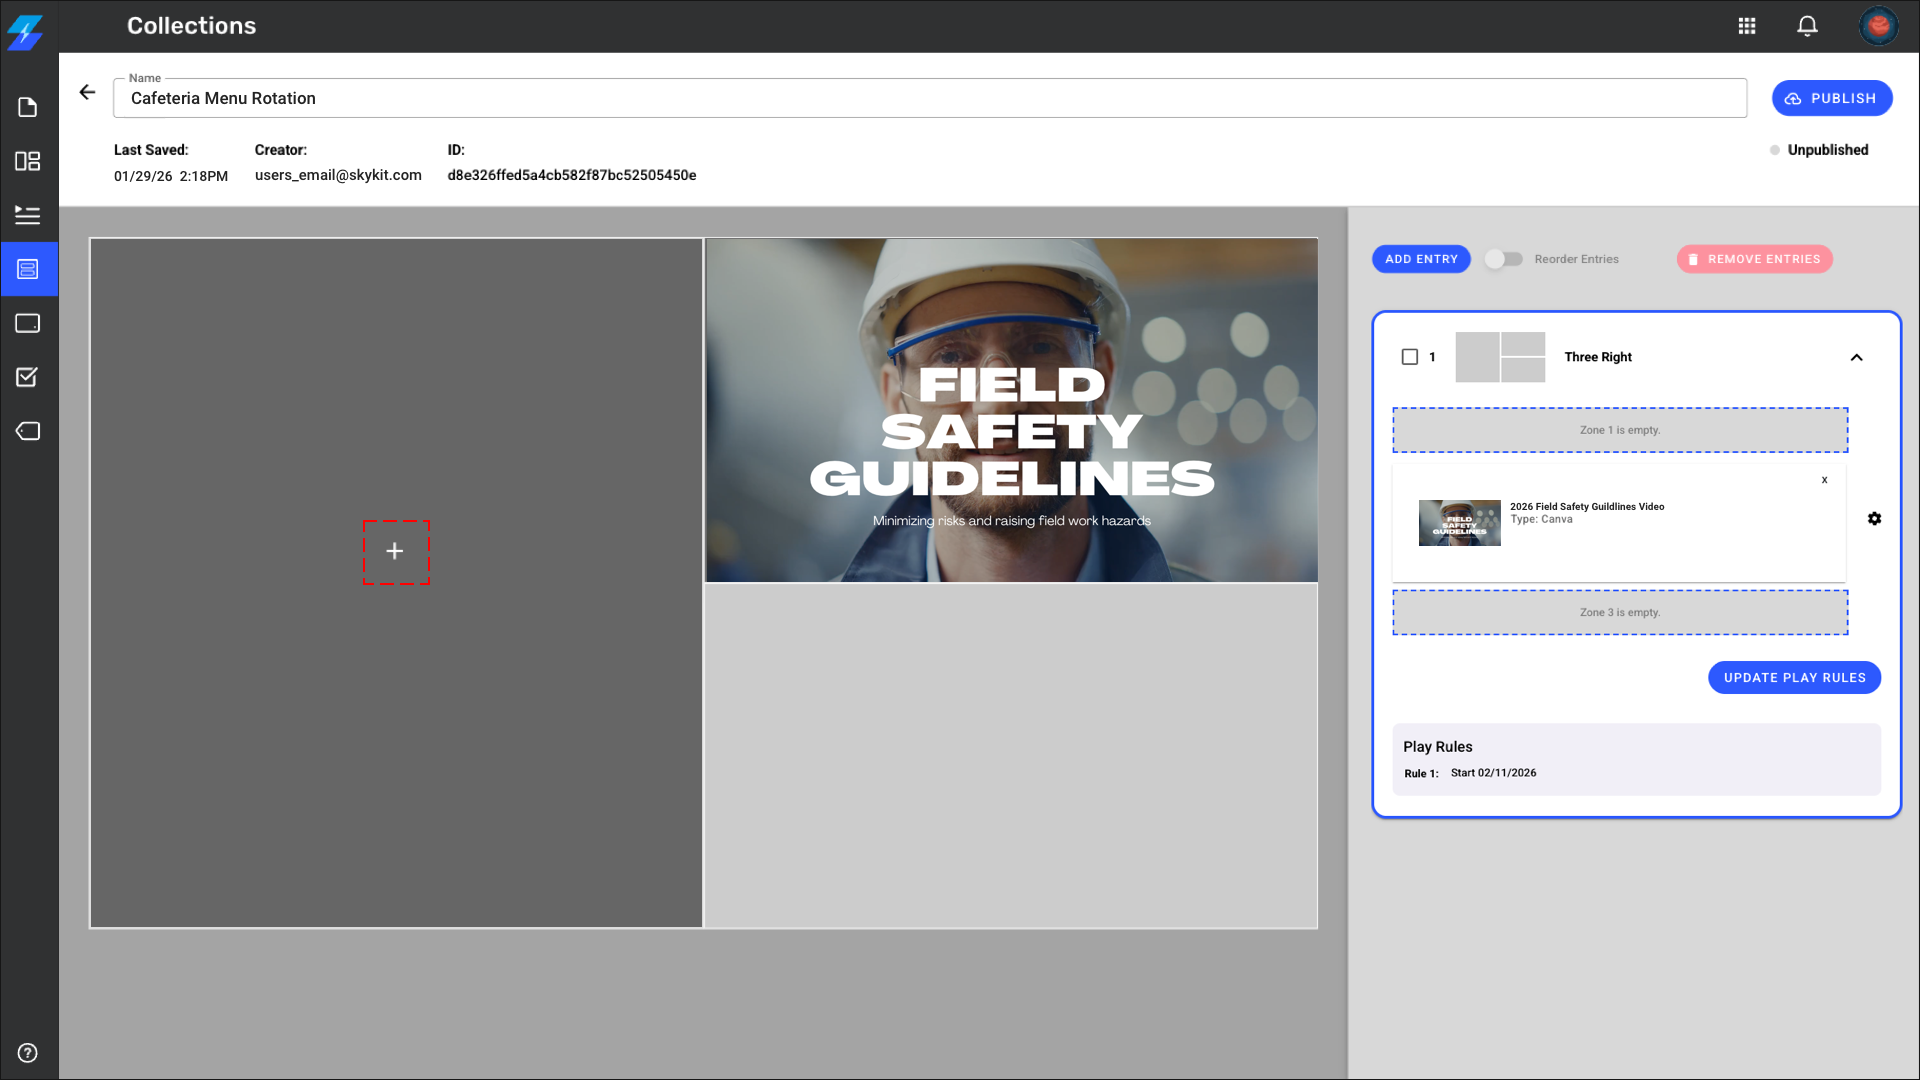
Step 3: Add Content to Your Layout Zones
For each zone in your layout you can add an individual piece of content, a playlist or a single pane program:
Option A: Add Individual Content Items
Click the + icon in a zone
.png)
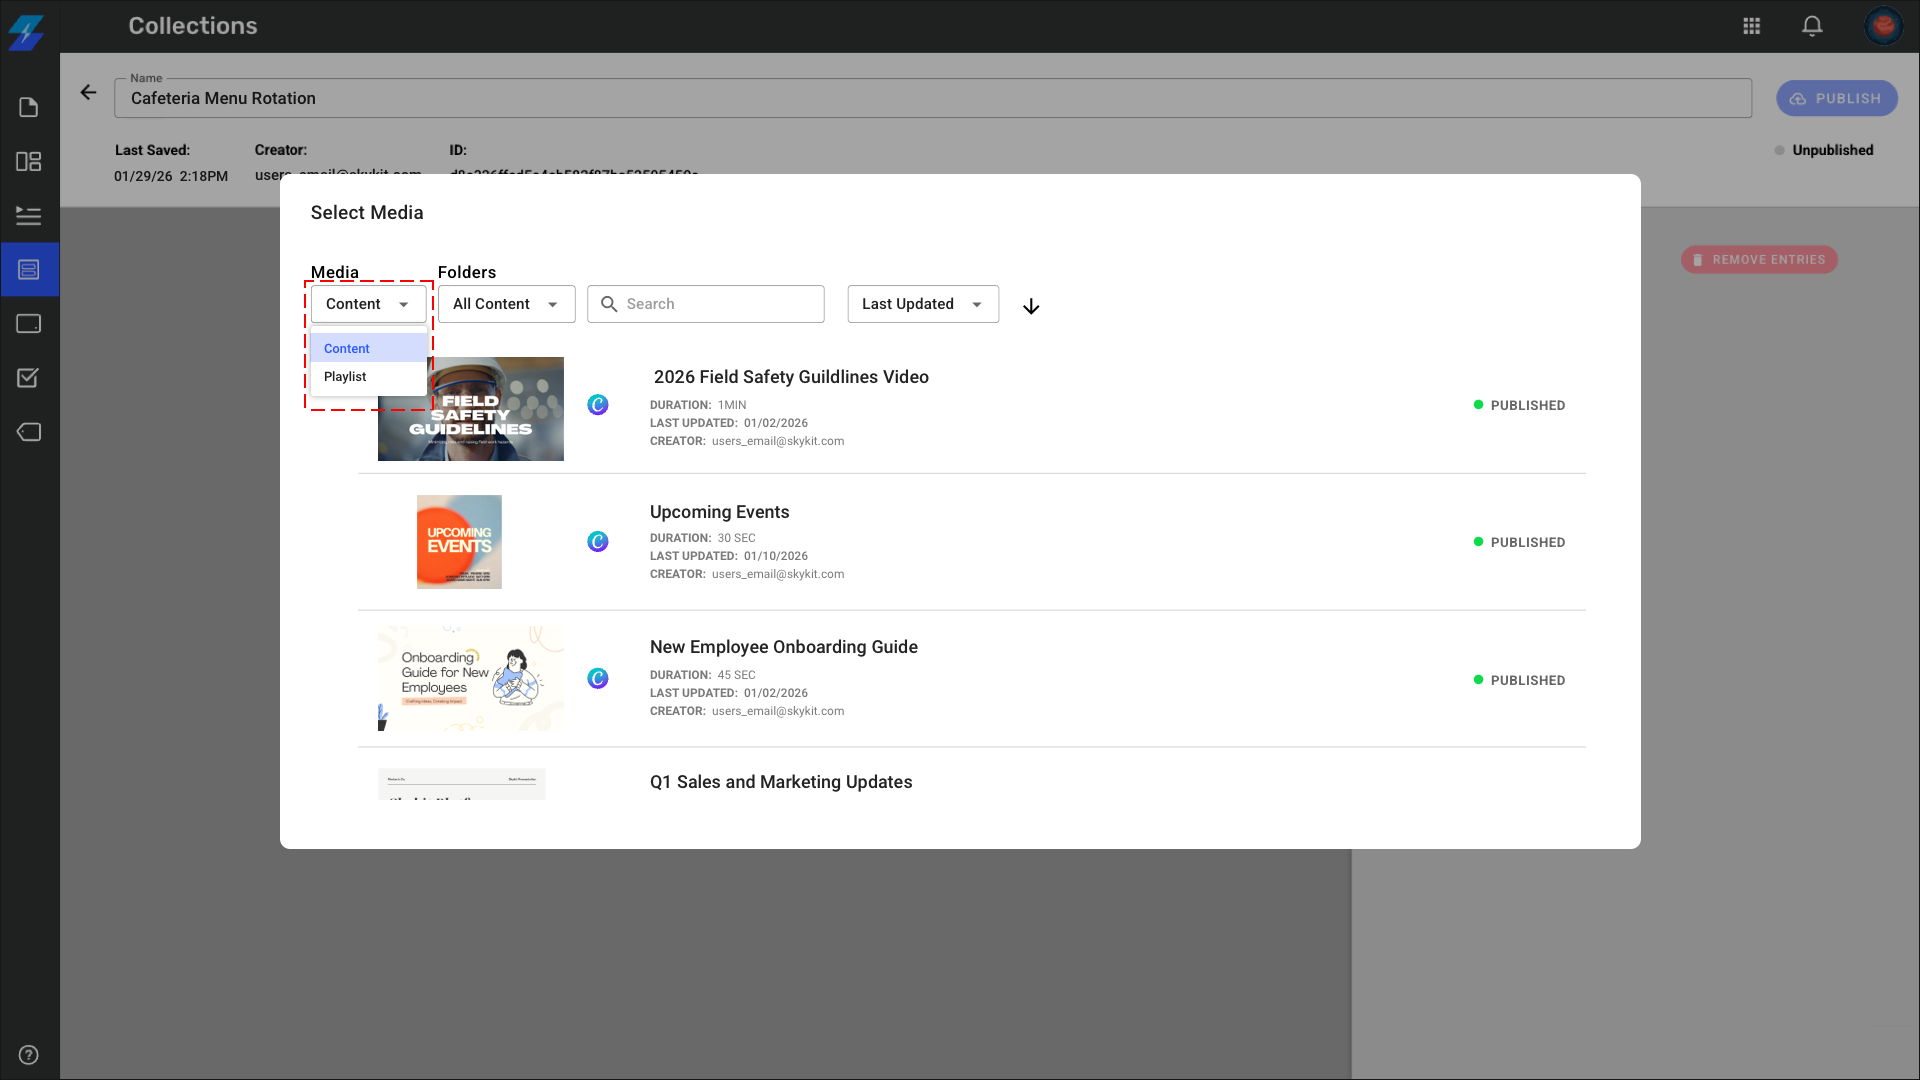
Select the dropdown under Media and select Content
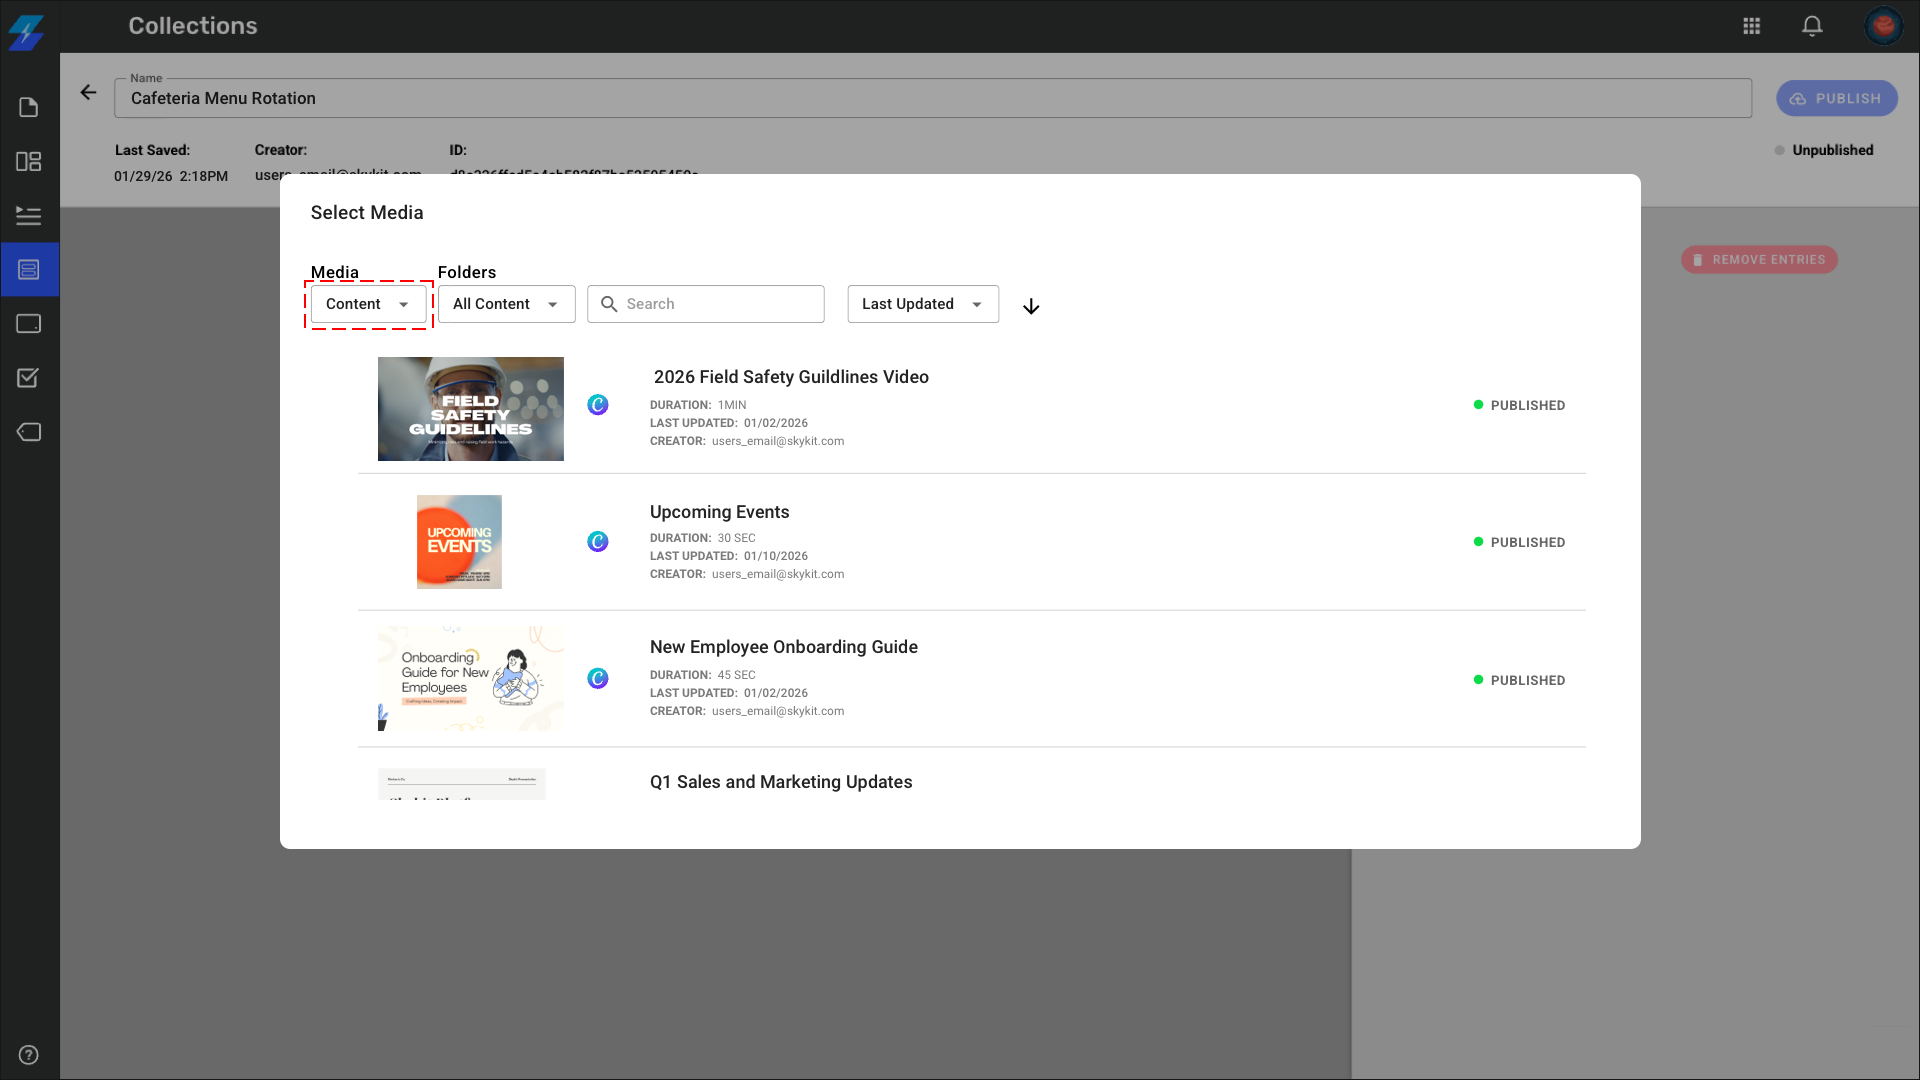
Select the content item you want to display in the selected zone
Option B: Add a Playlist
Click the + icon or placeholder in a zone
Select the dropdown under Media and select Playlist
Select the playlist you want to display in the selected zone
.png)
To remove a content or playlist simply click the X within the entry. To remove the entire entry, select the entry number and click Remove Entry/Entries.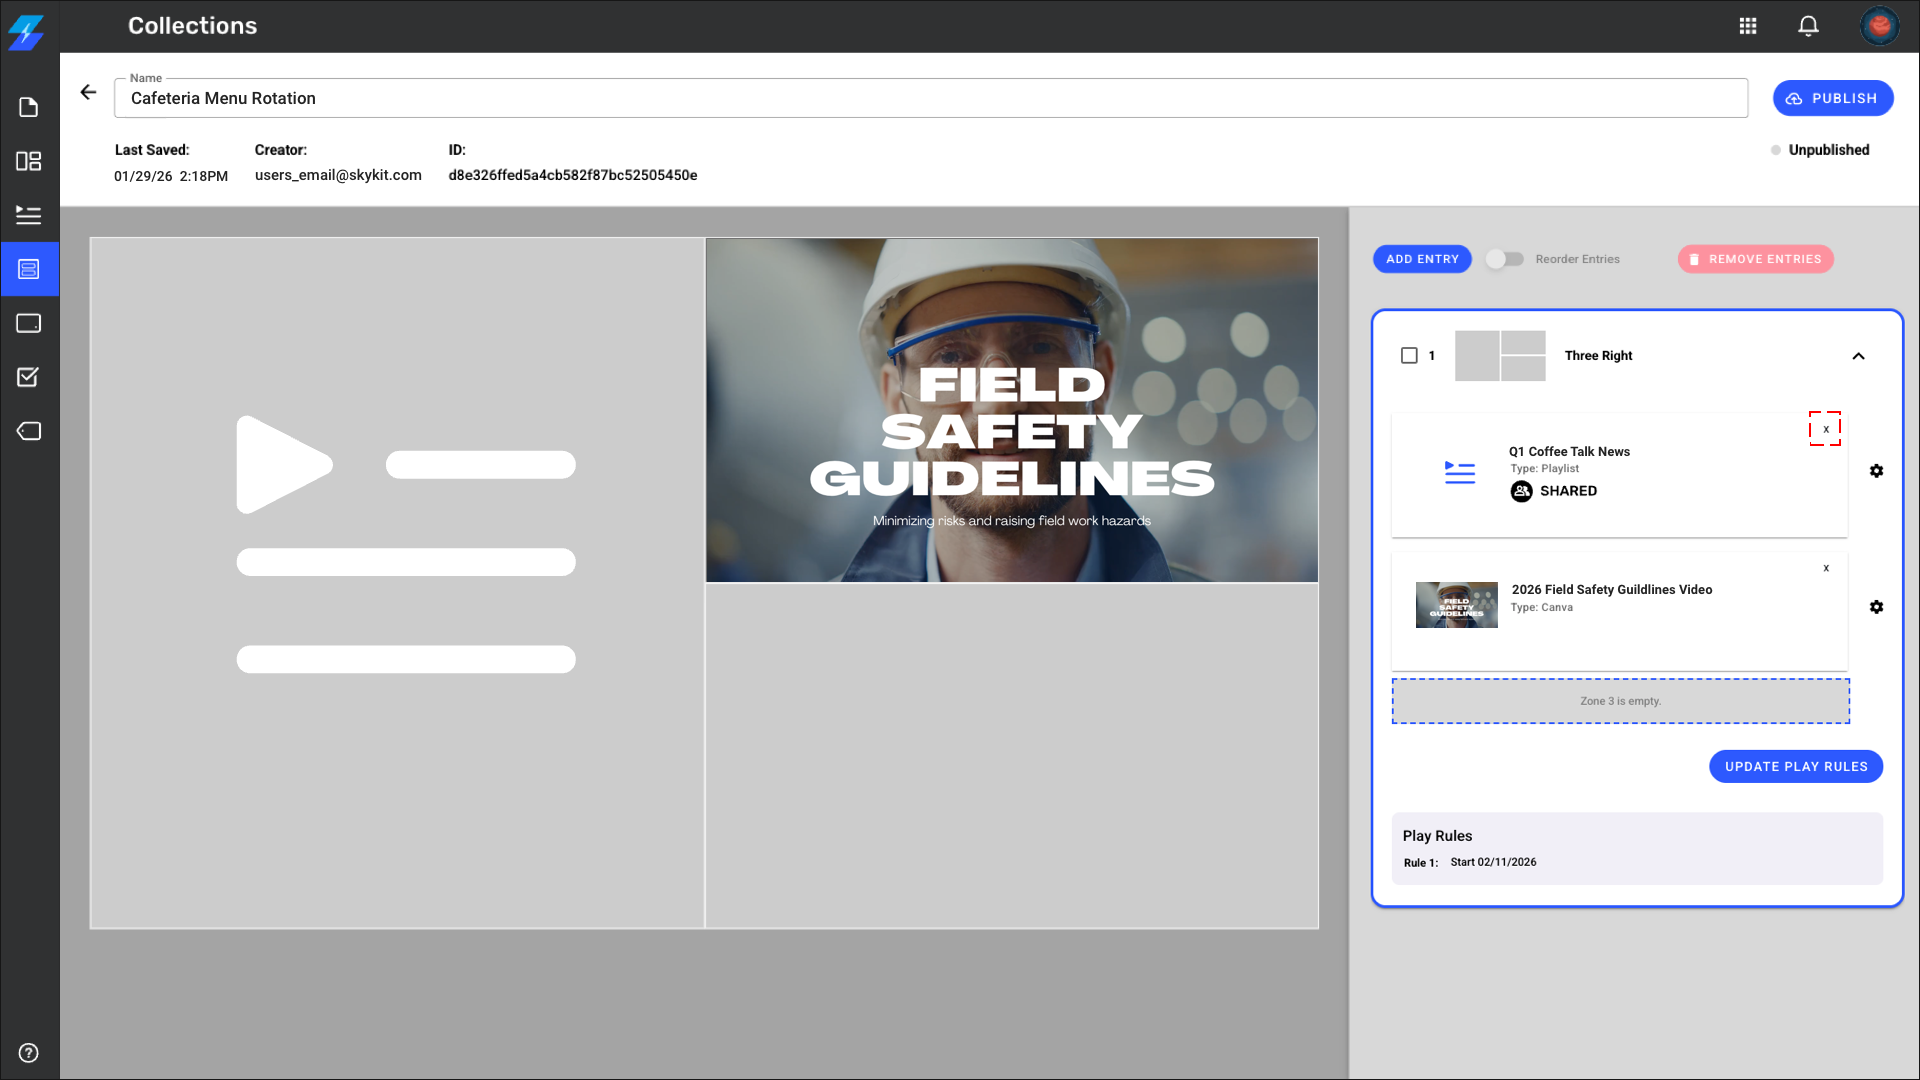
Tip:
Using playlists in zones is powerful - you can have static content in 3 zones and a rotating playlist in the 4th zone, all within one layout.
Step 4: Set Lead Zone (Optional)
When you need this:
If your layout zones have different content lengths OR when you have multiple collection entries and need to control when the collection advances to the next entry.
How Lead Zones Work:
Within a single entry: The lead zone's content duration determines when that layout completes, regardless of other zones' durations.
With multiple entries: The collection only advances to the next entry after the lead zone completes a full content rotation. This ensures your primary content finishes completely before moving on.
To Set a Lead Zone:
Click the Settings icon on the zone you want to control timing
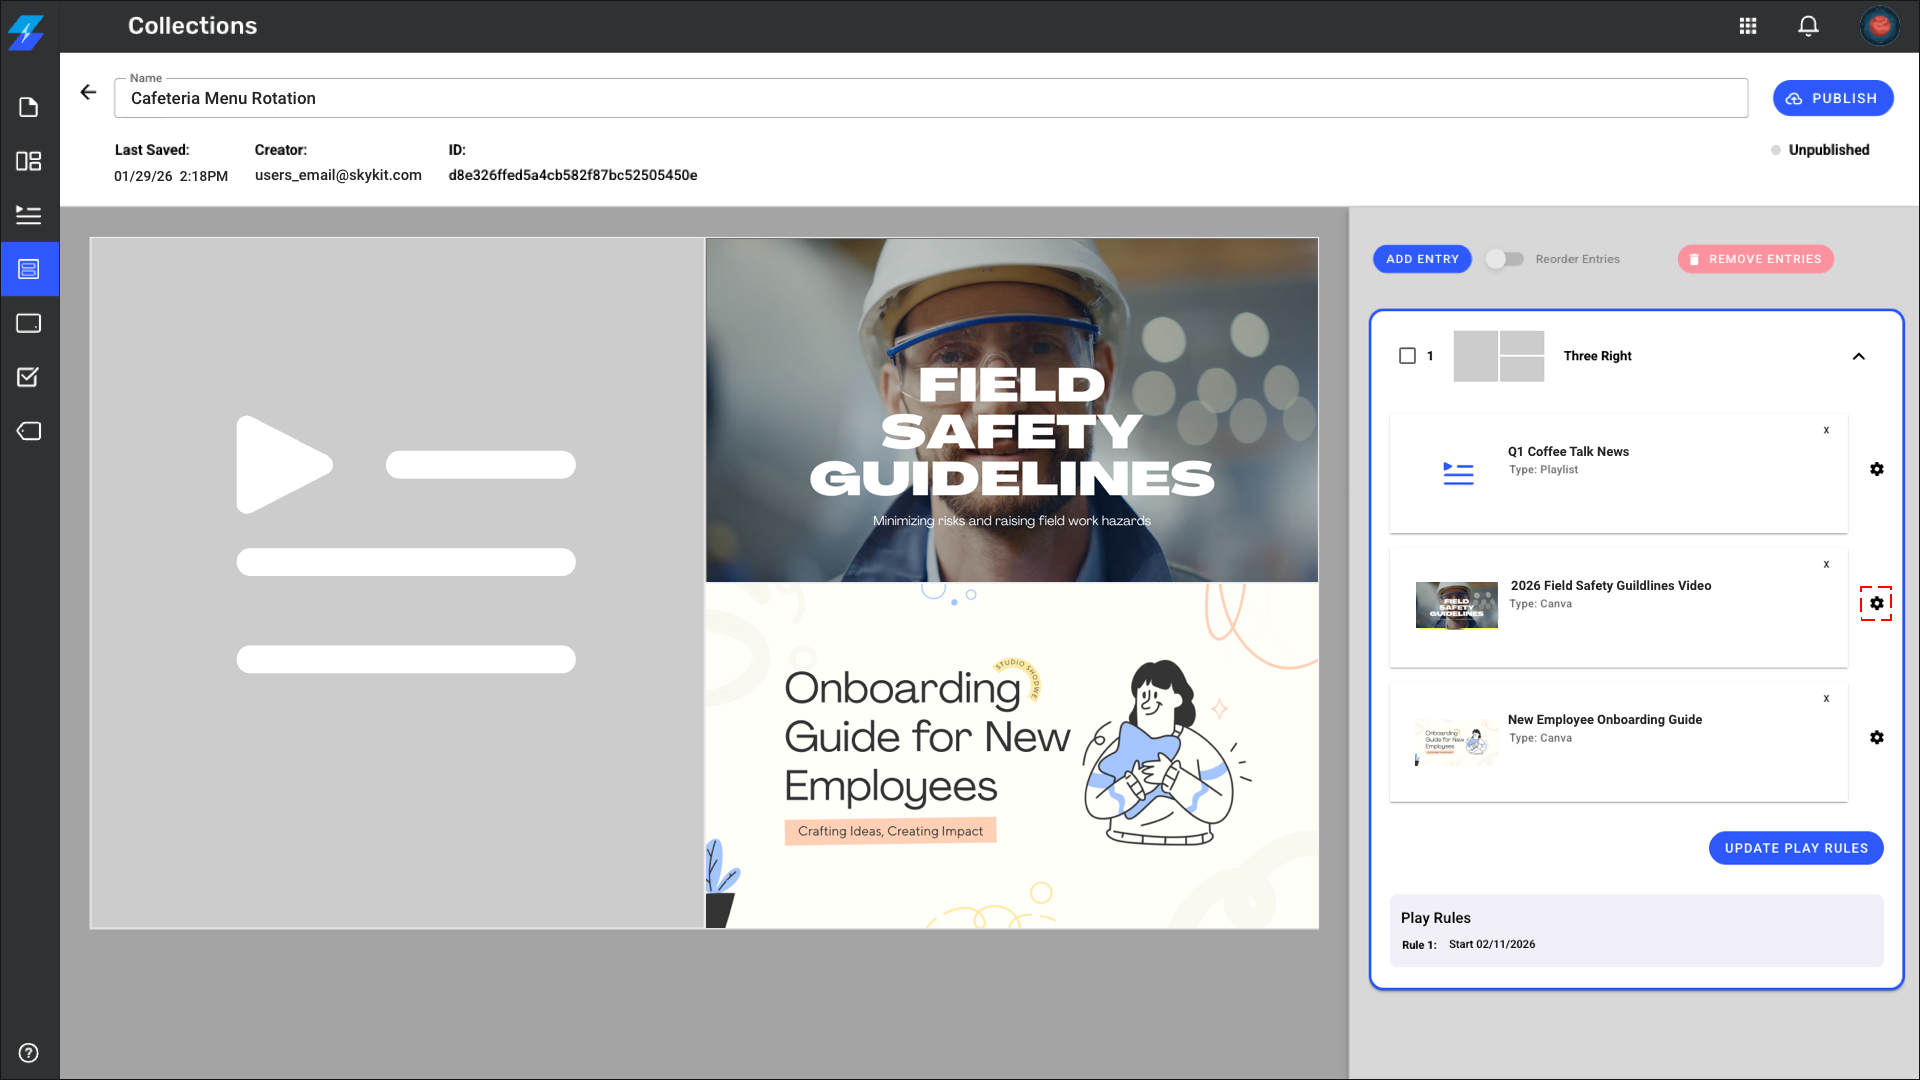
Toggle Lead Zone to Enabled
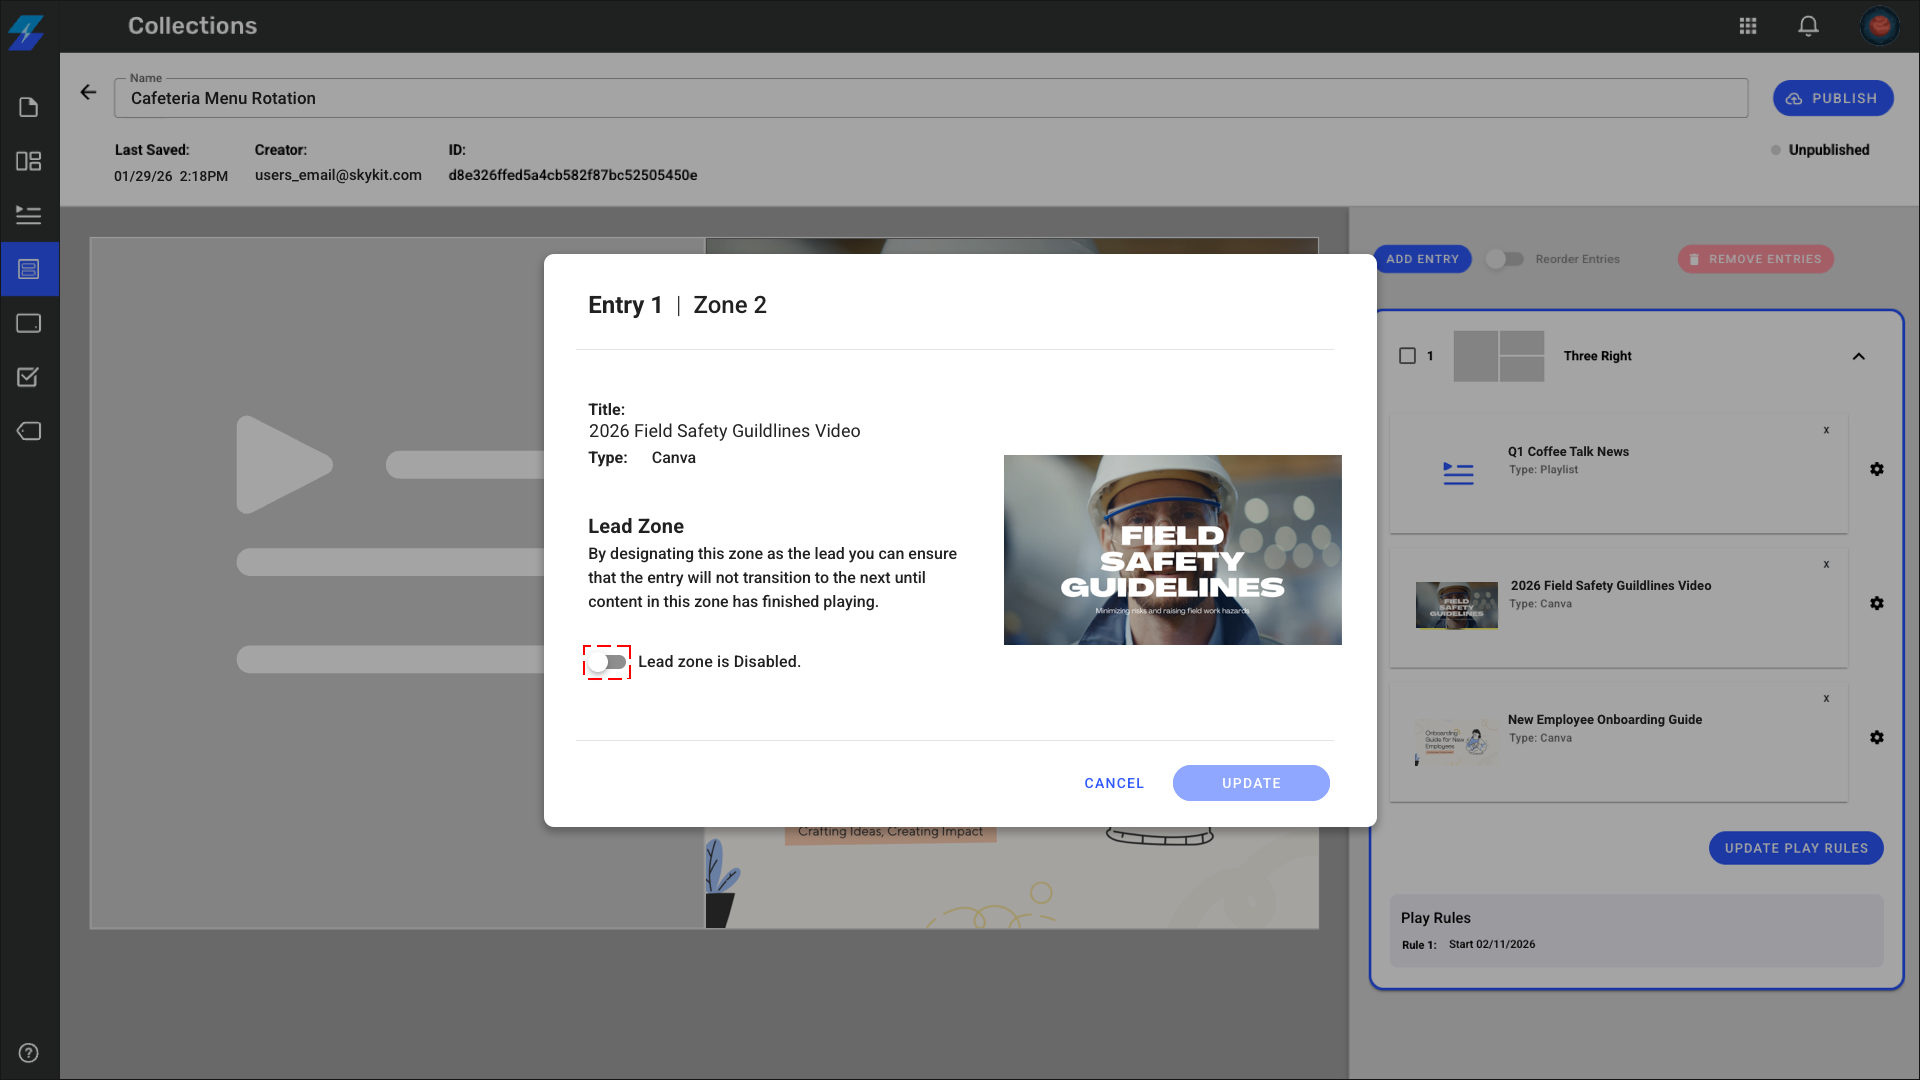
Click Update
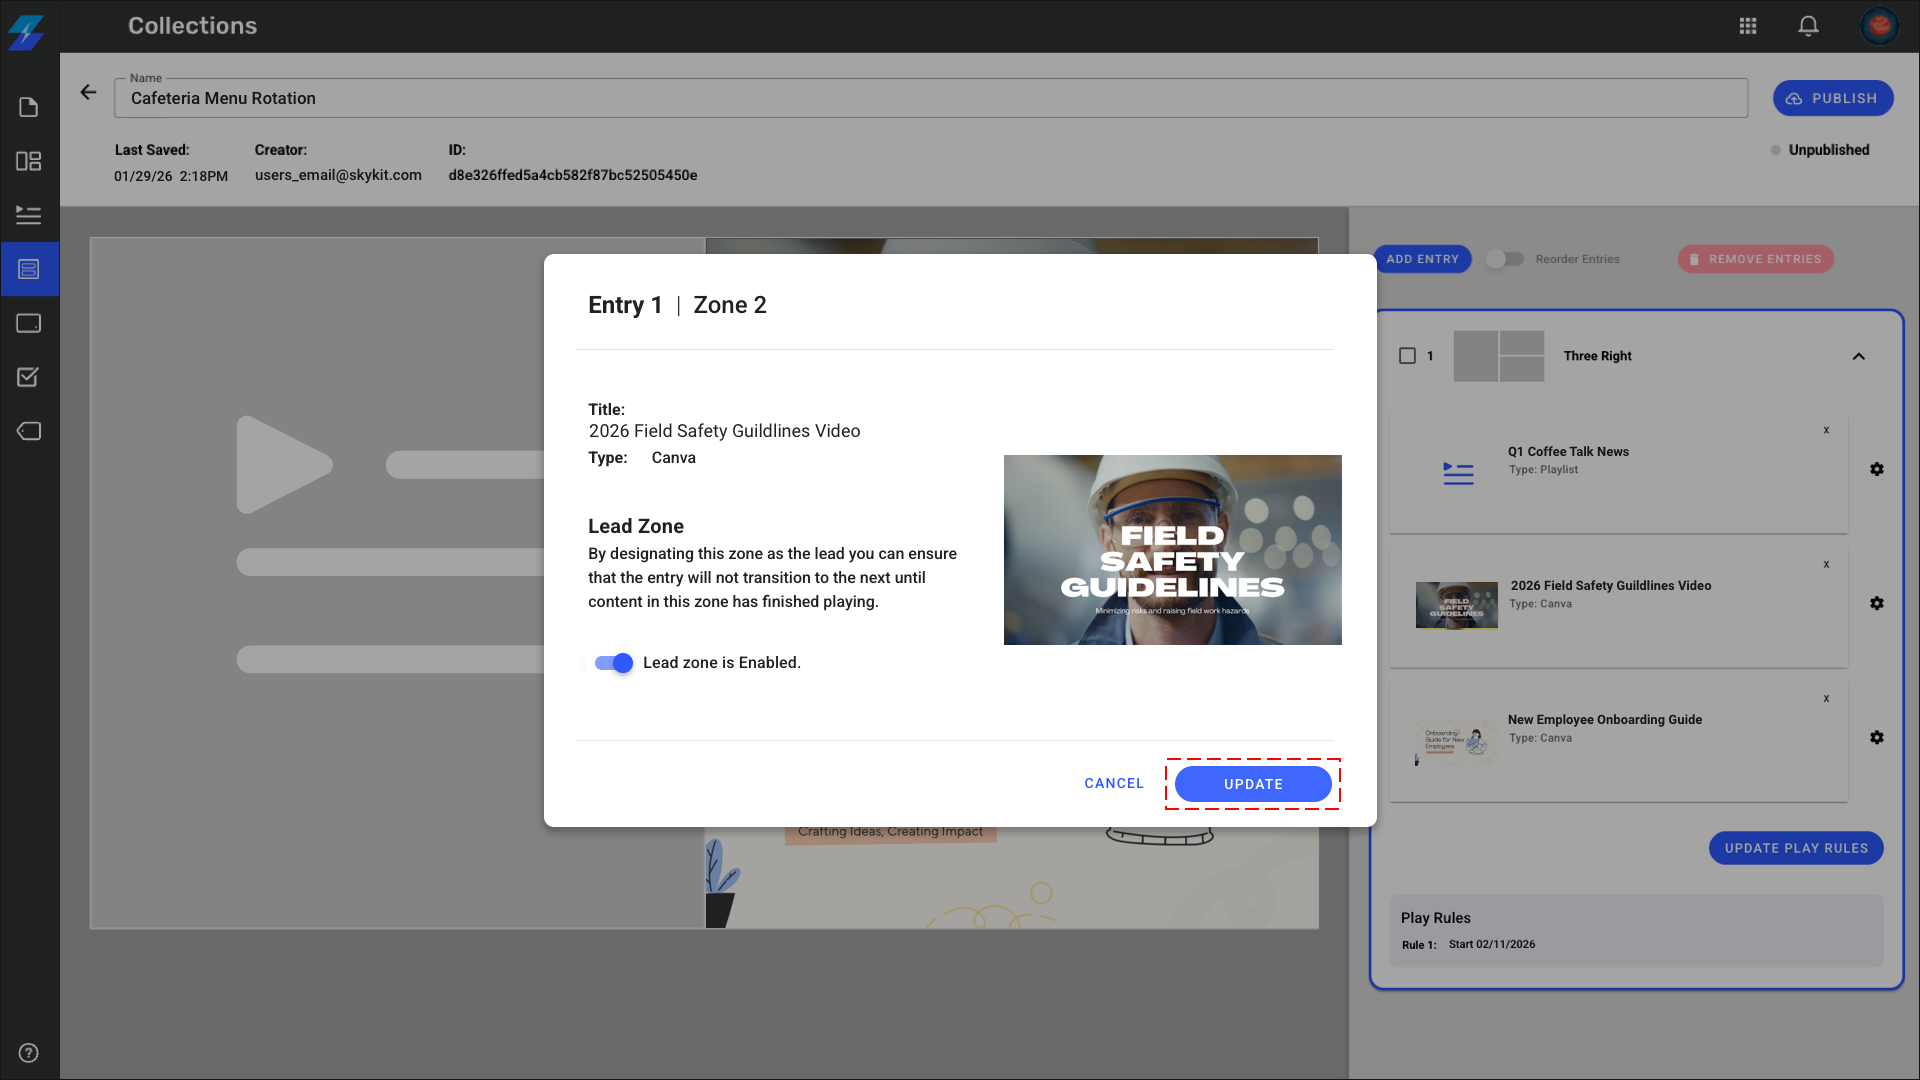
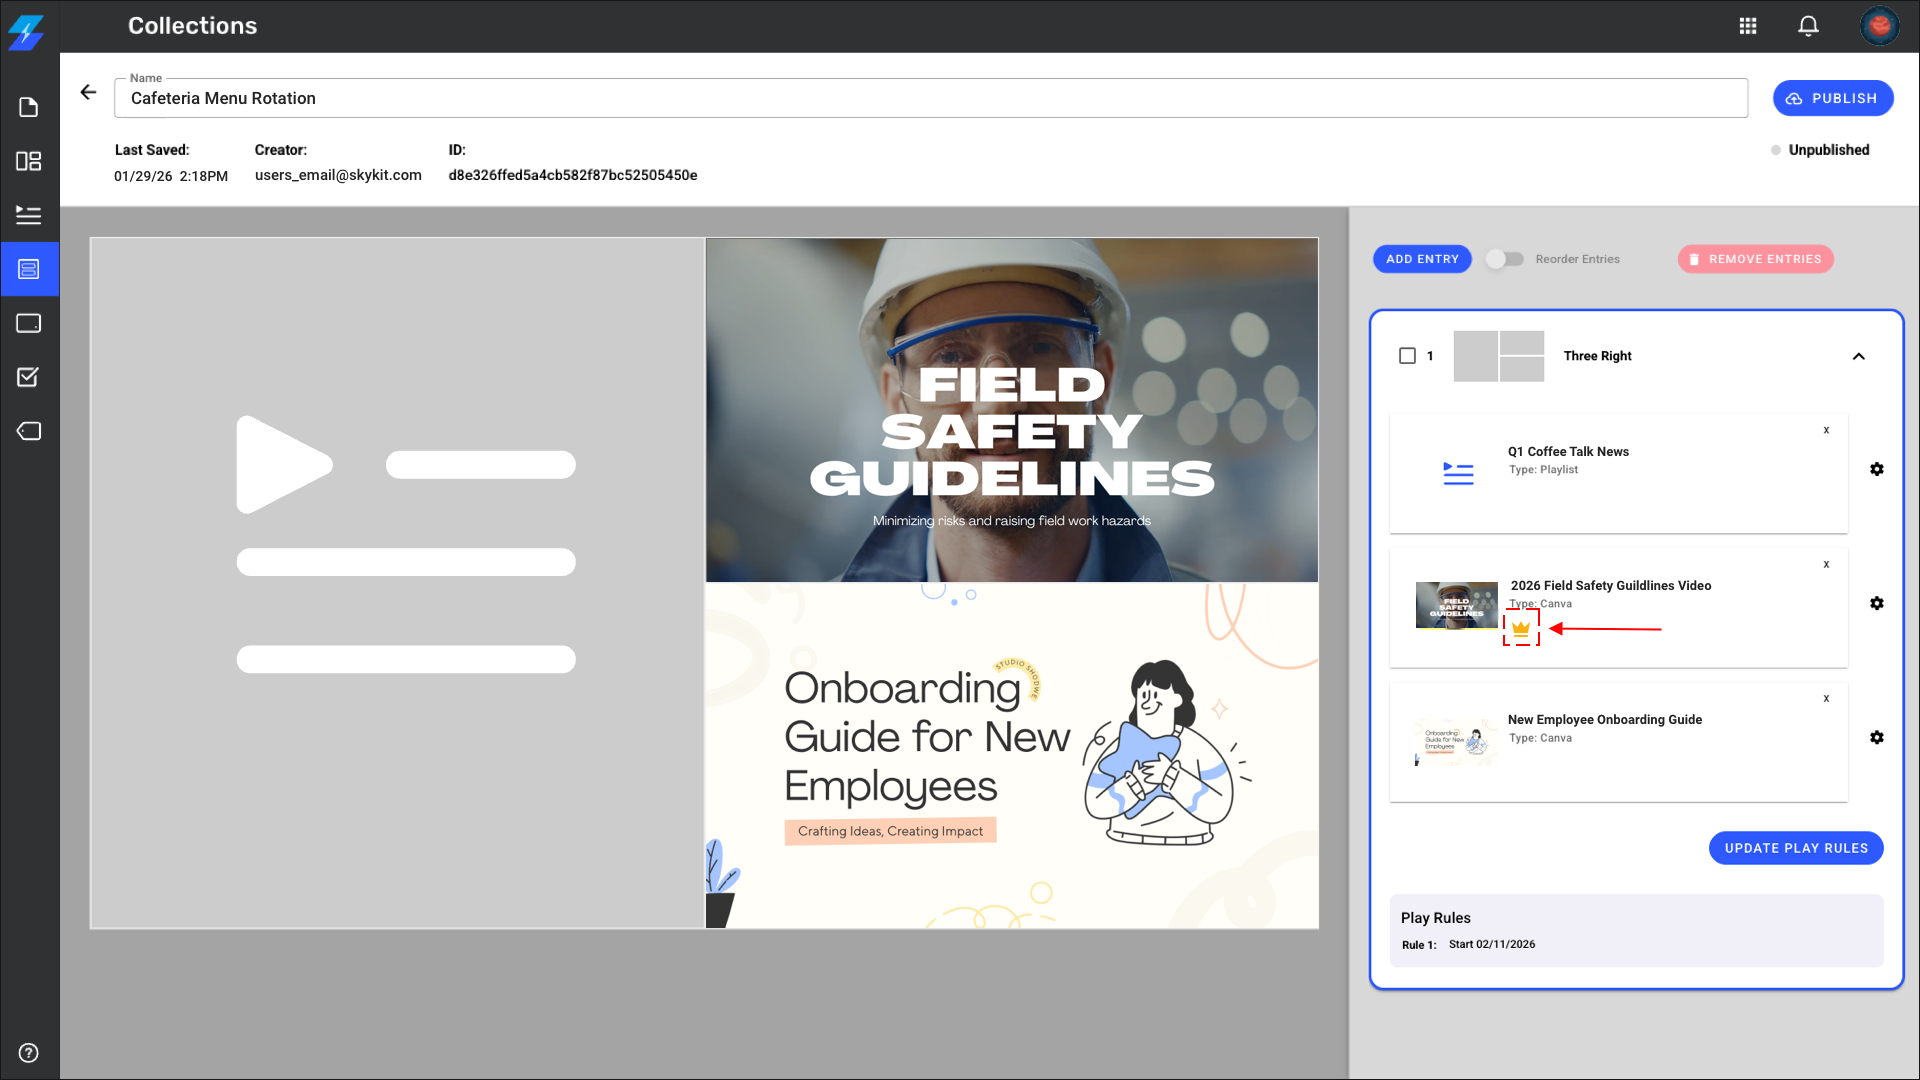
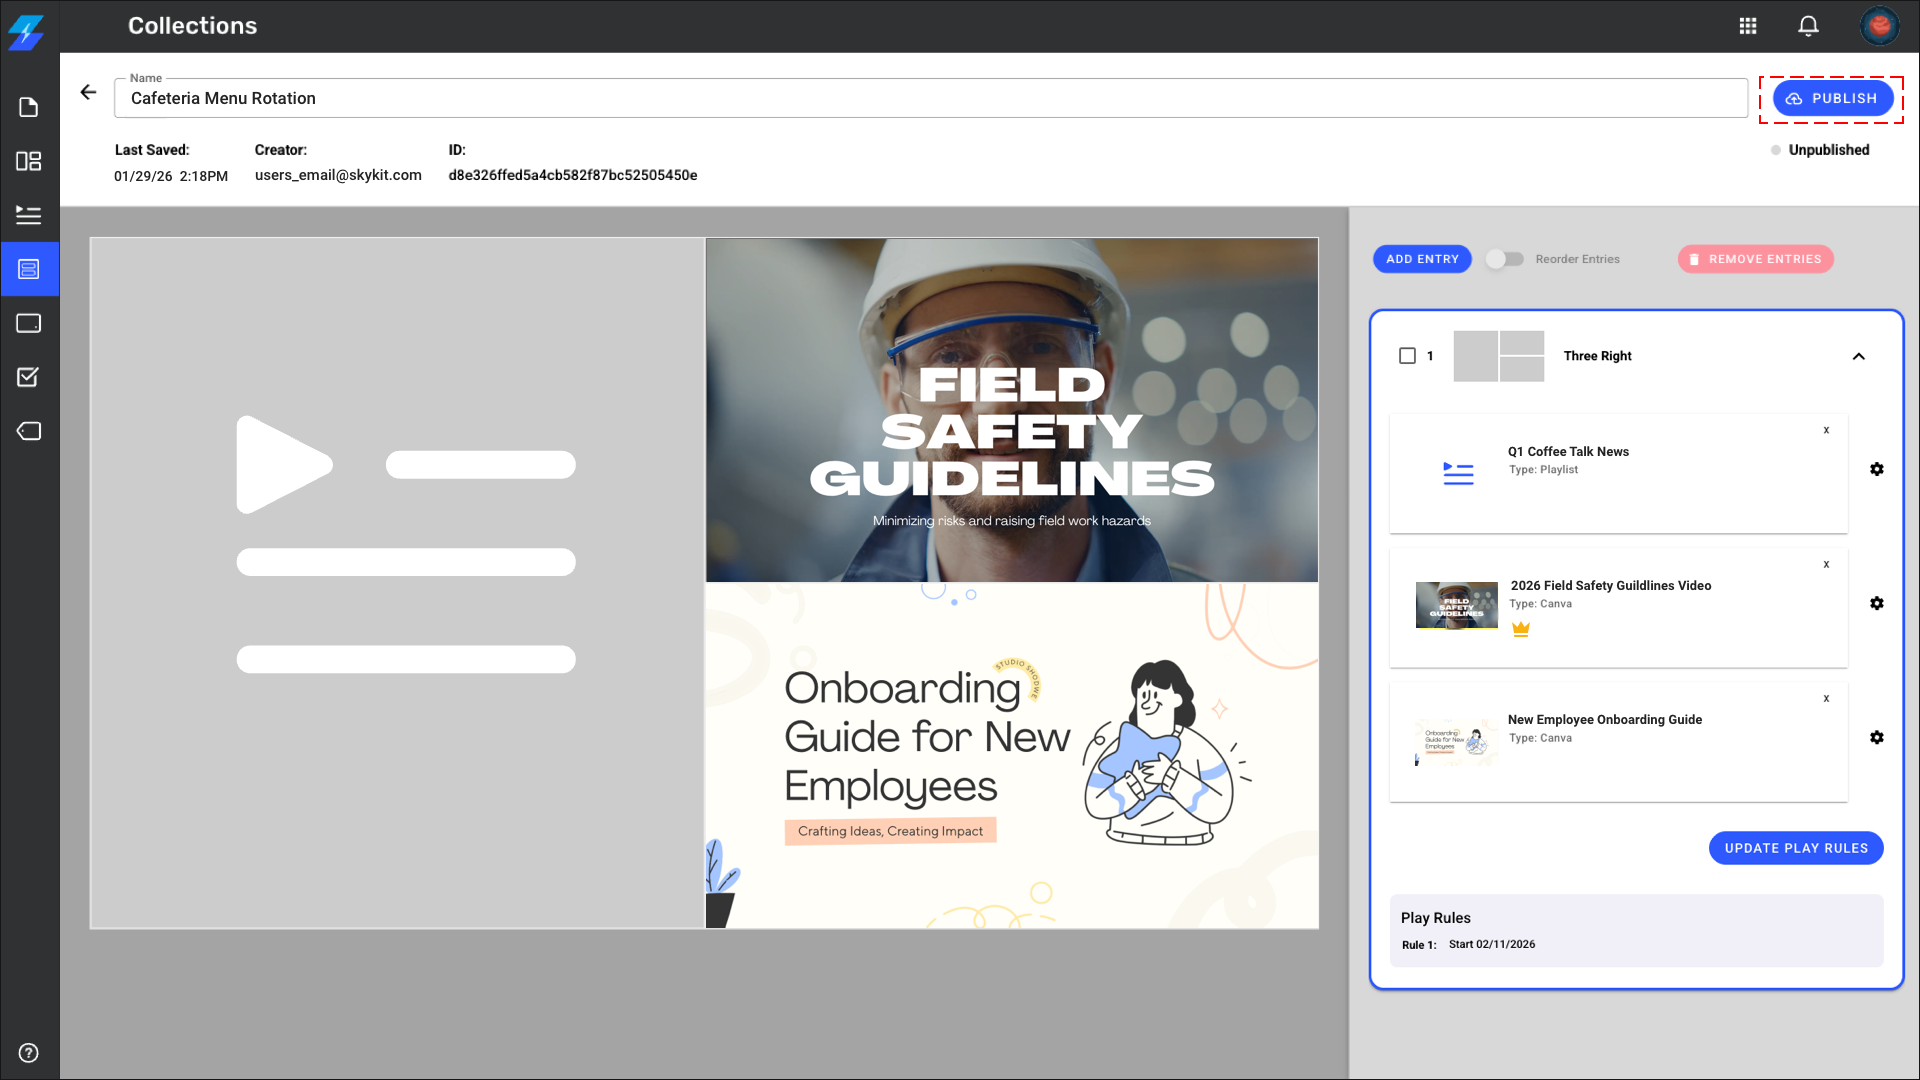
The Crown icon indicates that this is the Lead Zone
Click Publish
Note:
Only ONE zone per layout entry can be designated as the lead zone. Once a zone is selected as lead zone, this option is disabled for other zones
⚠️ Important:
Setting a lead zone is optional. Without one, the longest content in any zone determines the duration.
Example: If you have three static zones (5 seconds each) and one playlist zone (rotating 20 videos at 30 seconds each), setting the playlist zone as the lead zone ensures the entire playlist completes before moving to the next collection entry.
Without a lead zone: The longest content in any zone determines the duration, and shorter content may loop awkwardly.
Step 5: Add More Collection Entries (Layouts) - Optional
Want different layouts to rotate? Add multiple collection entries to your collection:
Click Add Entry again
Choose orientation (landscape, portrait, or unified view for E500)
Choose a different layout configuration (or the same one with different content)
Add content to the zones
Set a lead zone if needed
Repeat as needed
Your collection will cycle through all entries in sequence. If any entry has a lead zone designated, the collection will wait for that lead zone to complete before advancing.
Step 6: Apply Play Rules (Optional)
Control when specific collection entries (layouts) or your entire collection displays.
To Set Play Rules on a Collection Entry (Layout):
Click the Update Play Rules on the layout entry
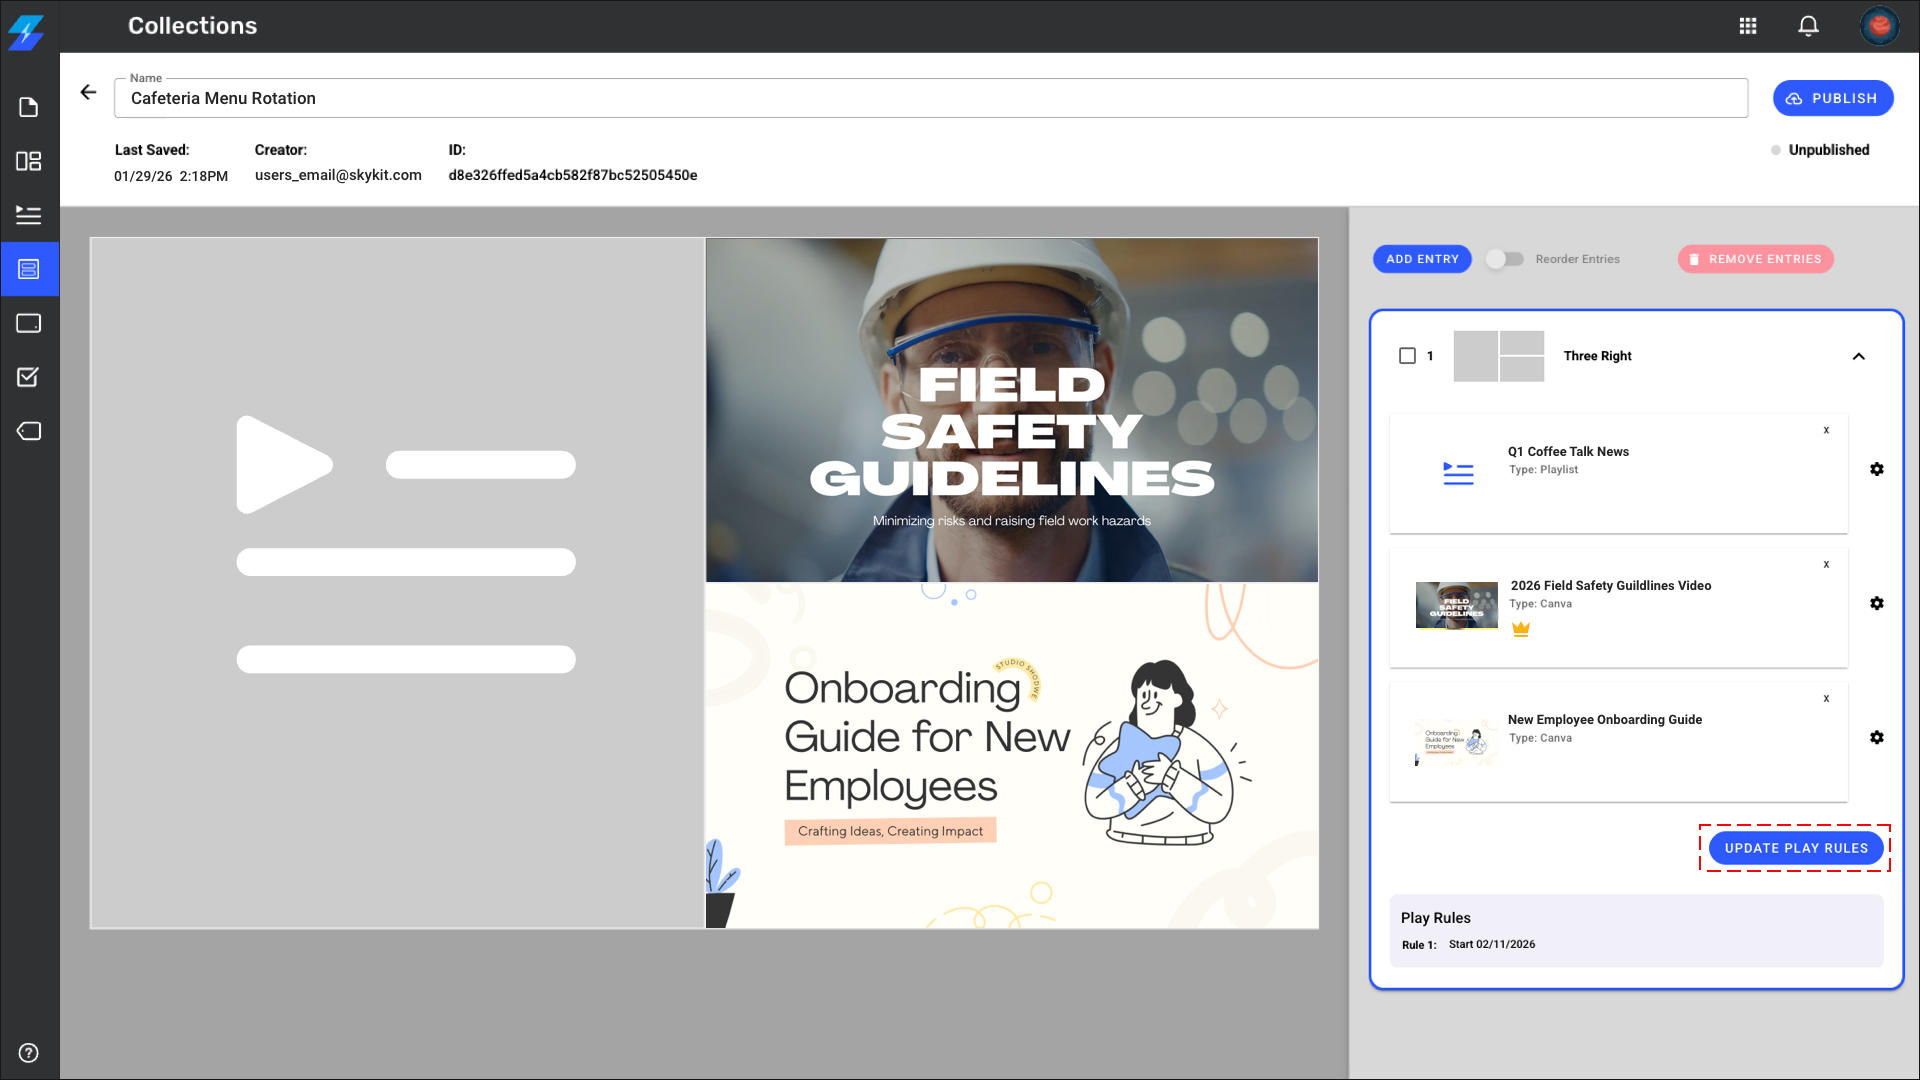
Add a start date and/or end date. Check Play without an end date to keep this playing indefinitely.
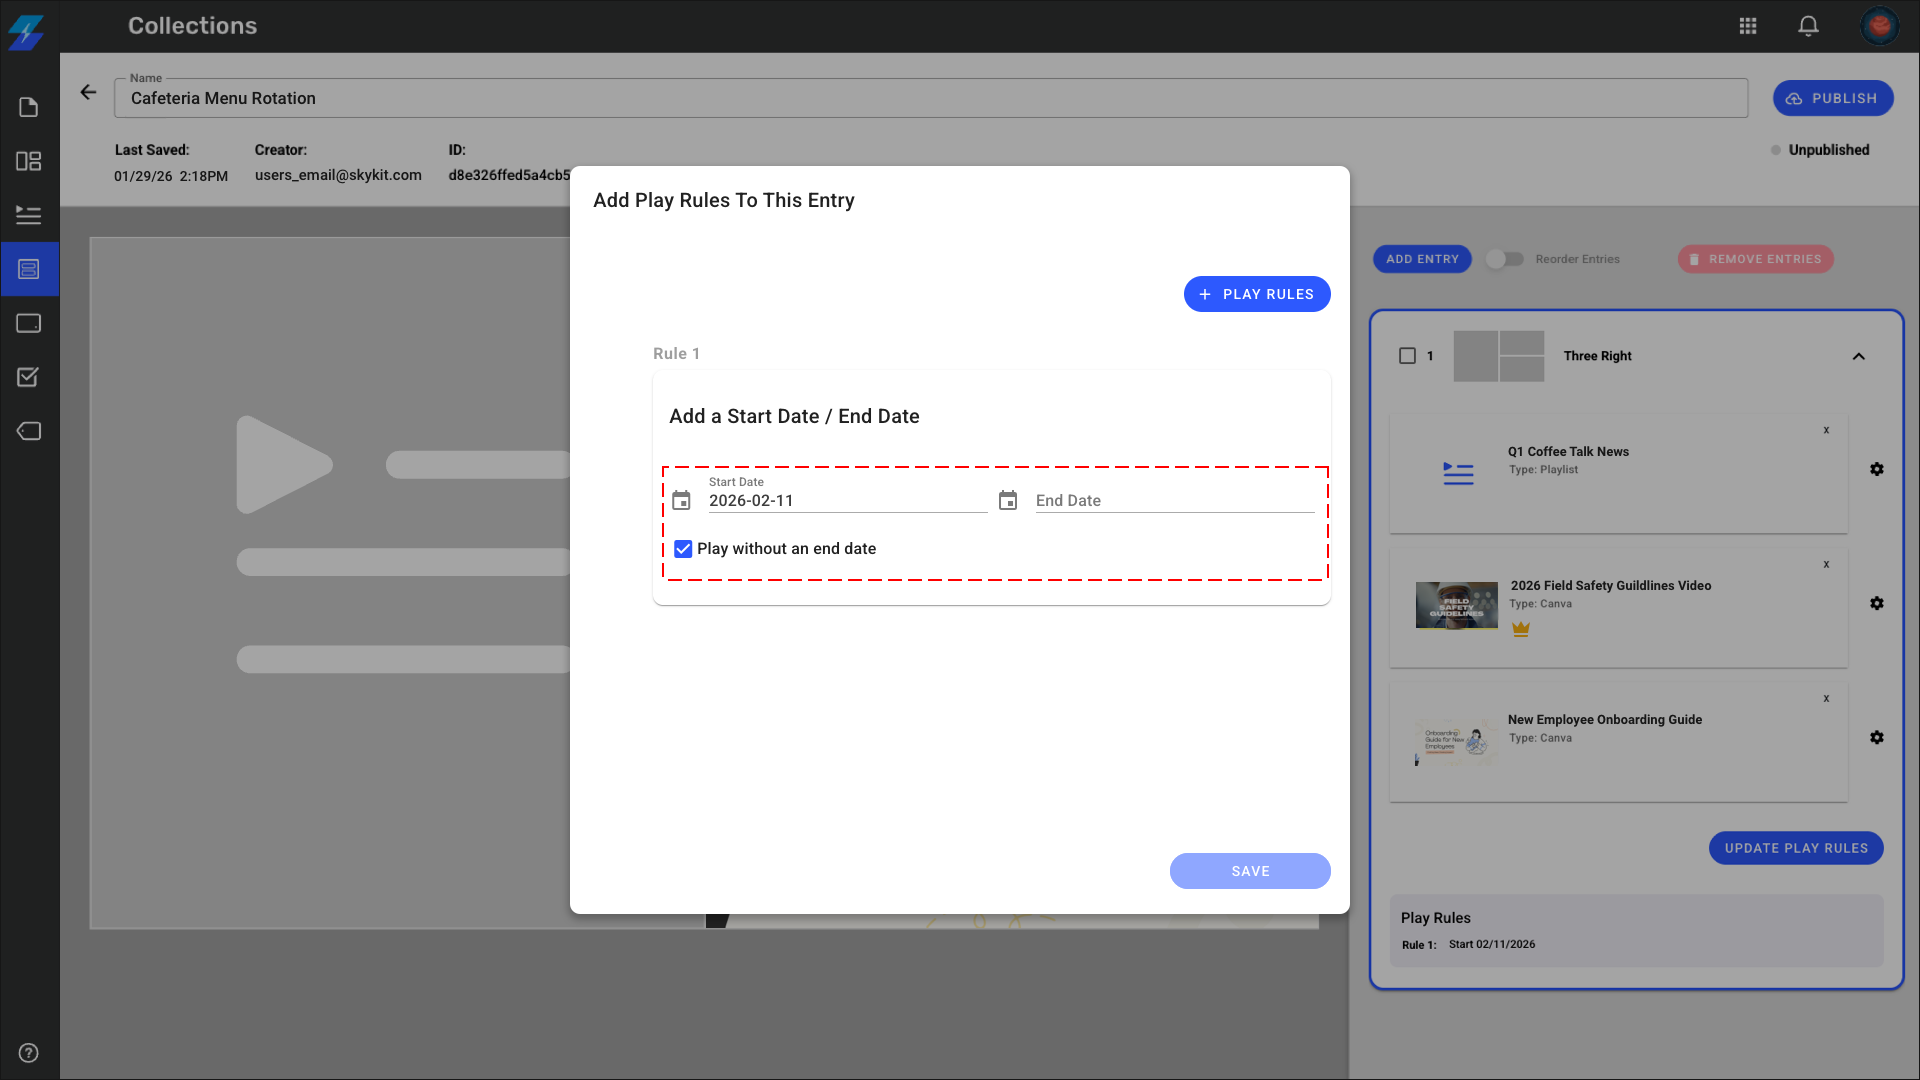
Click + Play Rules to further configure:
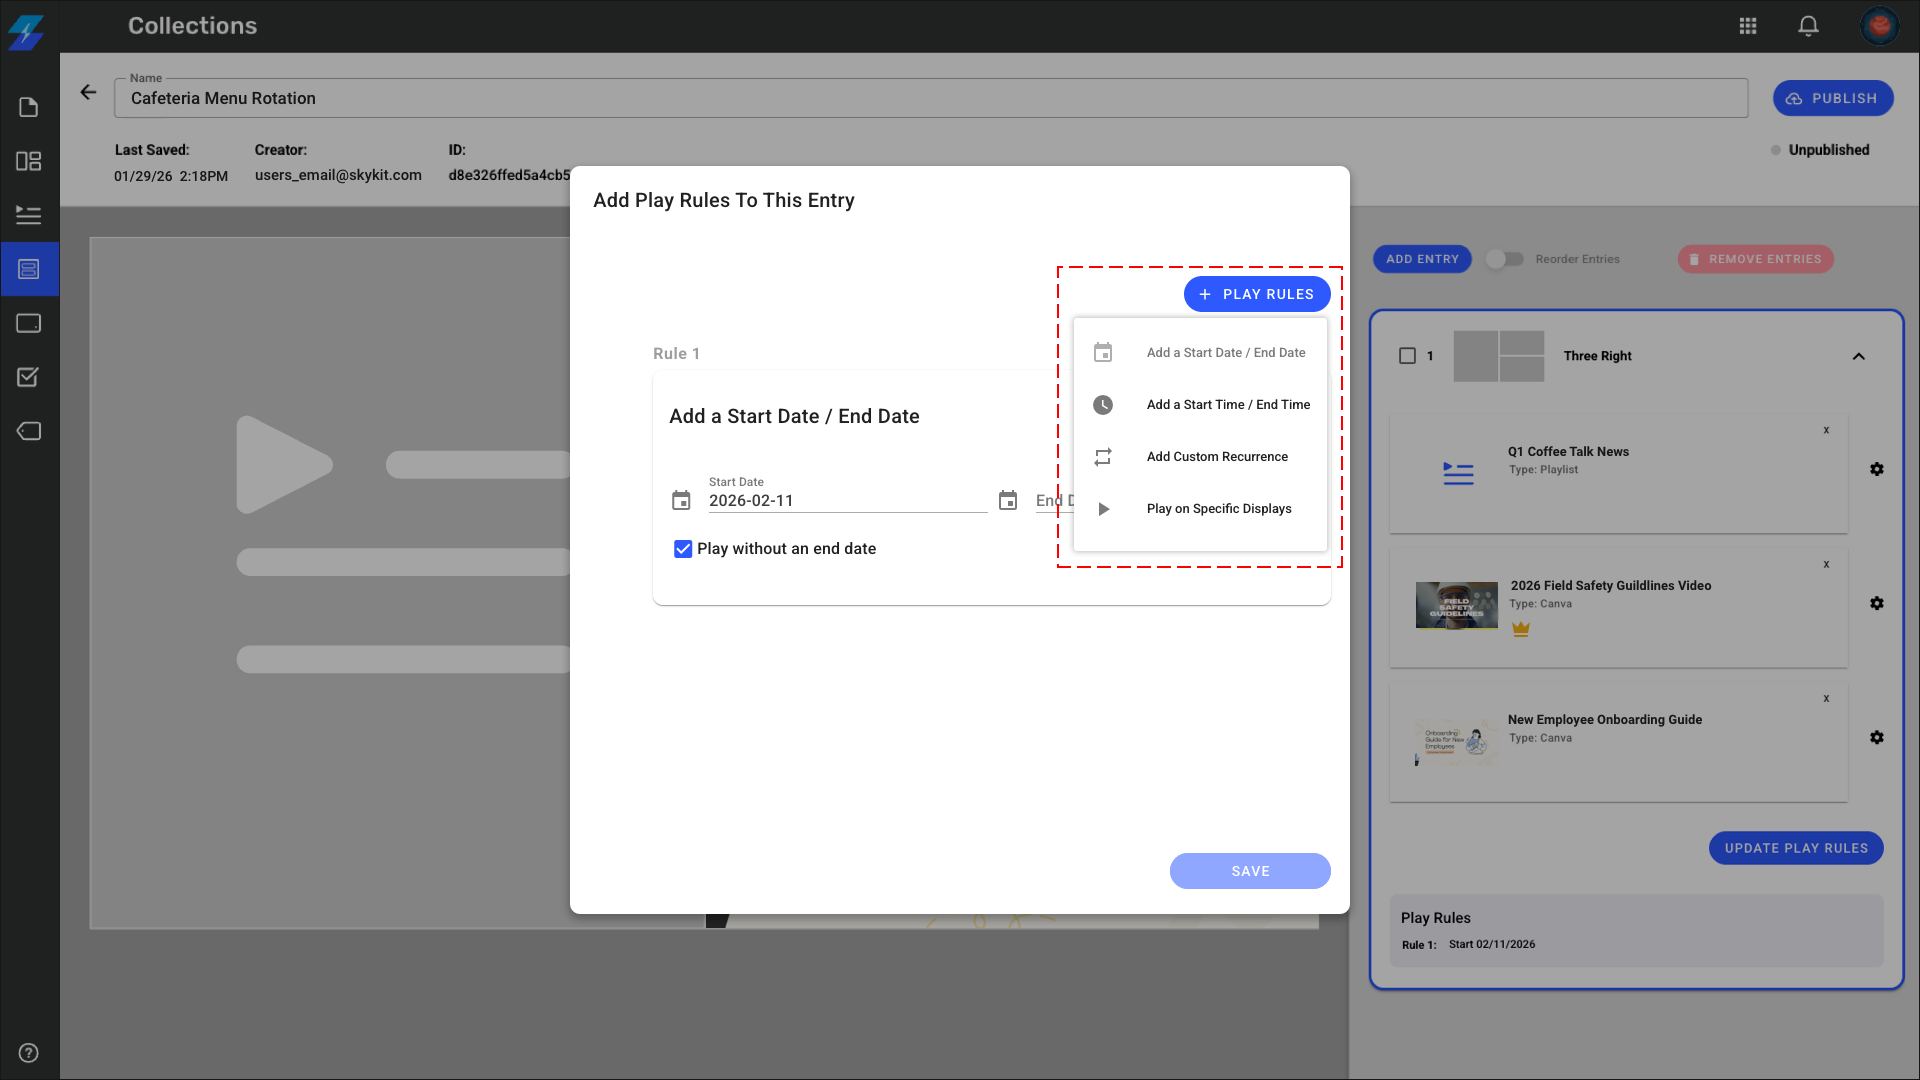
Add Custom Recurrence
Days of week - Select specific days
Months - Select specific months
Day of the month - Select specifics dates
Play on Specific Displays
Click Save
Play Rule Evaluation Order:
When content includes nested elements (collection with playlists), play rules are evaluated in this order:
Collection entry level - Evaluated first
Nested playlist level (playlist entries) - Evaluated second (only if collection entry is eligible)
The player checks eligibility at each level before proceeding to the next. If any level fails, the content won't play.
⚠️ Best Practice:
Set play rules at ONE level only - either on your collection entries OR on any playlists you've added to zones, but not both. Rules at multiple levels can conflict and prevent content from playing.
Step 7: Preview Your Collection
Review the visual preview of your collection entries
Check that content is in the correct zones
Verify your lead zones are set correctly (if applicable)
Verify your play rules are set correctly
Click Publish to make this collection available to your displays
Note:
There's no built-in preview player, but you can see thumbnails and layout structure. For testing actual playback, consider setting up a dedicated test device.
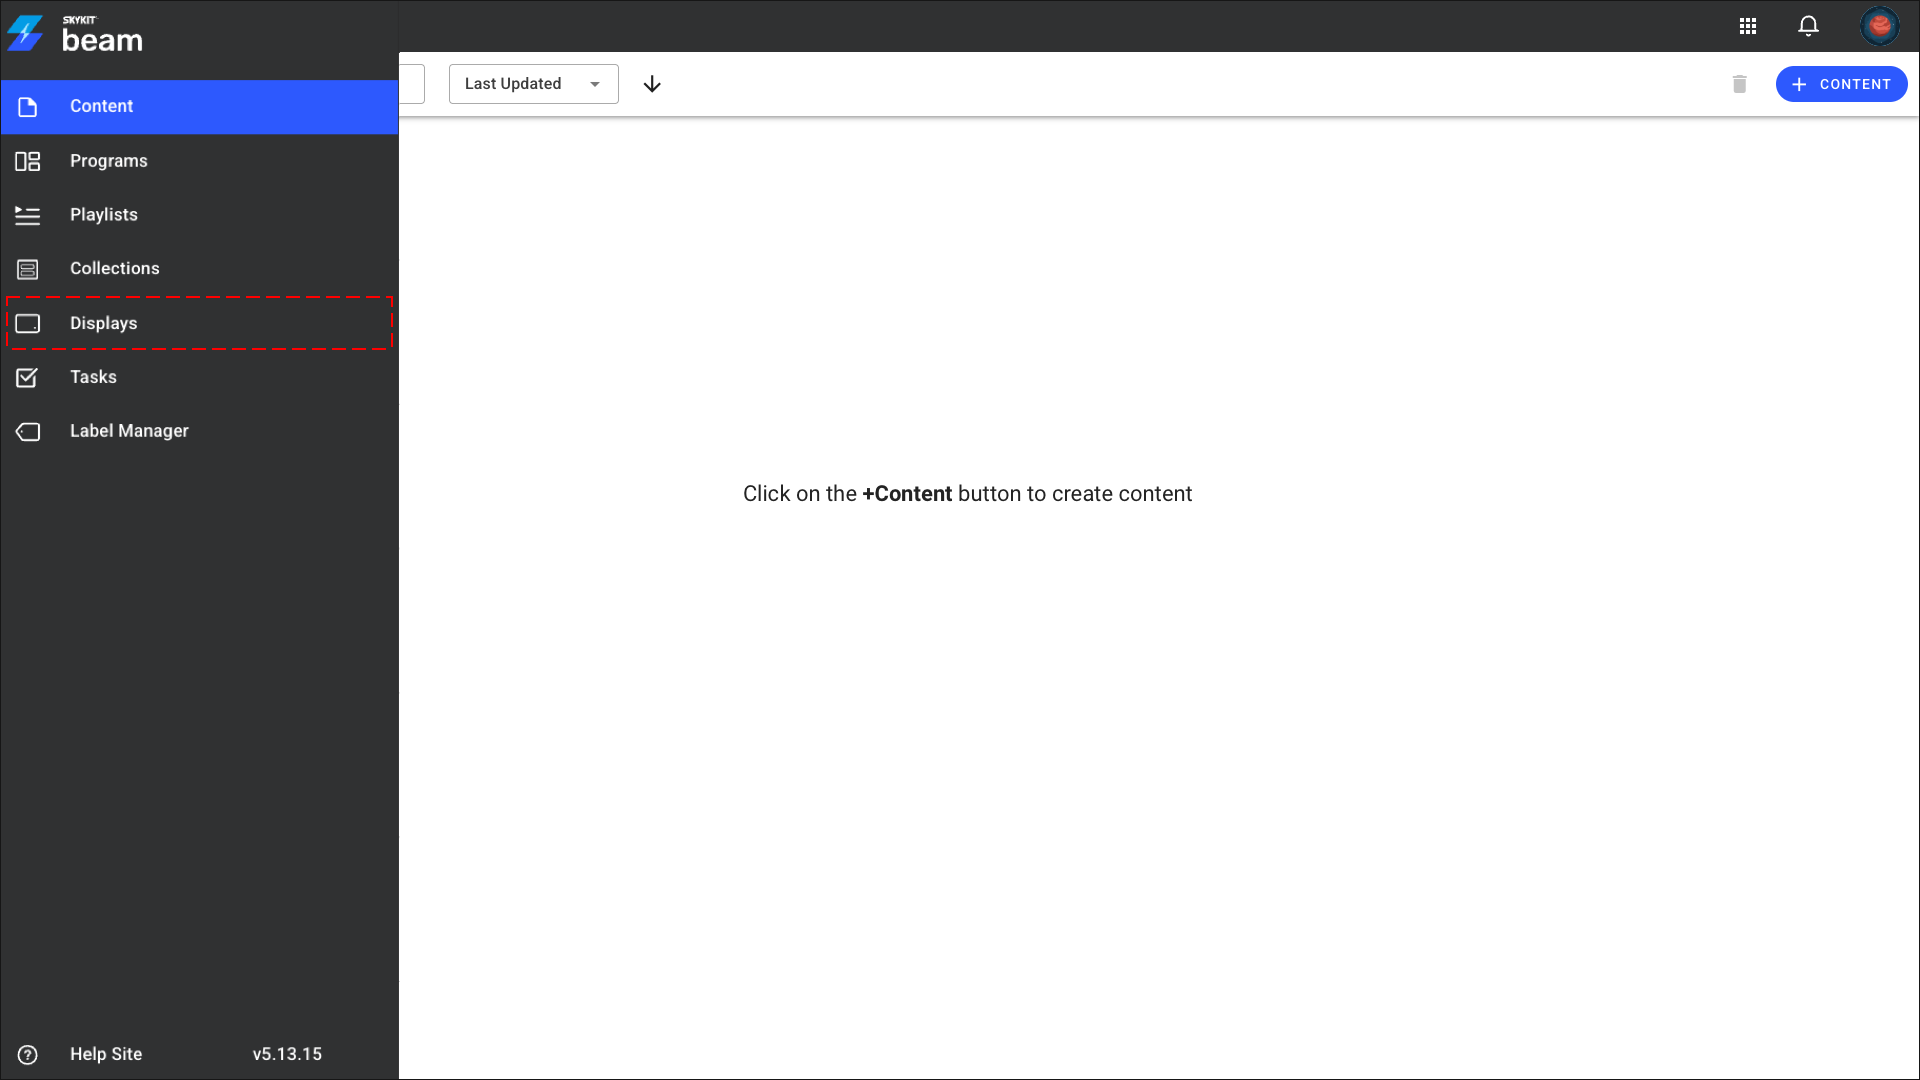
Step 8: Assign to Displays
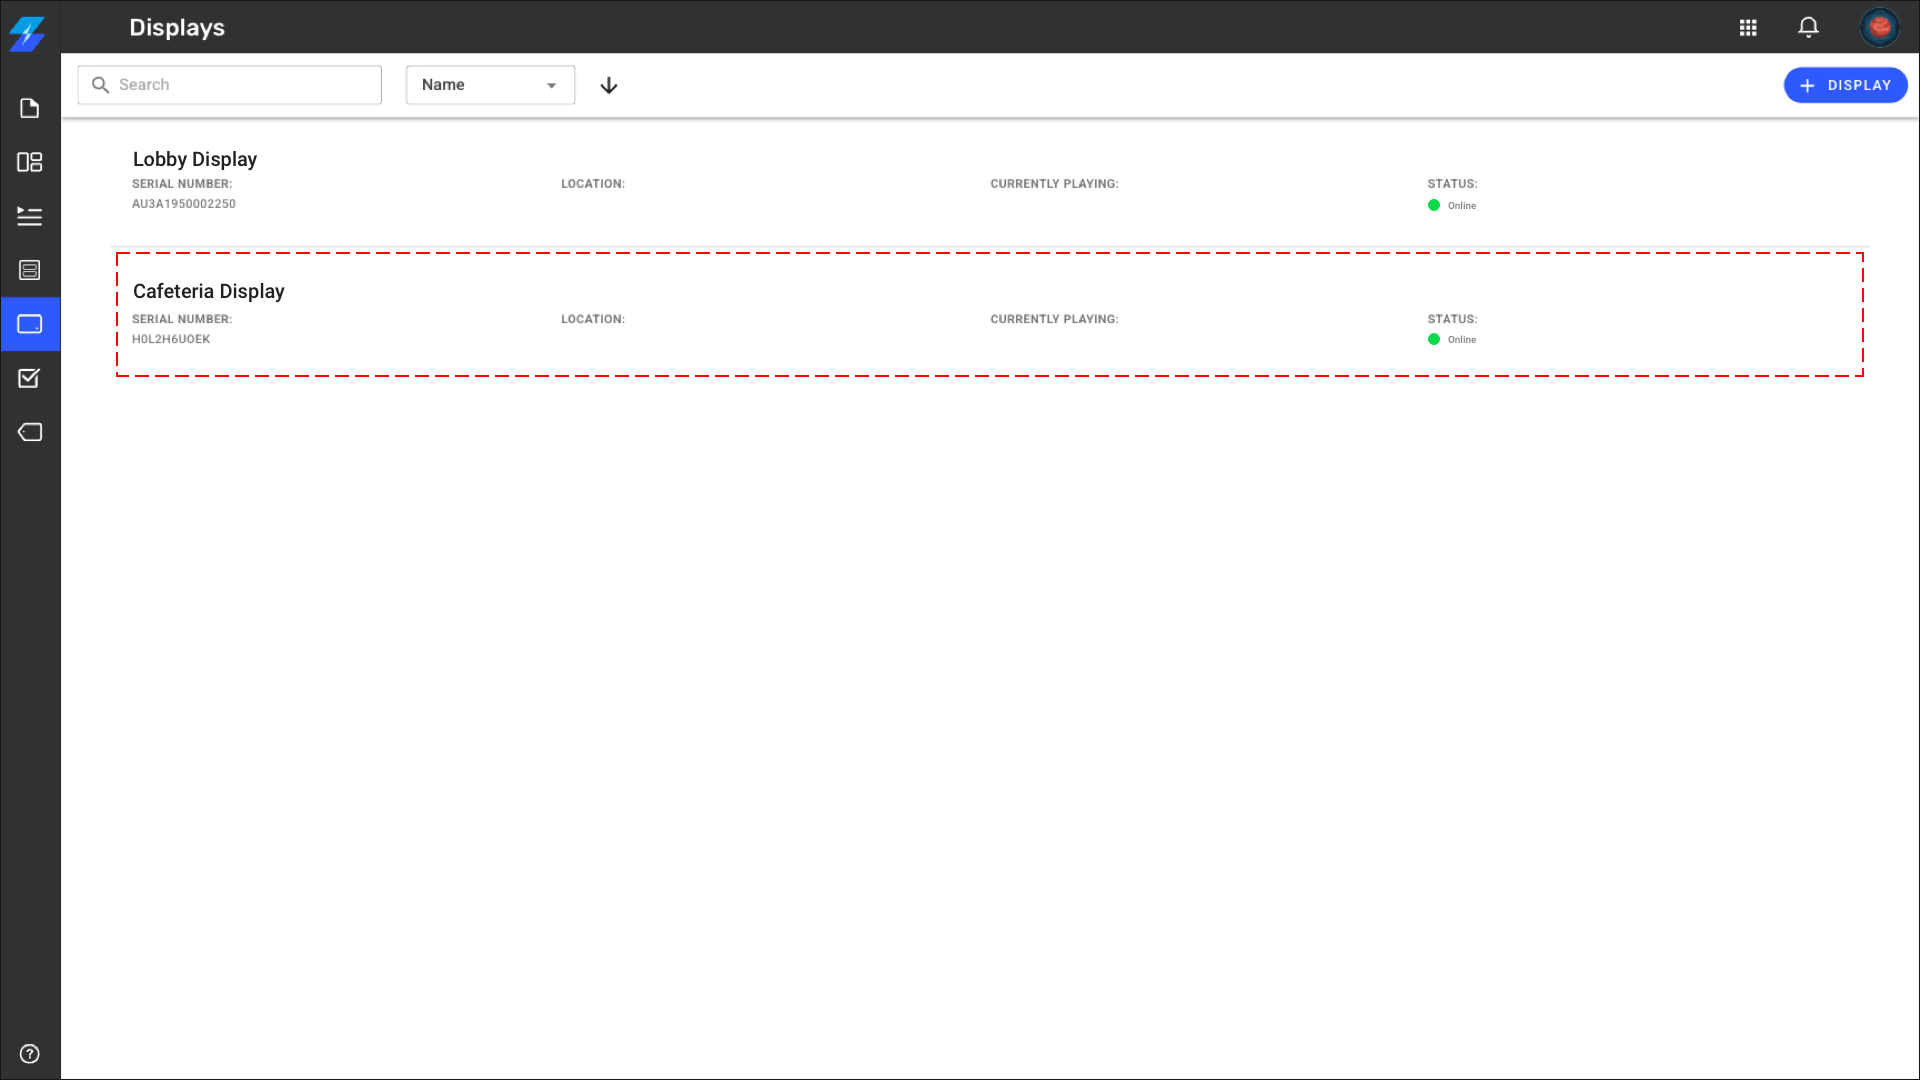
Navigate to Displays in the main menu
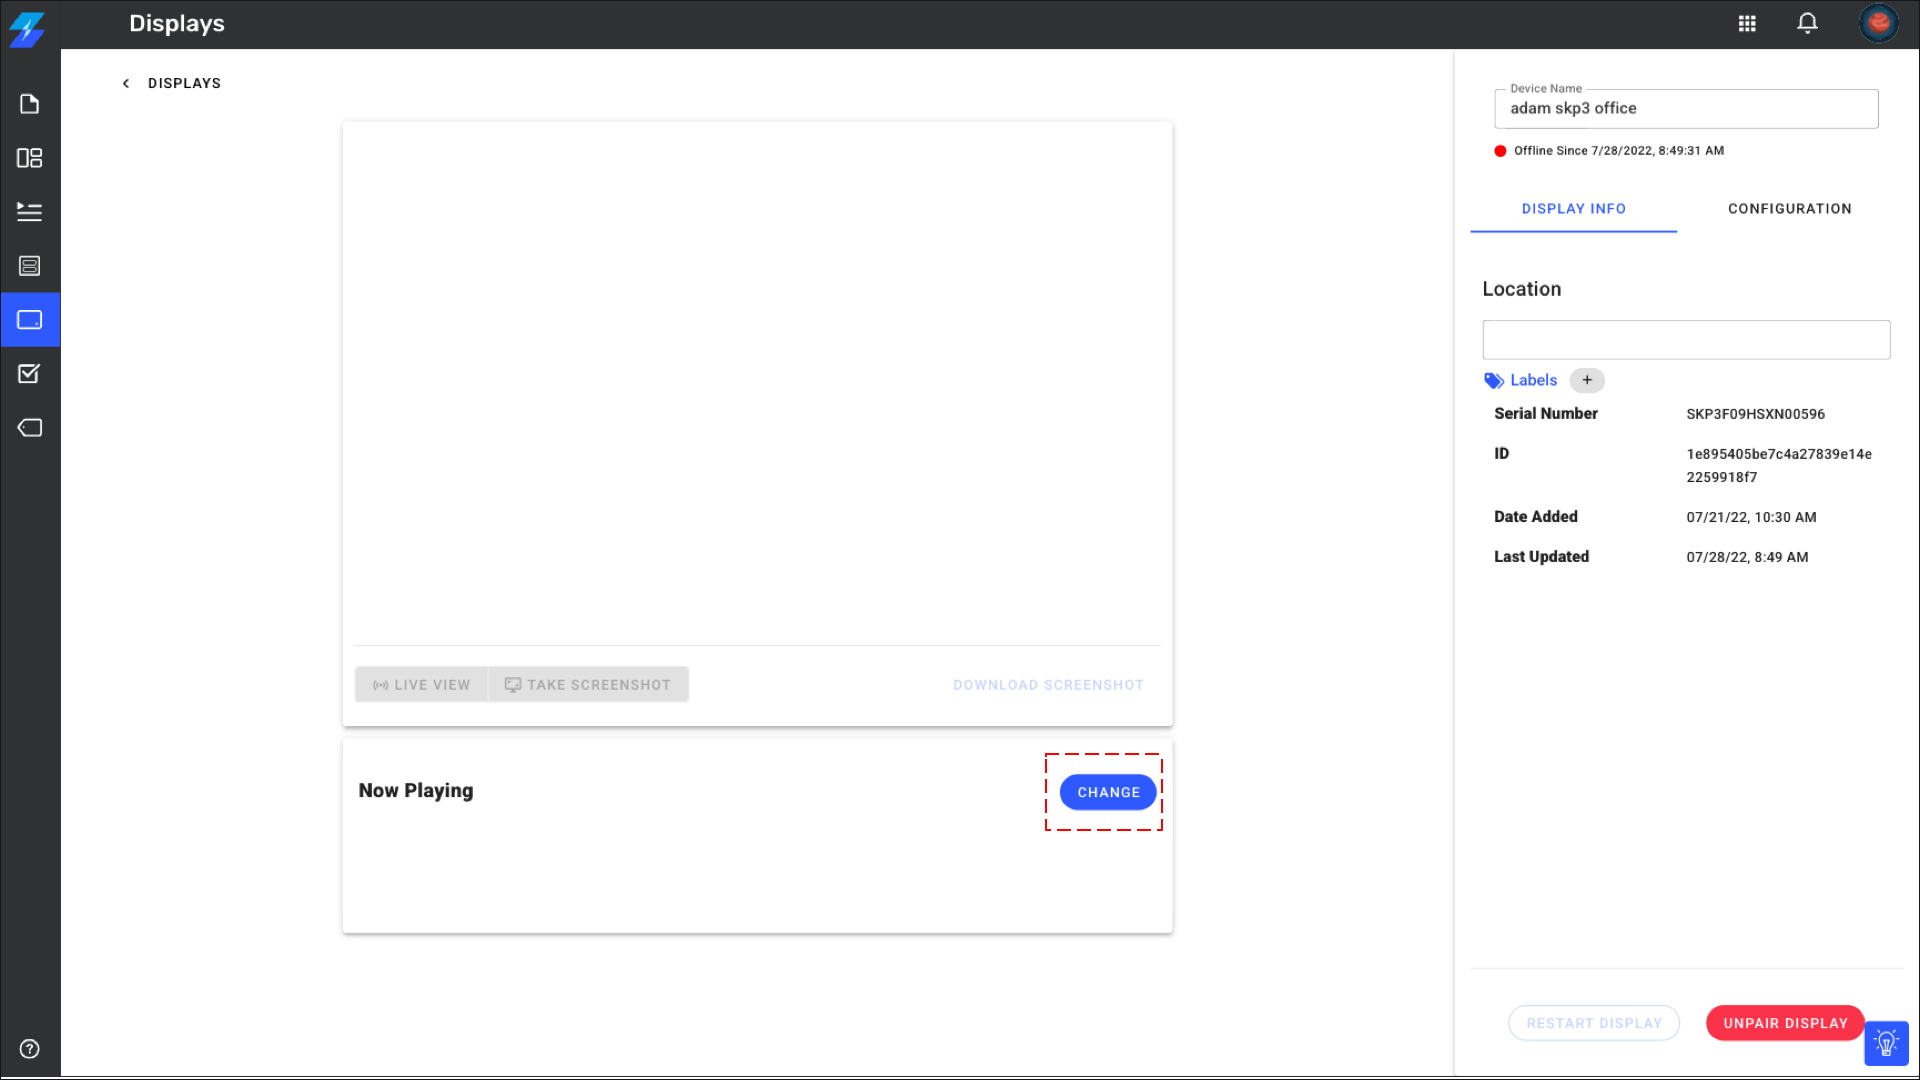
Select the display where you want this collection to play
Click Change
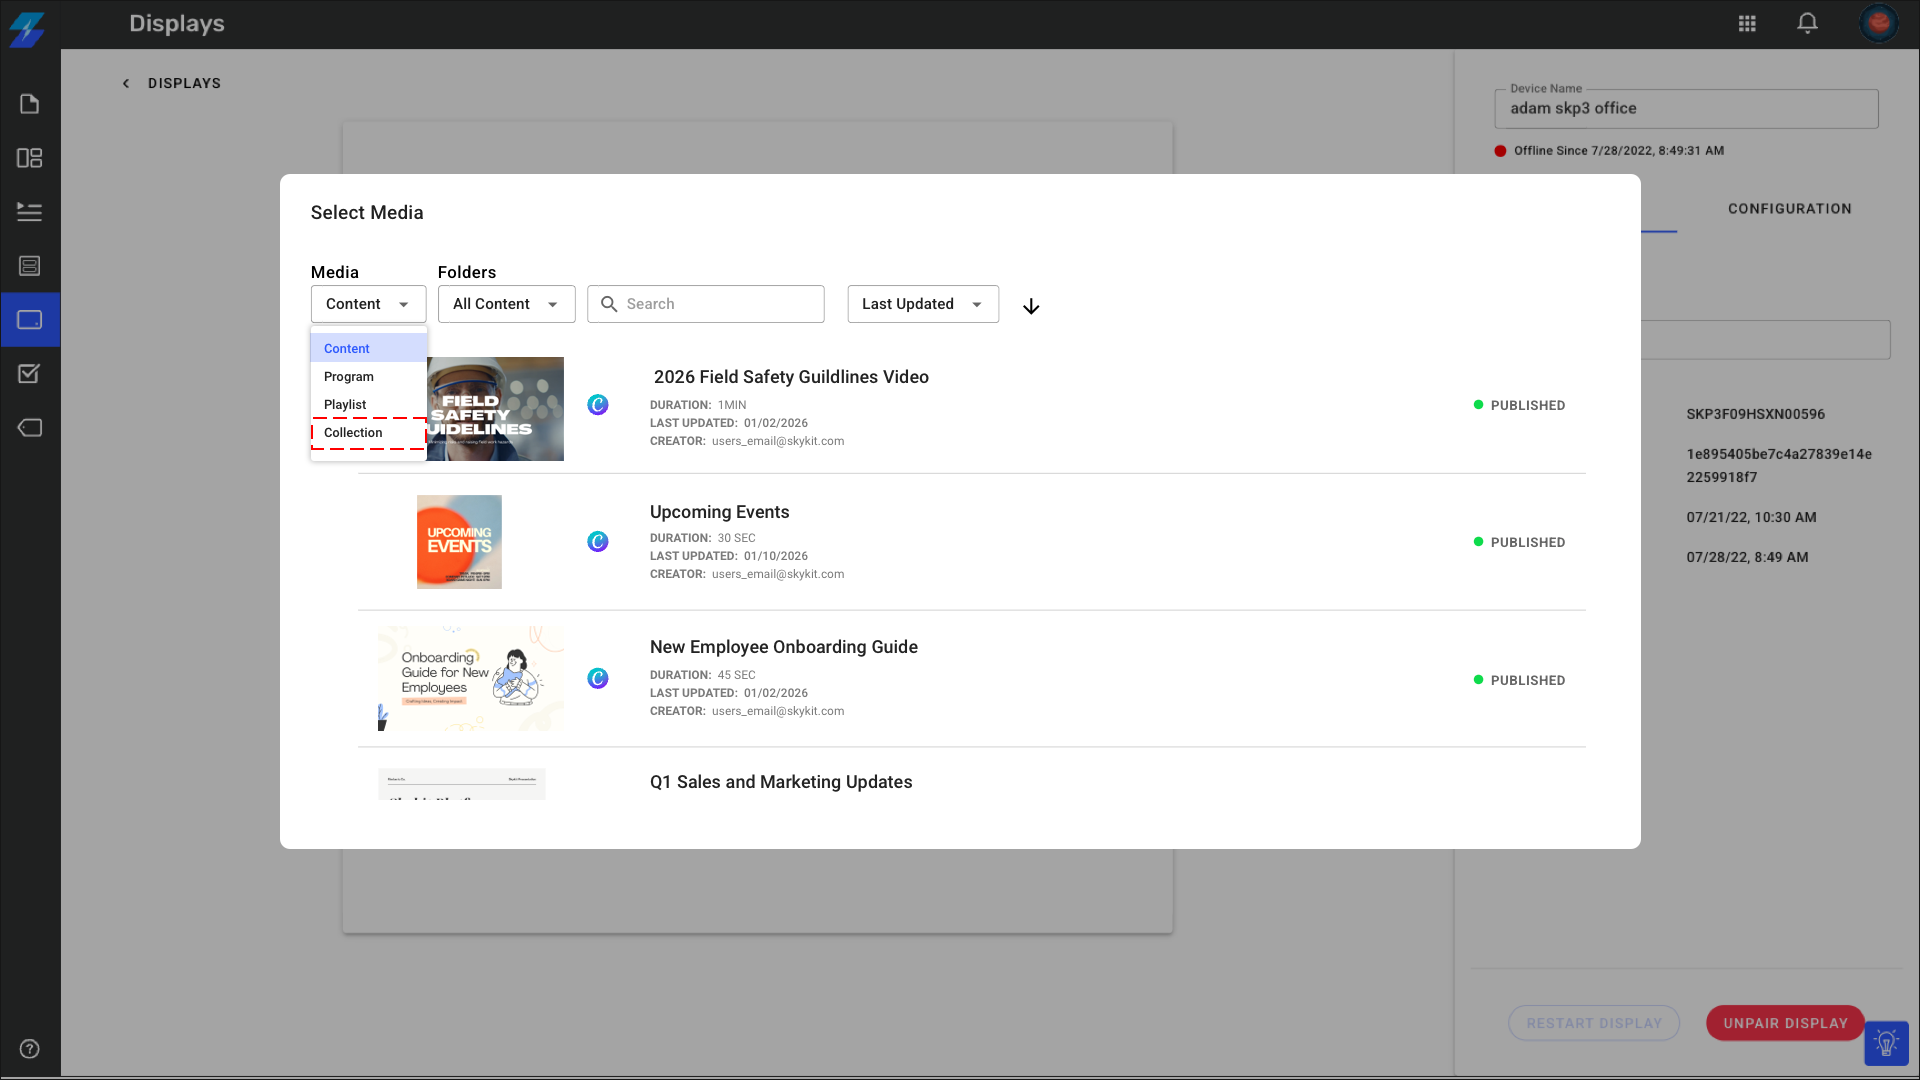
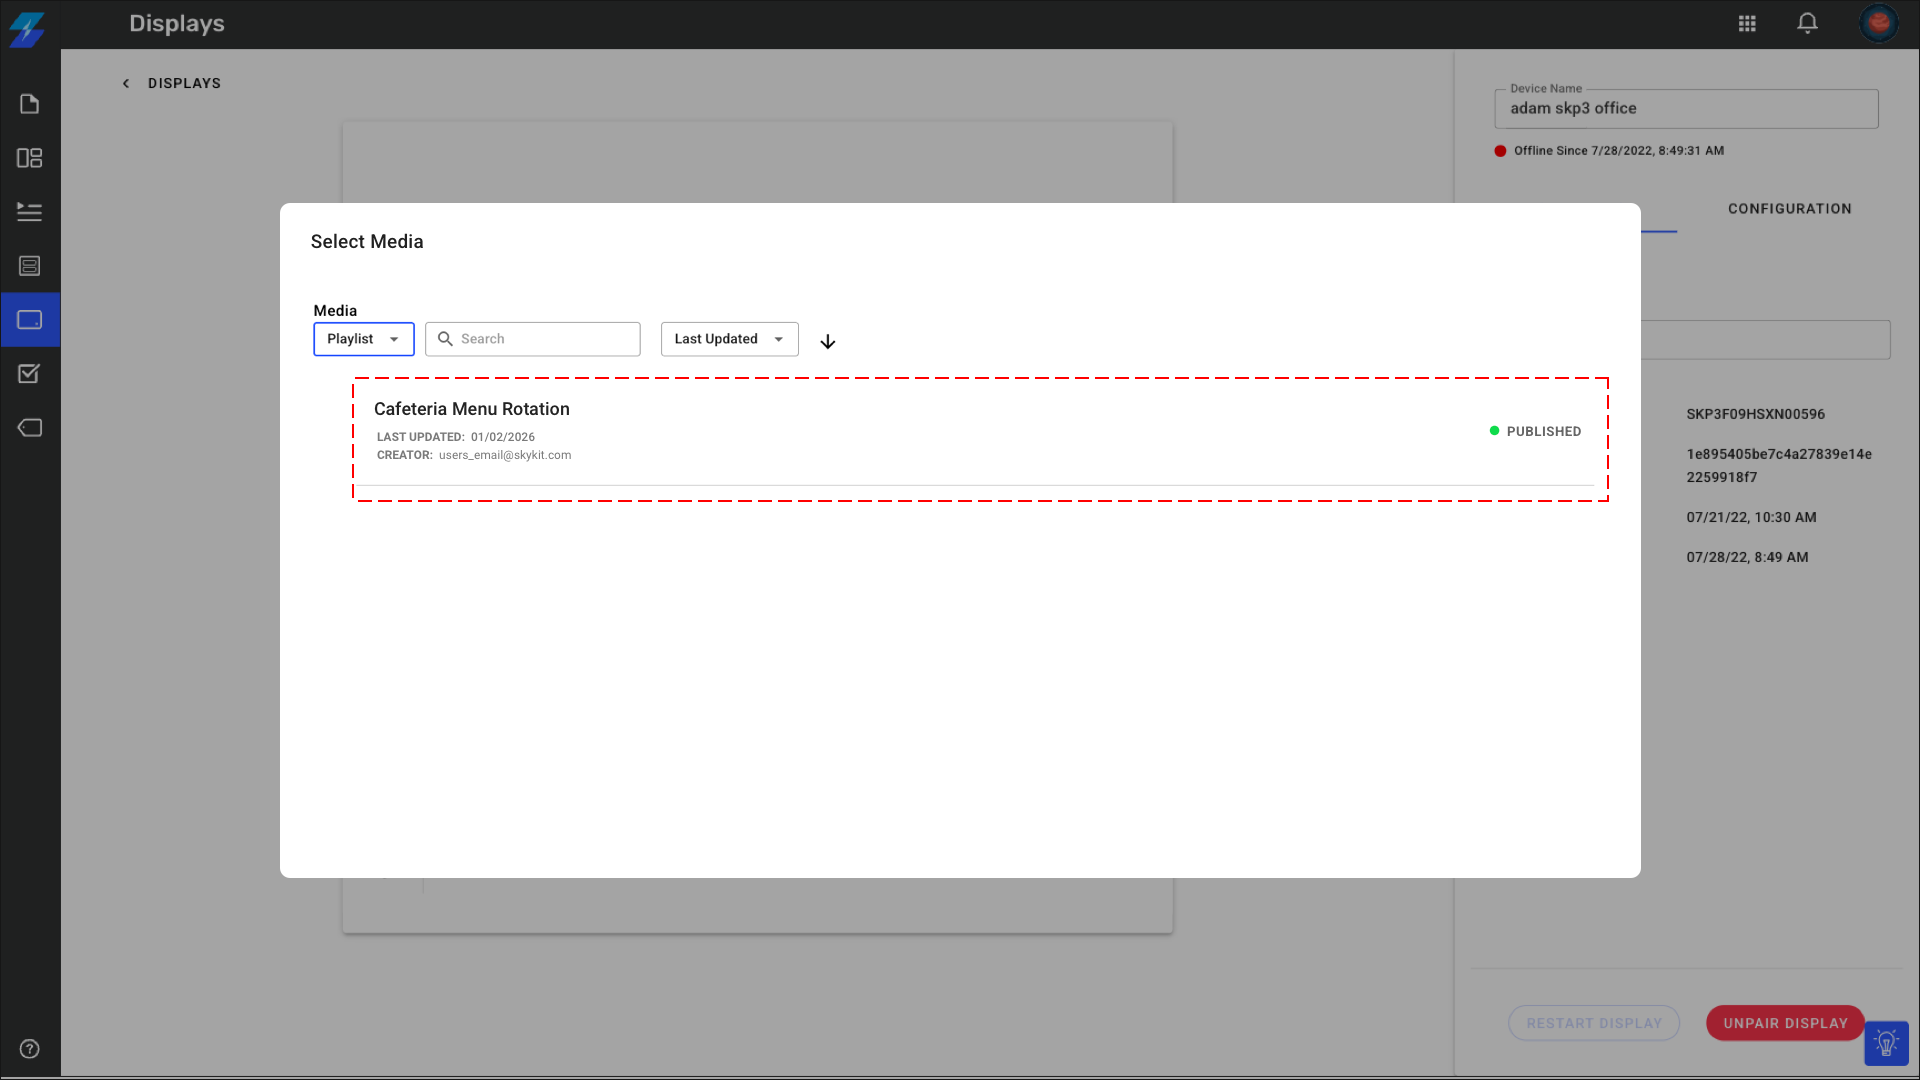
Click on the Media dropdown menu and select Collection
Select the collection you want to play
Your collection will now play on the assigned displays according to any play rules you've set.