Managing Your Dashboard Connections
Once you've created a dashboard connection, you can manage it by editing settings such as the type of transition between slides and the duration of each slide.
- From the Content menu, select the dashboard you want to manage. The Dashboard content manager window opens.
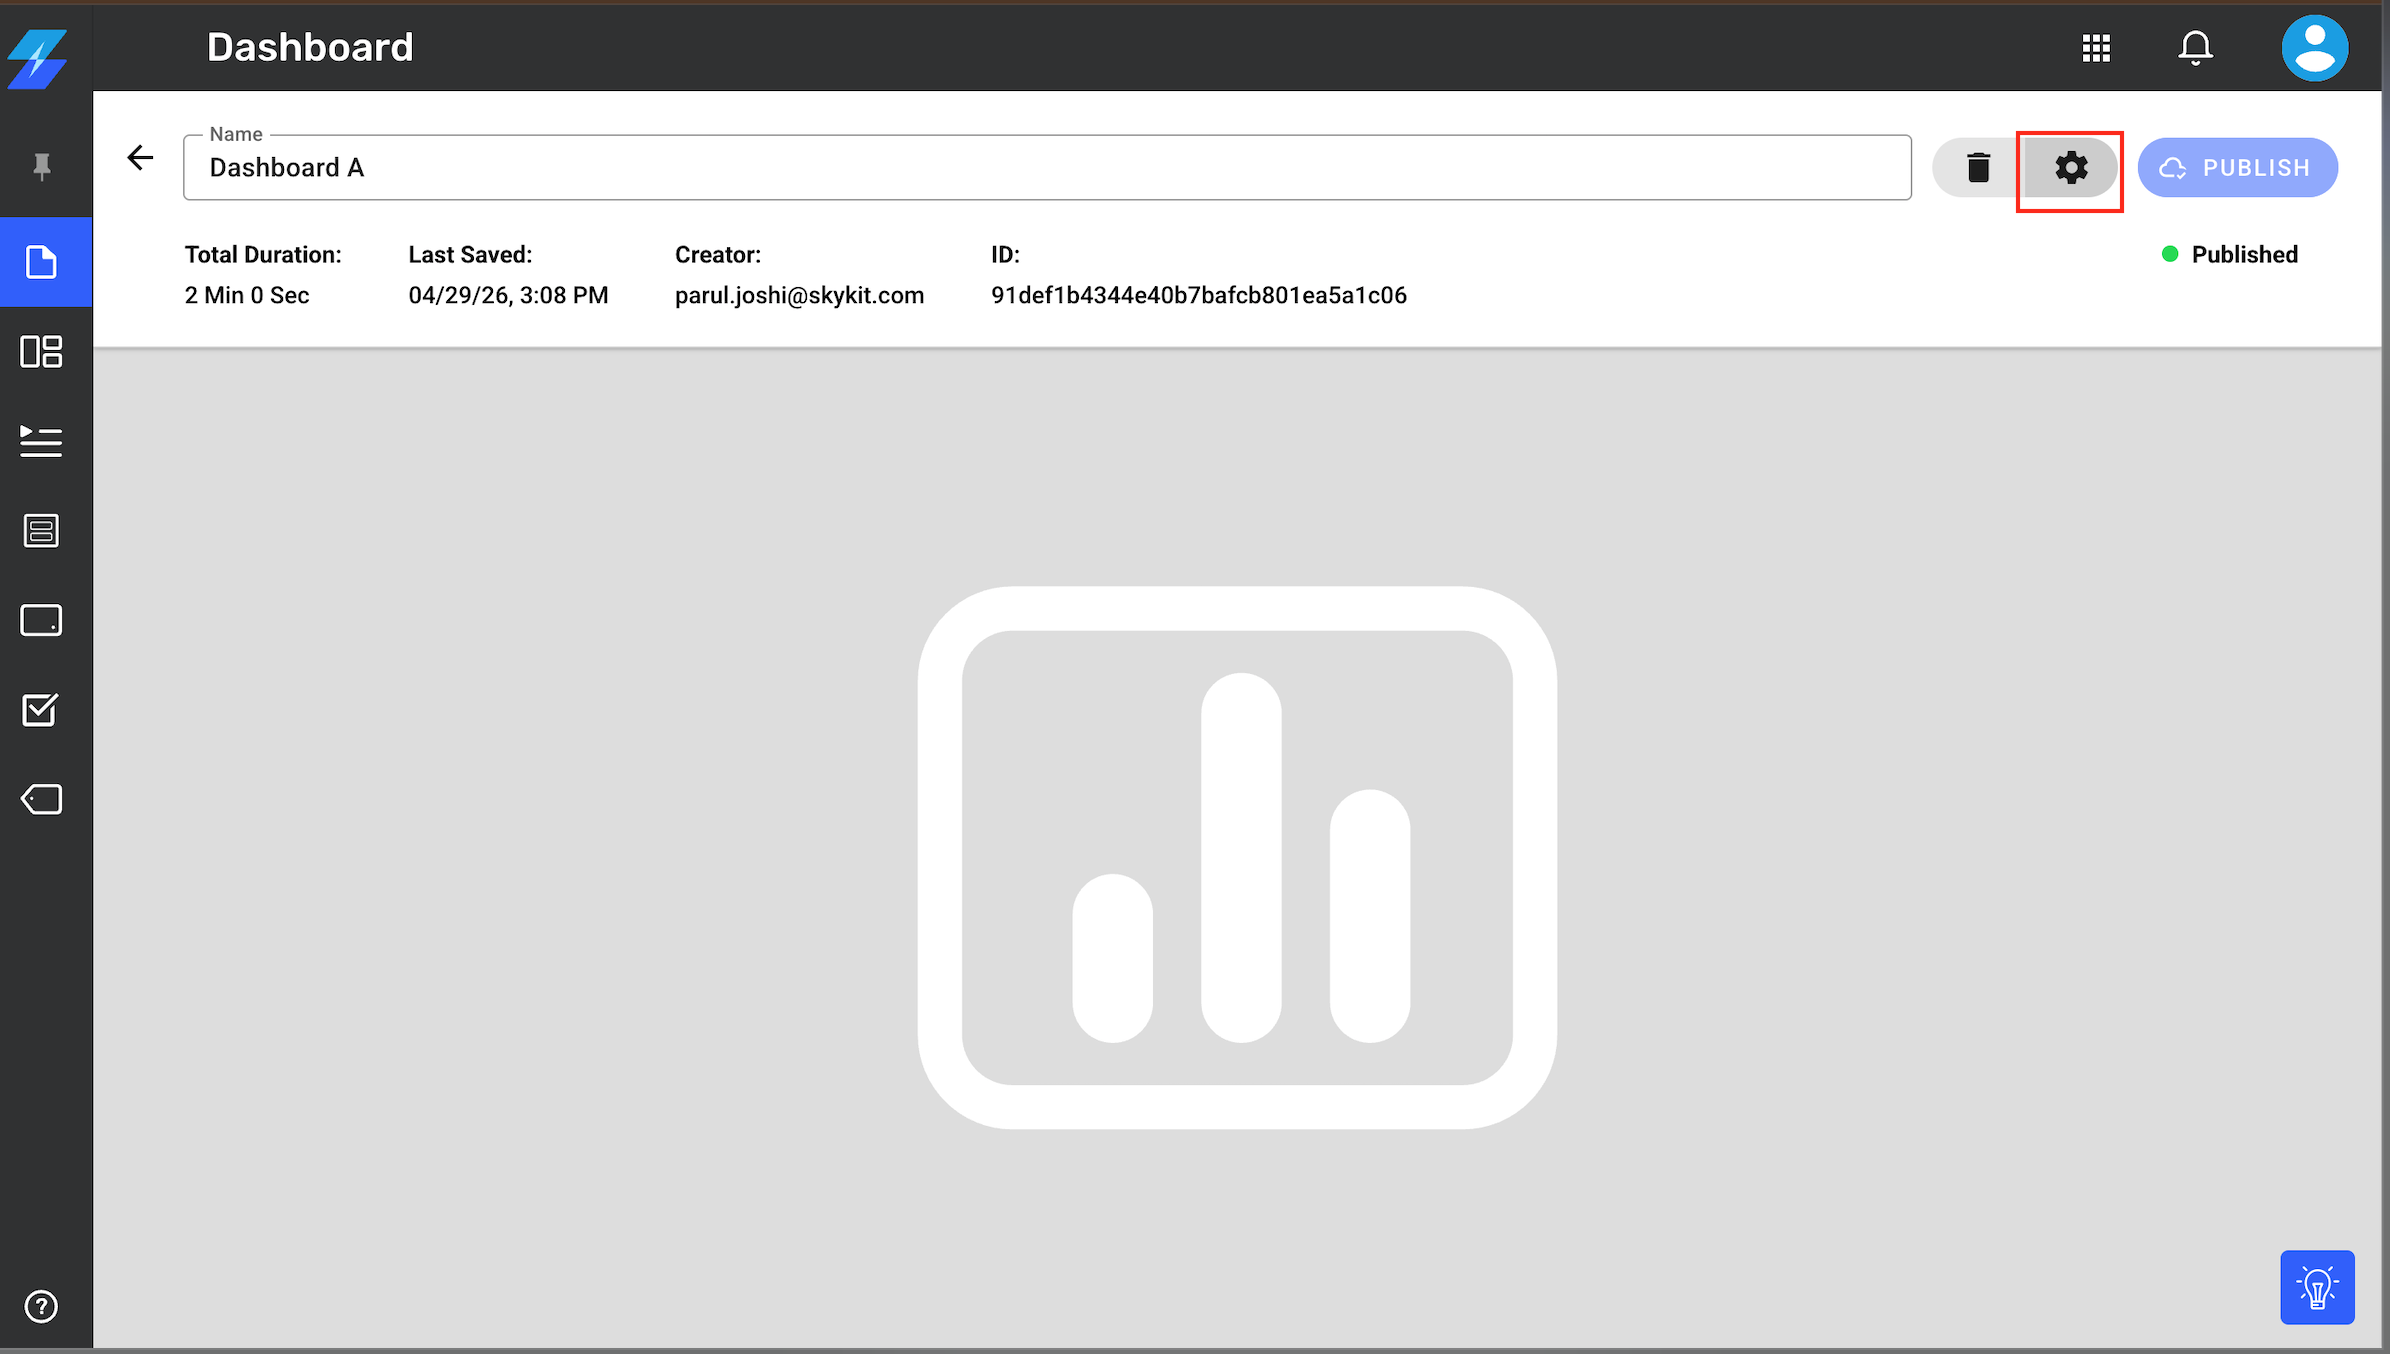
- Select the gear icon in the upper right corner of the window. The dashboard's Settings drawer opens.
- From the Transition list, select the transition effect you would like to use.
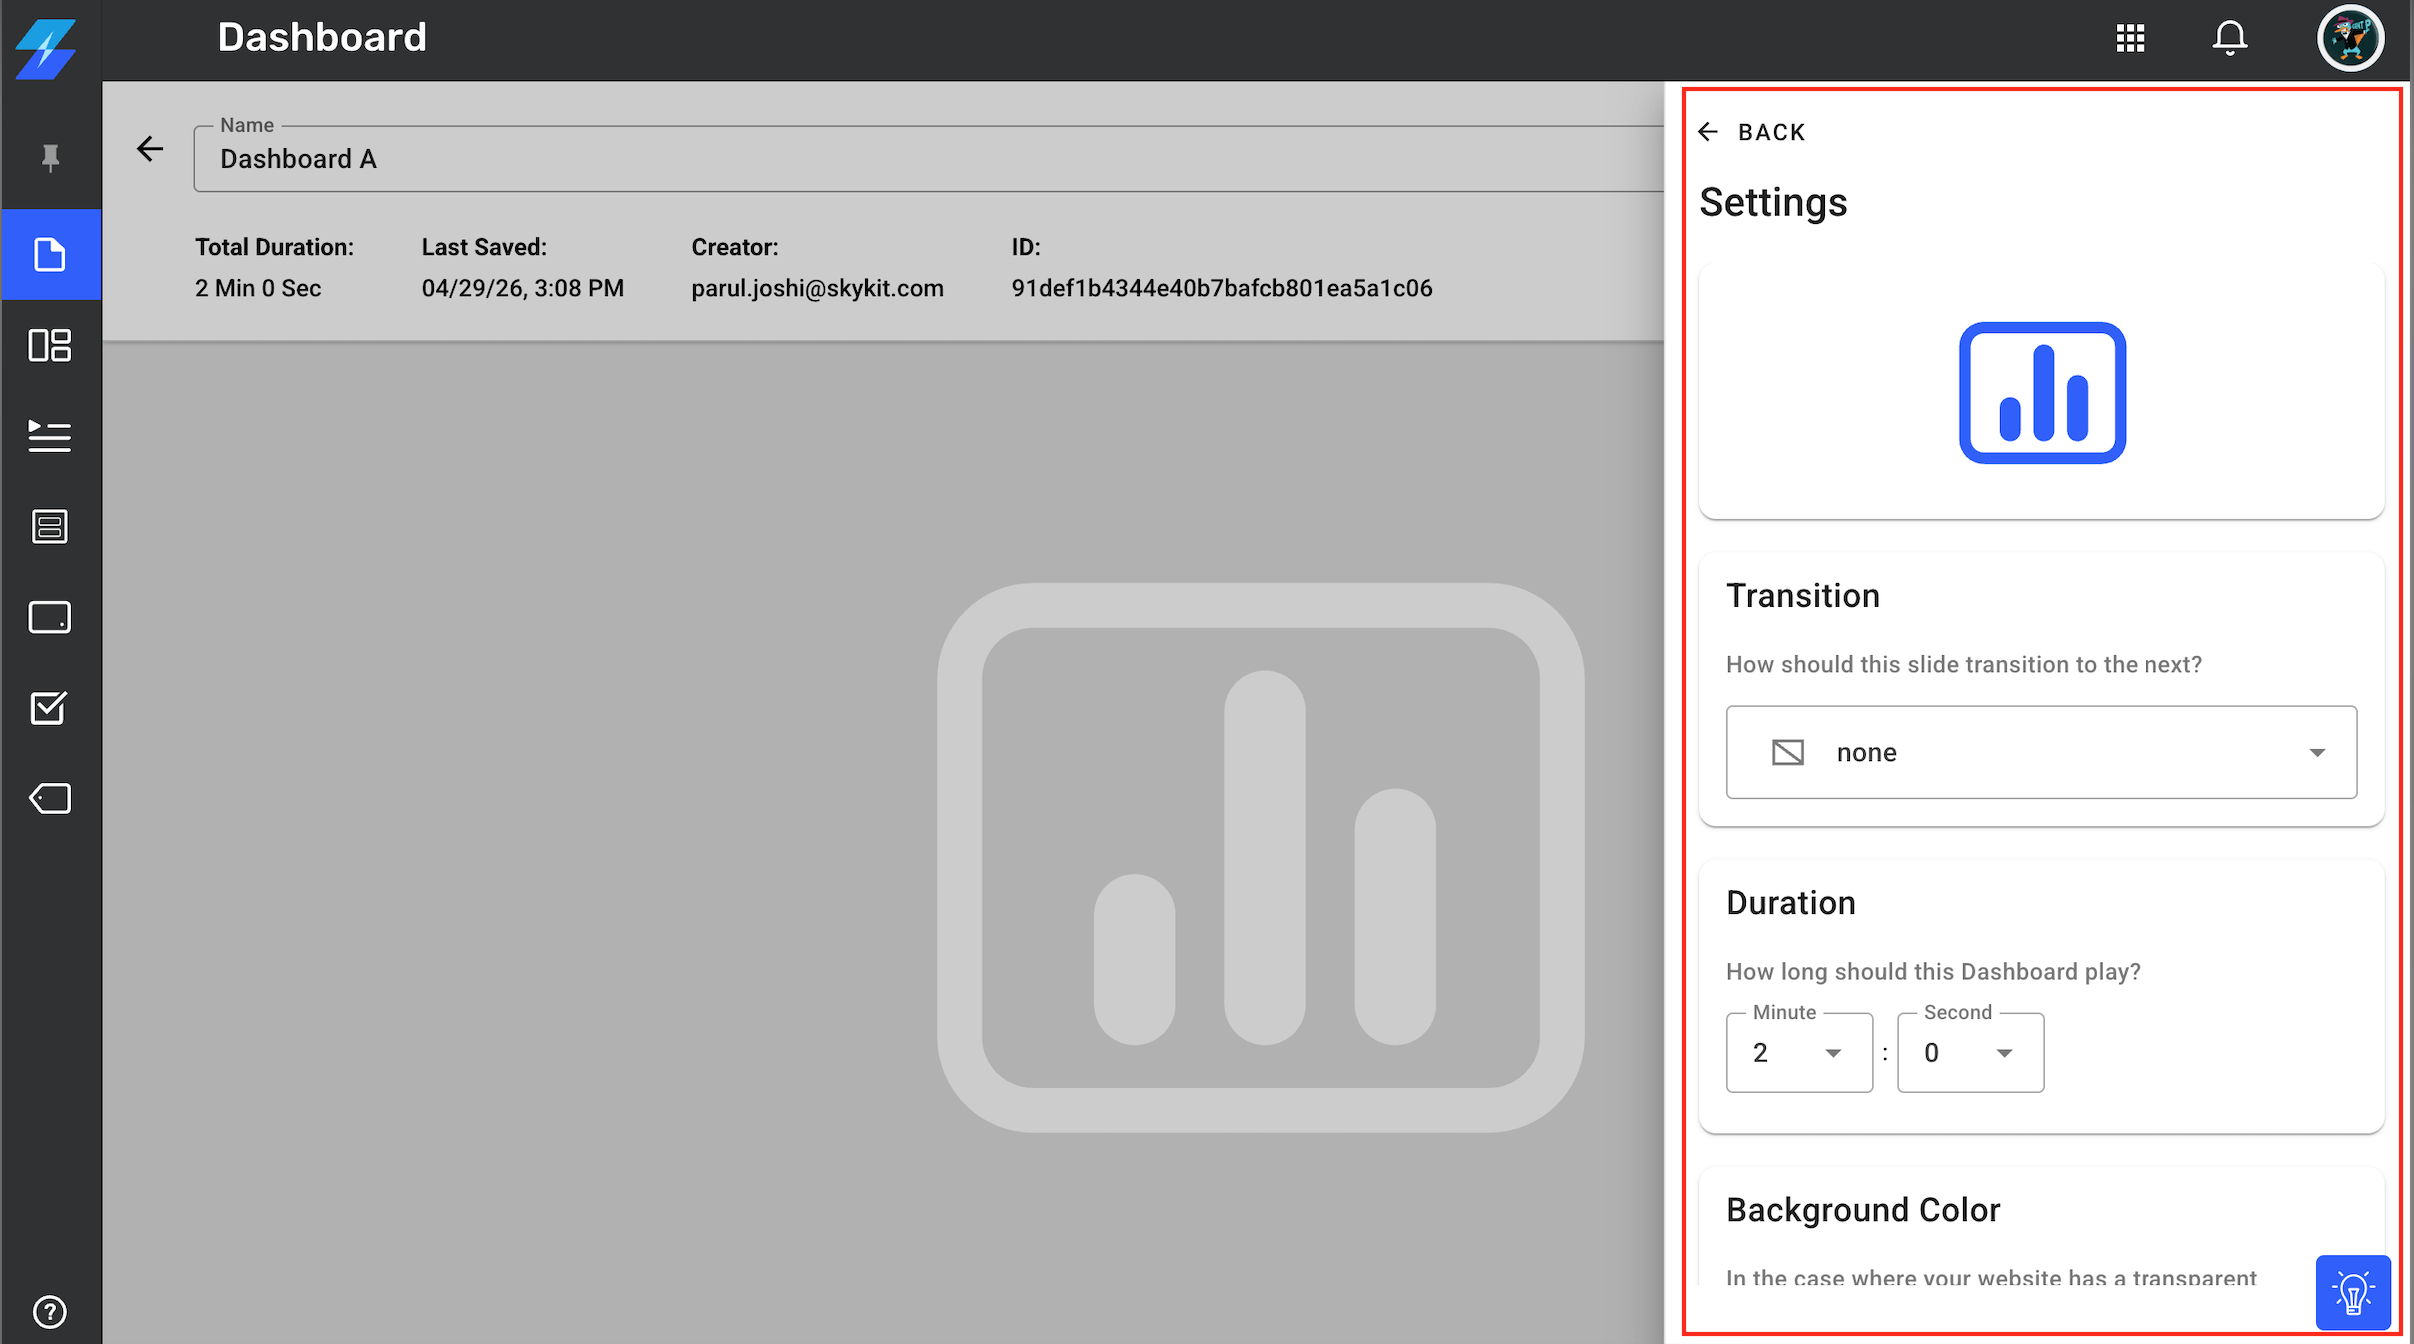
- In the Duration field, enter the length of time you would like the slide to play. Be sure to choose a duration that allows your viewers enough time to engage with the information; you don't want to move through the dashboards too quickly. The duration defaults to 2 minutes; the minimum duration is 30 seconds.
- Background color setting lets you select and add color using this setting for your Dashboard's background, in the case your website has a transparent background color.
- Mixed Content Mode
- Cacheable can be enabled to cache pages for faster loading. This setting enables to cache pages for faster loading. It can be disabled to always load fresh data. This setting doesn’t cache images or data.

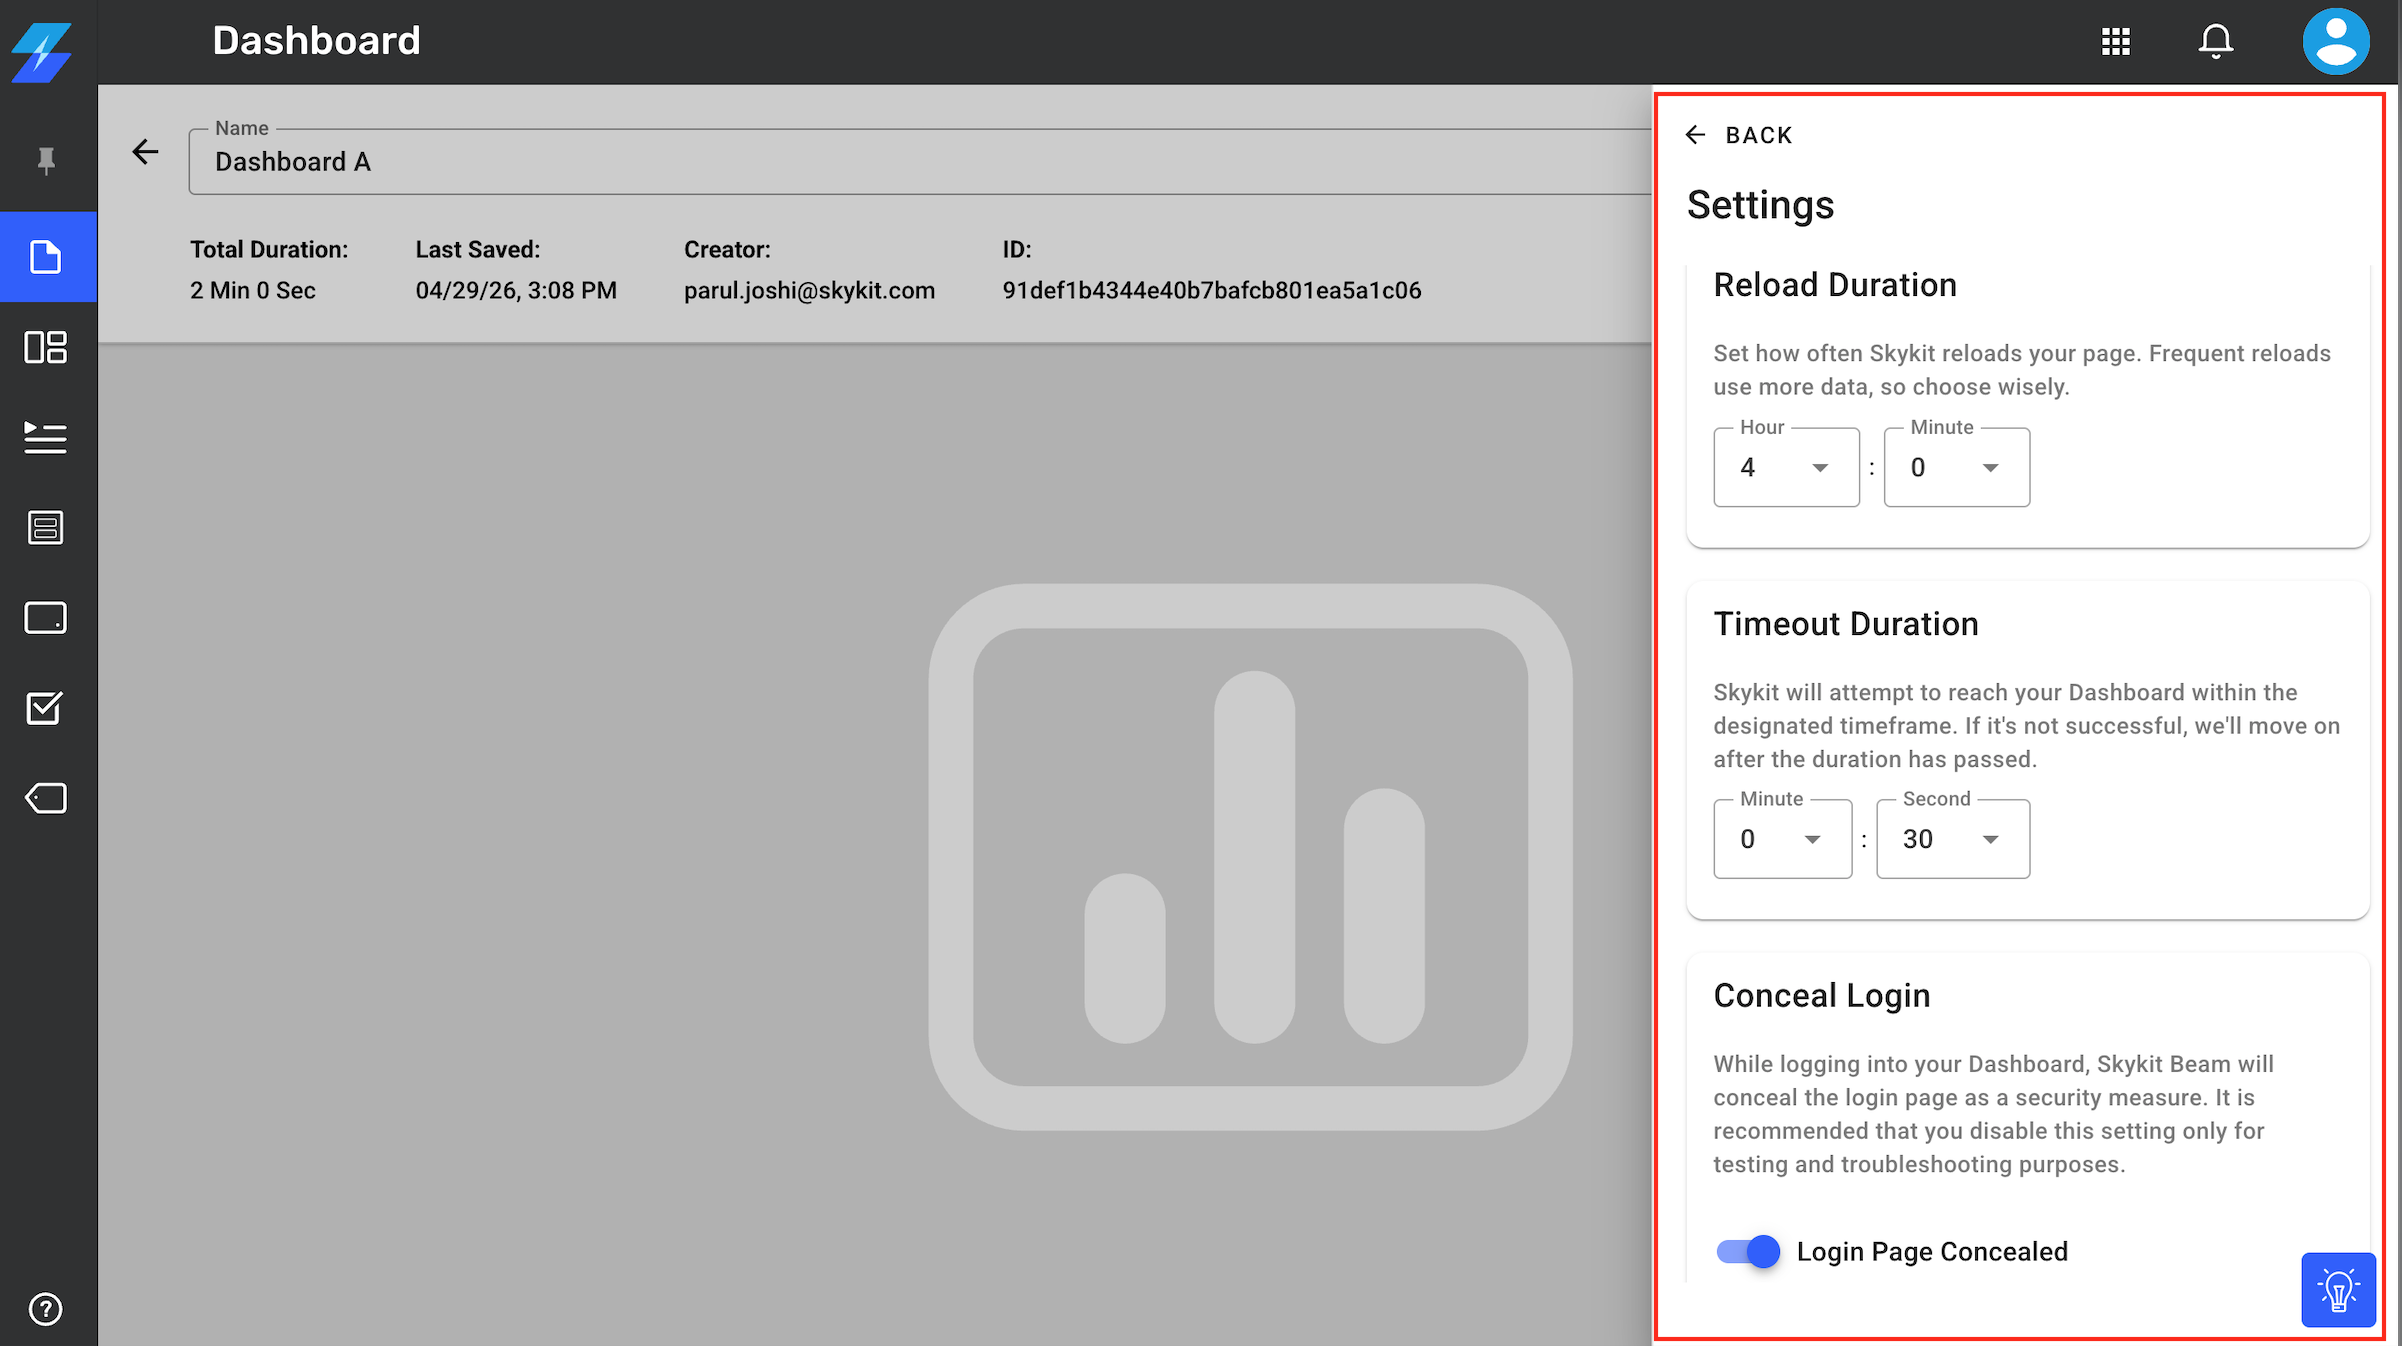
- Reload Duration
- Set how often Skykit reloads your page. Frequent reloads use more data, so choose wisely. This setting can also be configured at the time of dashboard creation and if not changed, it defaults to 4 hour
- Set how often Skykit reloads your page. Frequent reloads use more data, so choose wisely. This setting can also be configured at the time of dashboard creation and if not changed, it defaults to 4 hour
- Timeout Duration
- This setting can also be configured at the time of dashboard creation and if not altered, it defaults to 30 seconds. It is the time for which Skykit will attempt to reach your Dashboard and if not reachable then the player will move on to the next content set for play or retry.
- Conceal Login
- While logging into your Dashboard, Skykit Beam will conceal the login page as a security measure. It is recommended that you disable this setting only for testing and troubleshooting purposes. To see the logging process and turn the concealment off, just toggle to reveal and this will still hide the password and only reveal username. Its useful to turn this feature OFF when dashboards don't load on the displays and you continue to see the authentication screen. Setting it to reveal helps you identify if there are errors with credentials or url its trying to reach.
- While logging into your Dashboard, Skykit Beam will conceal the login page as a security measure. It is recommended that you disable this setting only for testing and troubleshooting purposes. To see the logging process and turn the concealment off, just toggle to reveal and this will still hide the password and only reveal username. Its useful to turn this feature OFF when dashboards don't load on the displays and you continue to see the authentication screen. Setting it to reveal helps you identify if there are errors with credentials or url its trying to reach.
- Under Dashboard Settings, update or replace the existing URL. However Login Type and Provider cannot be changed.
- If you would like to track when the content of your dashboard plays, turn the Proof of Play toggle to Enabled. Please note that Proof of Play is not a default setting but it can be enabled for your account/tenant on request.
- Credentials
- If you would like to change the username and password used to log in to the dashboard, select a new credential nickname from the Username and Password list. You can also add a new username and password by selecting +Add a new username and password from the list and completing the fields.

- If you would like to change the username and password used to log in to the dashboard, select a new credential nickname from the Username and Password list. You can also add a new username and password by selecting +Add a new username and password from the list and completing the fields.
- When you've finished editing the dashboard settings, select the ←Back button to save your changes and return to the Dashboard content manager window.
- If you're satisfied with your changes, select Publish to make your updated dashboard available to publish directly to a display or to insert into a program or playlist.
Next Steps
Now that you've successfully connected and managed your dashboards, it's time to publish them directly to your displays or insert them into a playlist or program.
Publish directly to a display: Publishing Content to a Display
Insert into a playlist: Playlists Overview
Insert into a program: Programs Overview