This feature is available in the following plans: | ||
| ✖ Base | ✖ Pro | ✔ Enterprise |
This article explains how to configure Microsoft SSO SAML for use with Skykit.
Configuration Steps
- Go to Azure Portal.
- Under Azure Services, select Enterprise applications.
- Click on New application.
- Click Create your own application at the top
- For the application name, enter "Skykit SSO SAML".
- Choose Integrate any other application you don't find in the gallery (Non-gallery) for the application type.
- Go to the application you created in Step 4.
- In the left navigation panel, select Overview.
- Under the Getting Started section, click on Set up single sign on.
- Choose SAML as the sign-on method. This will direct you to the SAML configuration page.
- Under Manage in the left navigation panel, select Single sign-on.
- For the Basic SAML Configuration, Skykit will provide you with the configuration for the following:
- Identifier (Entity ID): msft-skykit-sp
- Reply URL (Assertion Consumer Service URL): https://login.skykit.com/__/auth/handler
- Sign on URL: https://accounts.skykit.com/
- Click the Save button at the top, and click the 'X' in the top right corner to close the window
- For Attributes & Claims, update each claim name to update as follows:
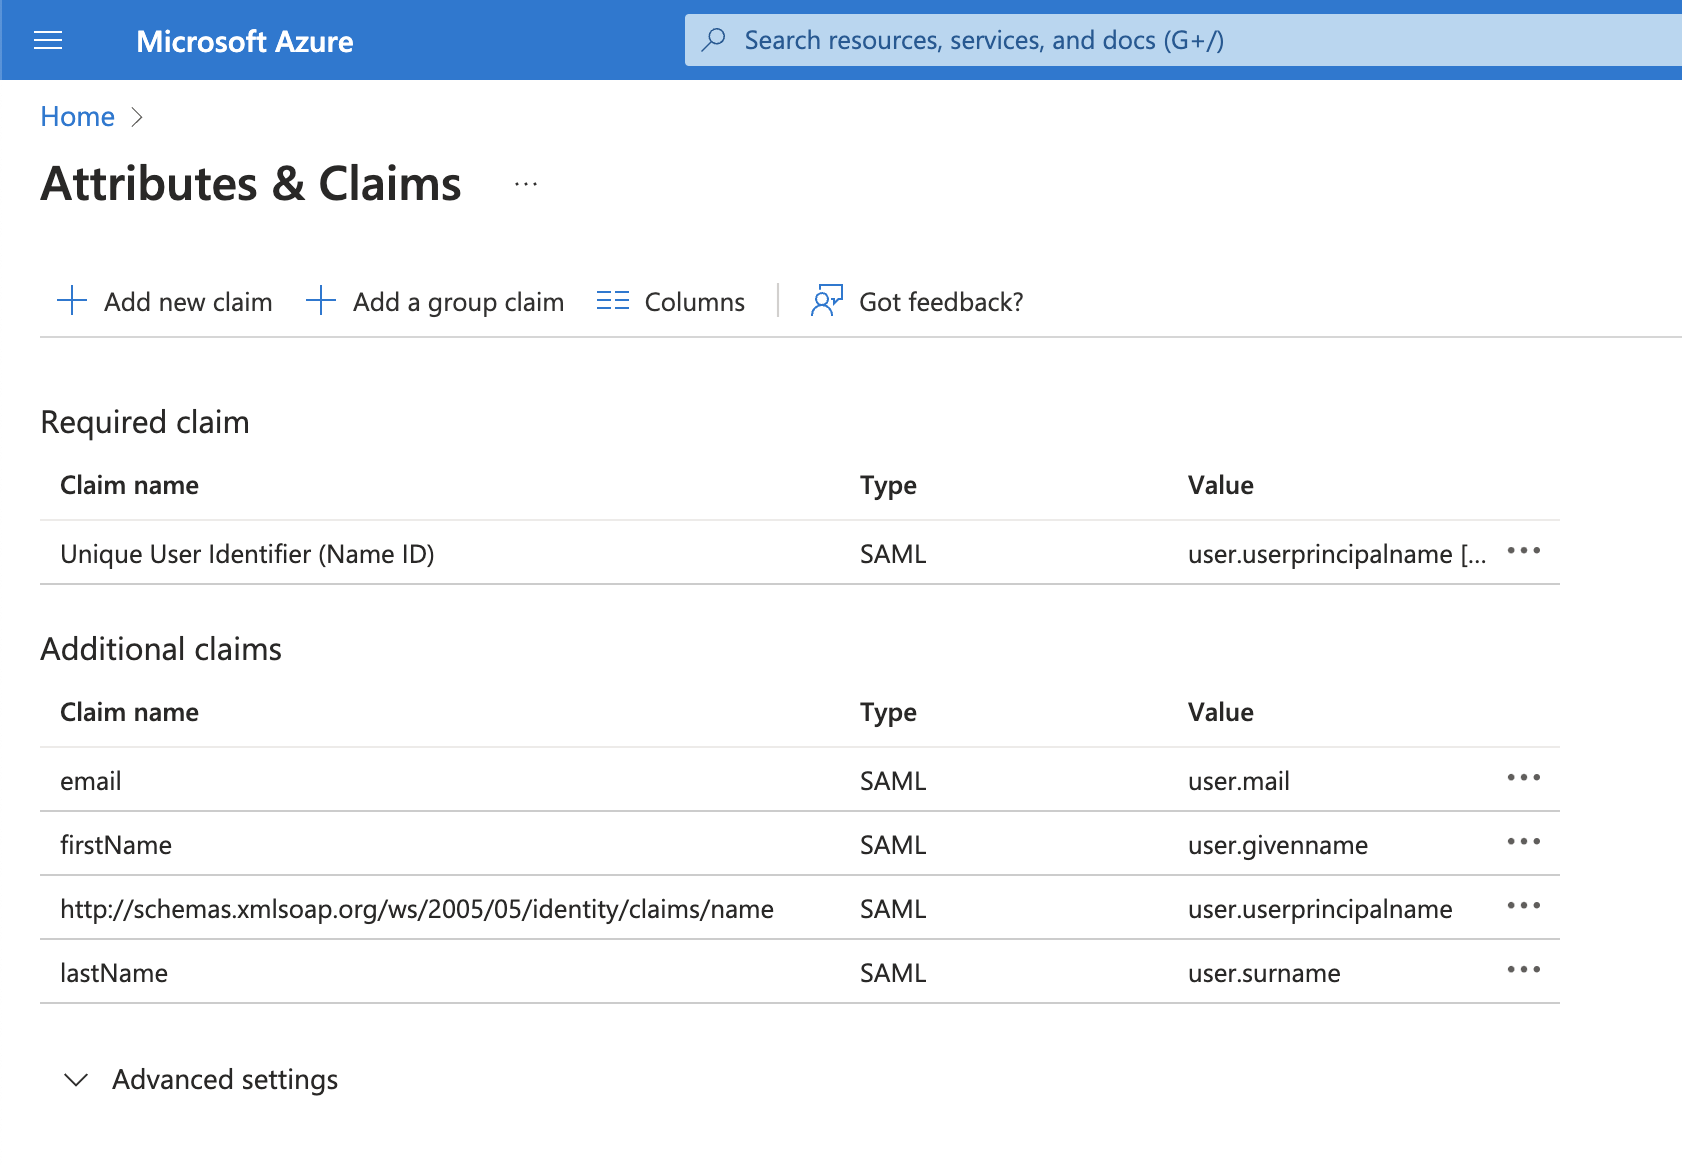
- Unique User Identifier (Name ID): user.userprincipalname
- email: user.mail
- Remove the Namespace value
- firstName: user.givenname
- Remove the Namespace value
- name: user.userprincipalname
- Keep the Namespace value
- lastName: user.surname
- Remove the Namespace value
- Click the 'X' in the top right corner to close the claims window after you're finished
- If you are sent back to the Azure home screen, navigate back to the Enterprise application you created in Step 4.
- Back on the Single Sign-On setup screen, under SAML Certificates, click on "Download" next to Certificate (Base64) to download the certificate. Provide this certificate to Skykit.
- Provide your domain to skykit.
- Under Step 4 or Set up Skykit SSO SAML, provide Skykit with the following information:
- Login URL
- Microsoft Entra Identifier
- Lastly, add users or groups to the application to enable SSO functionality, under the Manage > Users and Groups section.
Send Us Your Configuration
Please send an email to support@skykit.com with the subject "Microsoft SSO SAML Setup", and include:
- Certificate from Step 15
- Domain name, Login URL and Microsoft Entra Identifier from Step 16 &17
The Skykit Support Team will contact your shortly with further instructions once your configuration has been set.
User Access & Login Issues
If a user is experiencing issues logging in via SSO despite the integration being active, please verify their status within your Microsoft Entra ID (formerly Azure AD) environment.
To log in successfully, users must be explicitly assigned to the Skykit Enterprise Application in Entra. If a user is not assigned, the authentication request will fail before reaching Skykit.
If a user is having trouble logging in, you can confirm their access by:
- Navigate to Enterprise Applications in the Entra portal
- Select the Skykit App
- Verify the specific user or group they belong to is listed under Users and Groups
If you encounter any issues or have any questions, please reach out to support@skykit.com.