The Network tab displays the device's current Wi-Fi settings and allows you to add networks, set up over-the-air (OTA) firmware updates, and reset the modem remotely.
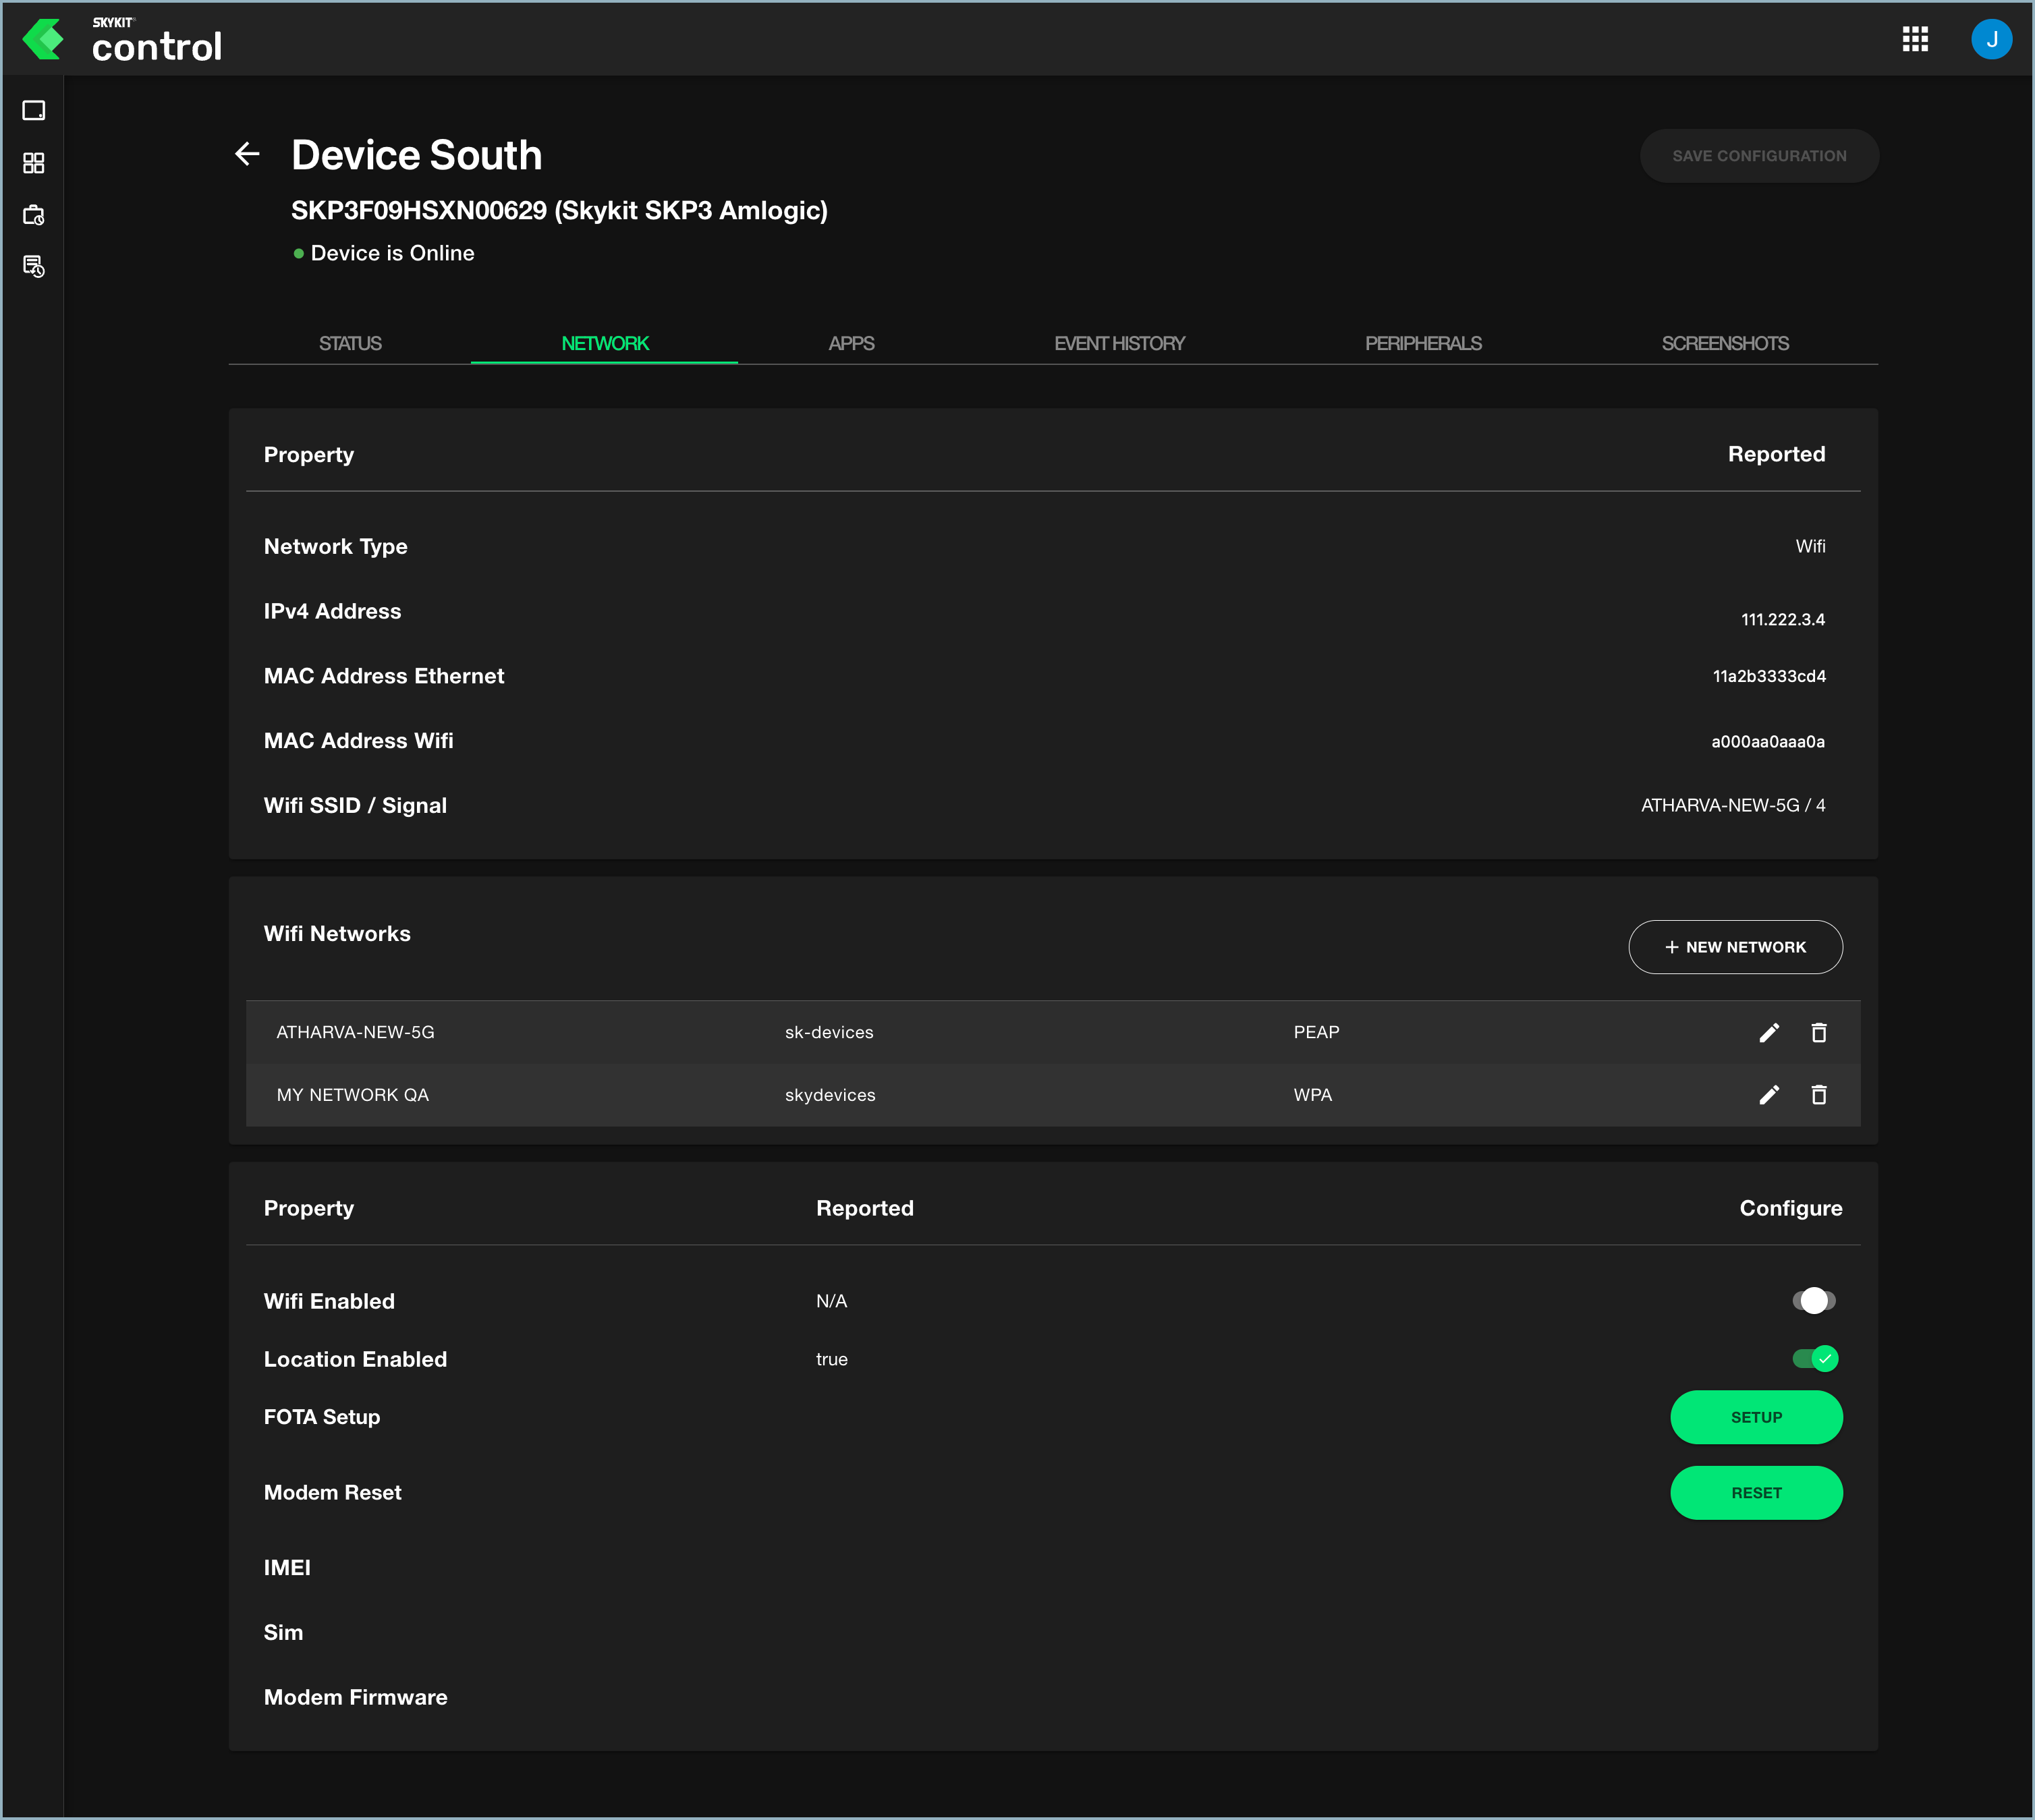
Online / Offline Status
A red or green indicator shows if your device is online or offline.
Typically, this is caused by the network the device is connected to not following our Network Connectivity Recommendations.
Adding a Wi-Fi Network
The Wifi Networks section lets you add Wi-Fi networks to the device. This isn't a common task, but it does allow you to pre-configure networks. For example, you can use this feature if you have a display that needs to be shipped to another location and you want to set up that location's Wi-Fi network on the display before you ship it out.

- Select +New Network in the Wifi Networks section. The Add Wifi Network window opens.
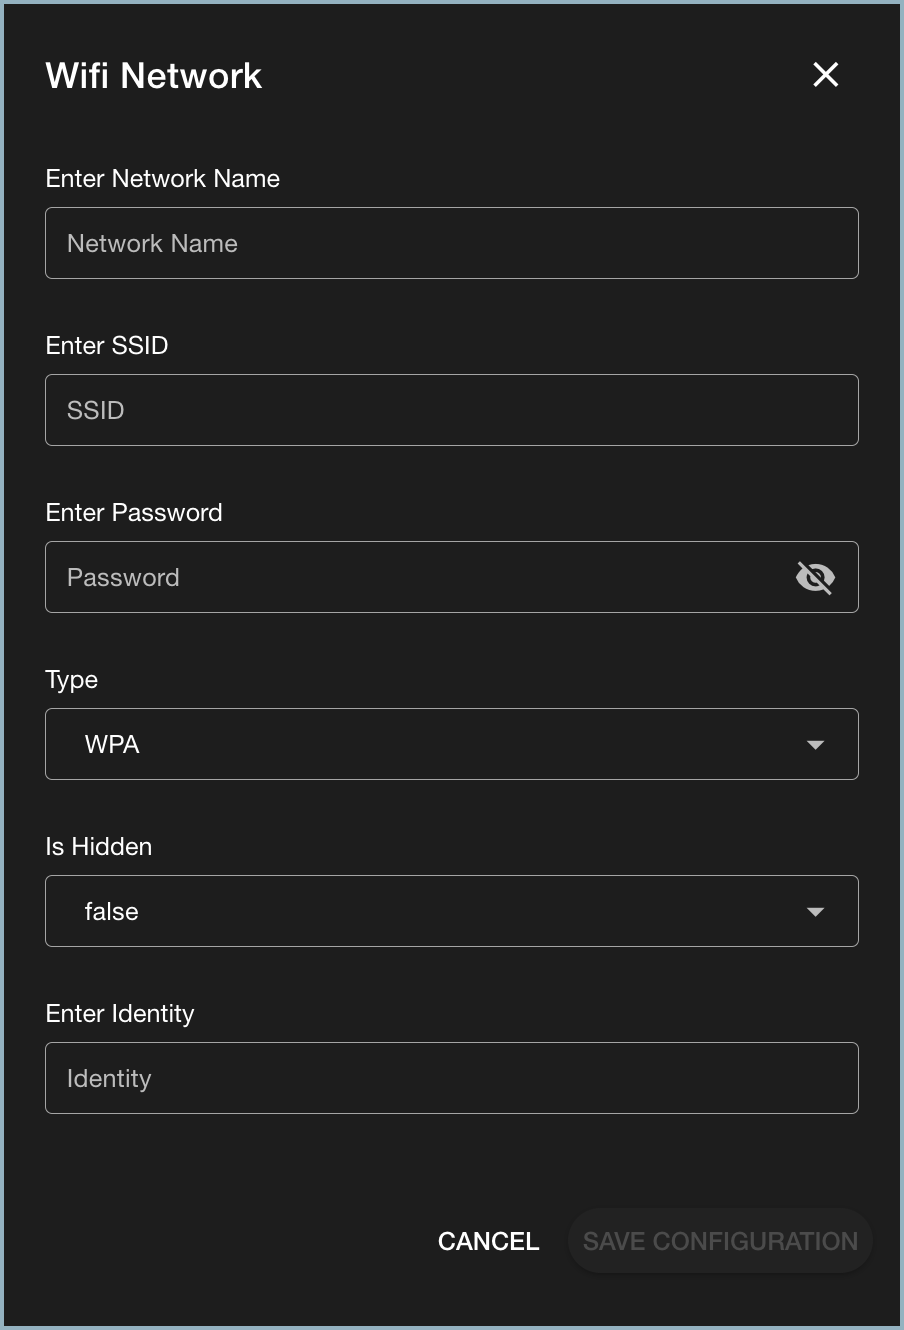
- Enter the name of the network in the Enter Network Name field.
- Enter the network ID in the SSID field.
- Enter the network password in the Password field.
- From the Type drop-down list, select the type of network: WPA (Wi-Fi Protected Access) or PEAP (Protected Extensible Authentication Protocol).
- If you want to hide the network, select True from the Is Hidden list. If you want it to be accessible, select False.
- Enter the network identity in the Identity field. This is usually the employee's user name.
- Select Save Configuration to save your changes and return to the Network tab. The new network is now listed under Wifi Networks.
To delete a network, select the trash icon next to the network name.
Network Properties
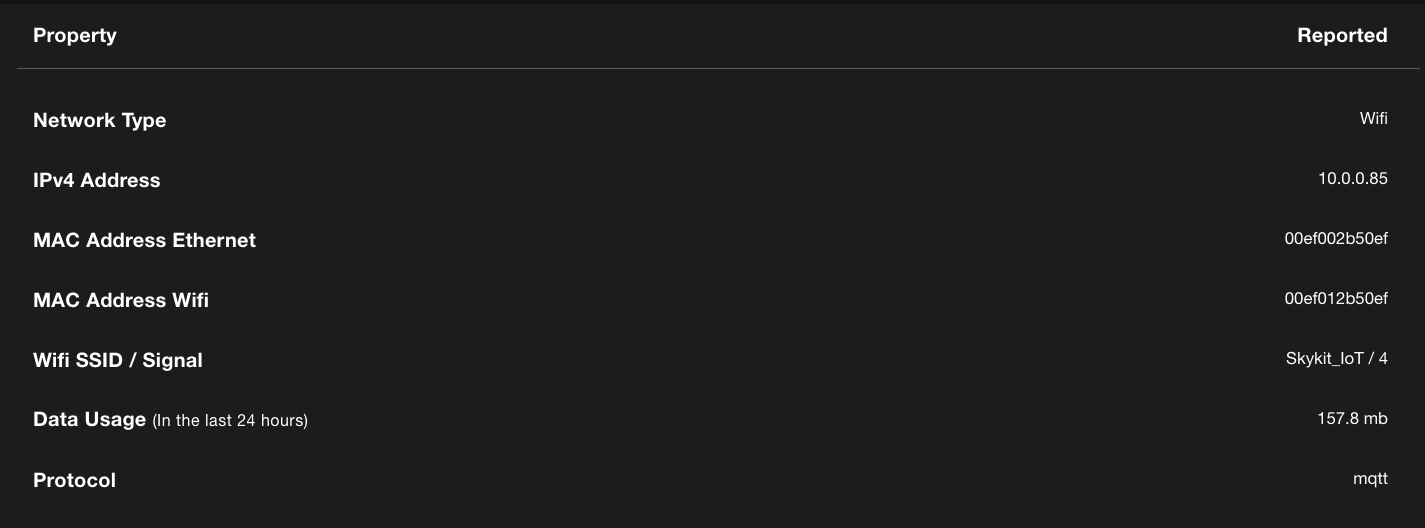
The first section in the Network tab displays the network properties of the device as reported from the display.
| Property | Reported Value |
|---|---|
| Network Type | Wi-Fi or ethernet |
| IPv4 Address | The device's IP address |
| MAC Address Ethernet | The MAC (Media Access Control) ethernet address is the device's hardware address. It is unique to the device. It identifies the hardware manufacturer and is used for network communication between devices in a network segment. |
| MAC Address Wifi | Your device uses a different MAC address for each Wi-Fi network it connects with. This value is the unique identifier the device uses to connect with the Wi-Fi network. |
| Wifi SSID/Signal | The network ID and signal strength on a scale of 1 to 5. This only represents the strength of a WiFi network. Devices connected to ethernet or mobile will display a strength of 0. |
| Data Usage | The amount of data the device has used in the last 24 hours. |
| Protocol | The network protocol the device is using. |
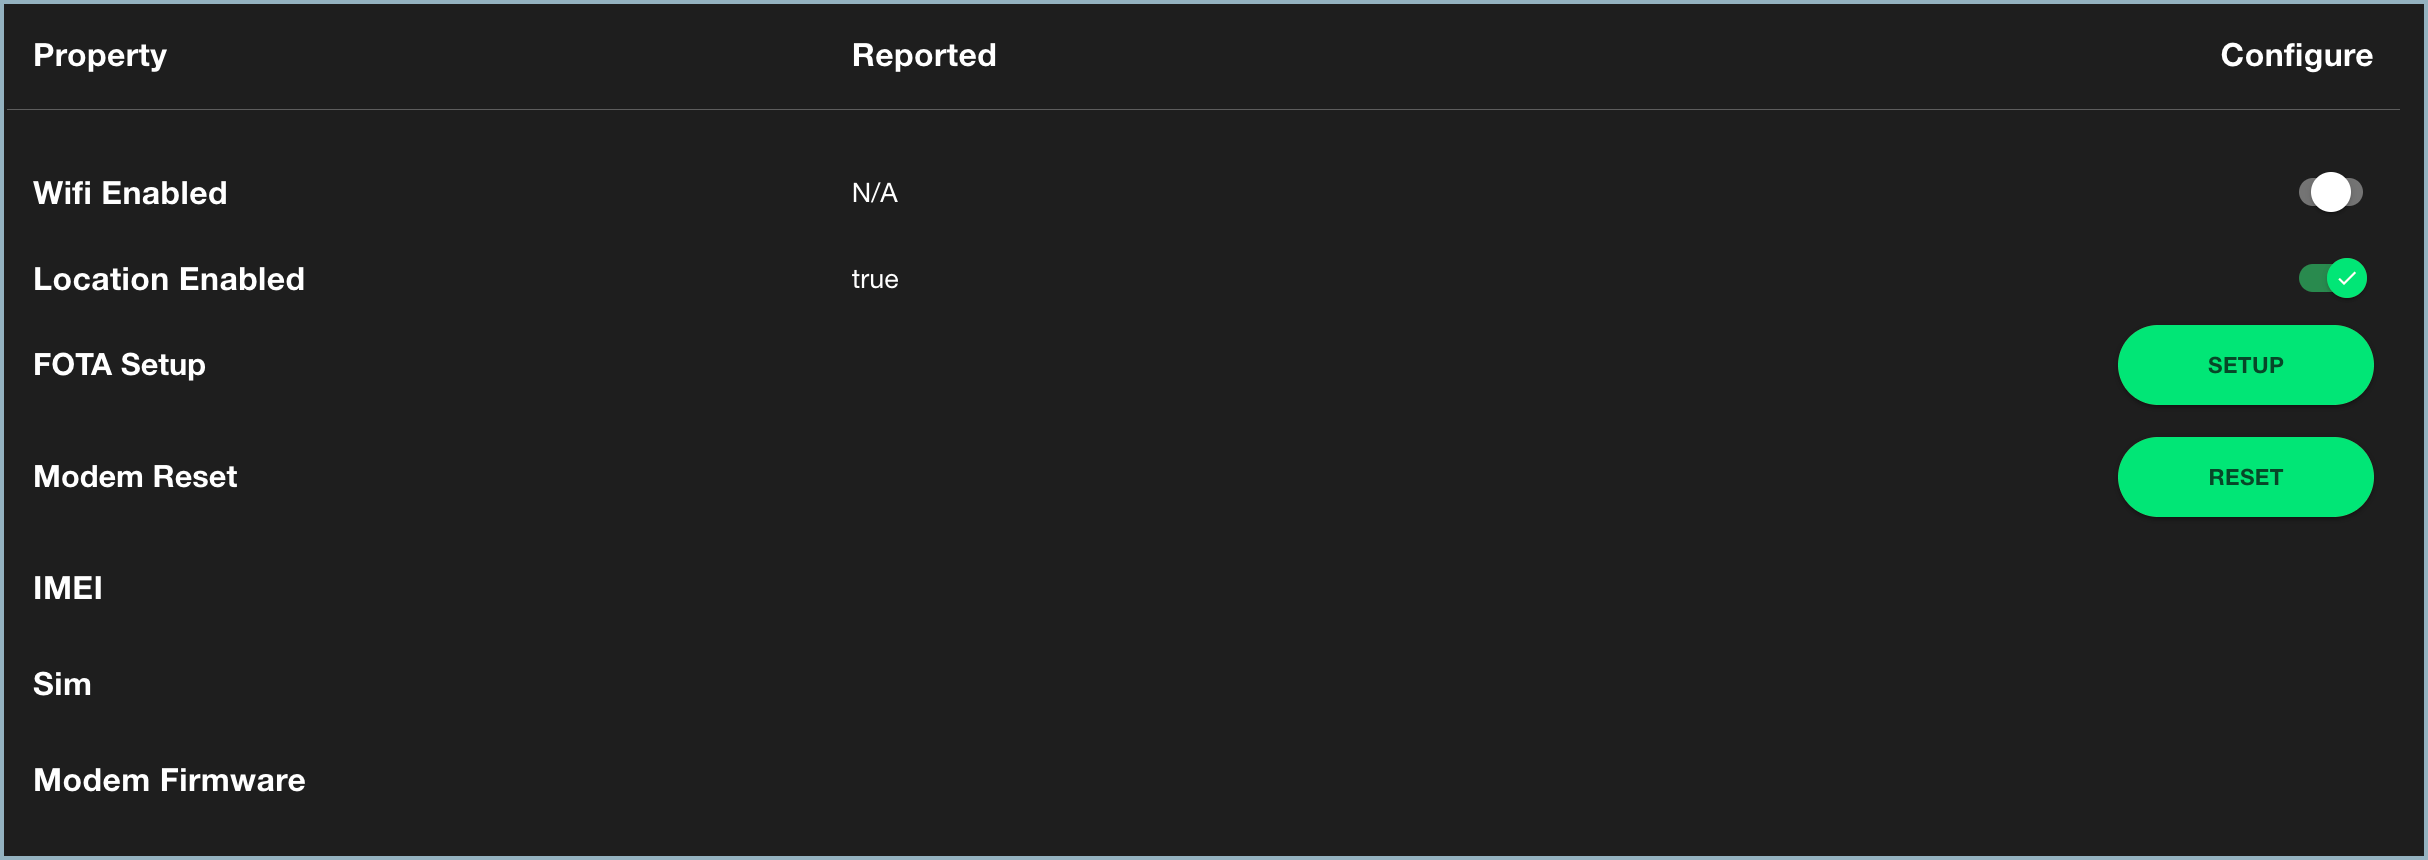
Cellular Device Properties
This section of the Network tab displays properties related to cellular devices such as the SKP Pro. You can also set up over-the-air (OTA) firmware updates and reset the modem remotely in this section.
| Property | Reported Value |
|---|---|
| Wifi Enabled | Turn the toggle on to enable Wi-Fi. |
| Location Enabled | A reported value of True means that the device can use your location. Turn the toggle on or off to enable or disable location services. |
| FOTA Setup | Select Setup to set up over-the-air (FOTA) updates of firmware. |
| Modem Reset | Select Reset to reset the modem remotely. |
| IMEI | The serial number of the cellular device. |
| SIM | The serial number of the SIM card used by the cellular device. |
| Modem Firmware | The software programmed into your modem that makes it run. |
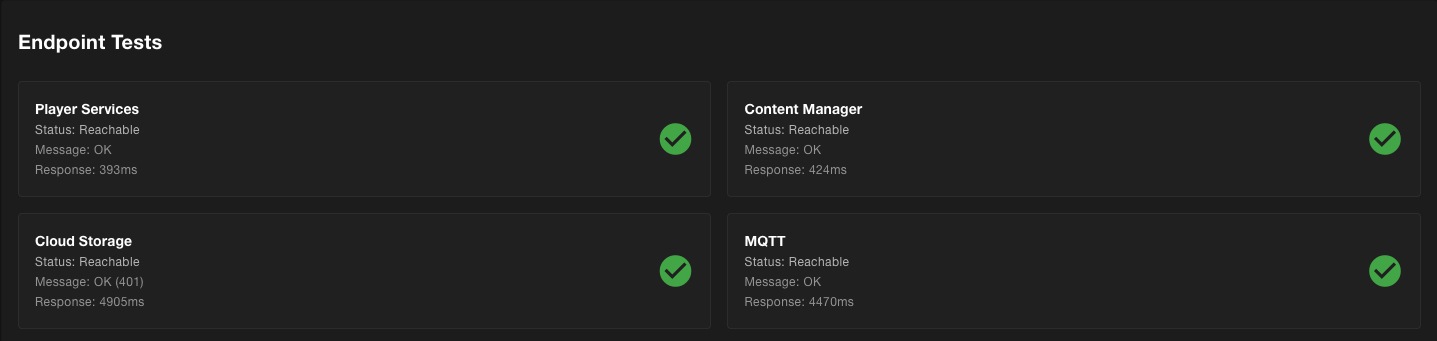
Endpoint Tests
The last section in the Network tab displays whether the device was able to reach Endpoints required for your Skykit device to function correctly. If any of these do not show a green check mark, the device the network is on likely needs to be updated to adhere to our Network Connectivity Recommendations.