In Skykit Control, administrators can find, diagnose, and troubleshoot device issues by sending device commands remotely, configuring device settings, and viewing device logs. You can also upload and install apps on your devices.
All of the tasks you perform in Skykit Control are done in one of the main windows: Devices, Apps, Job Status, and Reports.
Devices
The Devices window opens by default when you log in to Skykit Control. It is the starting point for the majority of the tasks you can perform in Skykit Control. This window lists all the devices that are currently registered in your tenant. From here, you can pair a new device and access a device's detail window, which is where you can configure settings, take screenshots, generate device reports, and more. You can also organize your devices by assigning them labels and send commands to multiple devices at once.
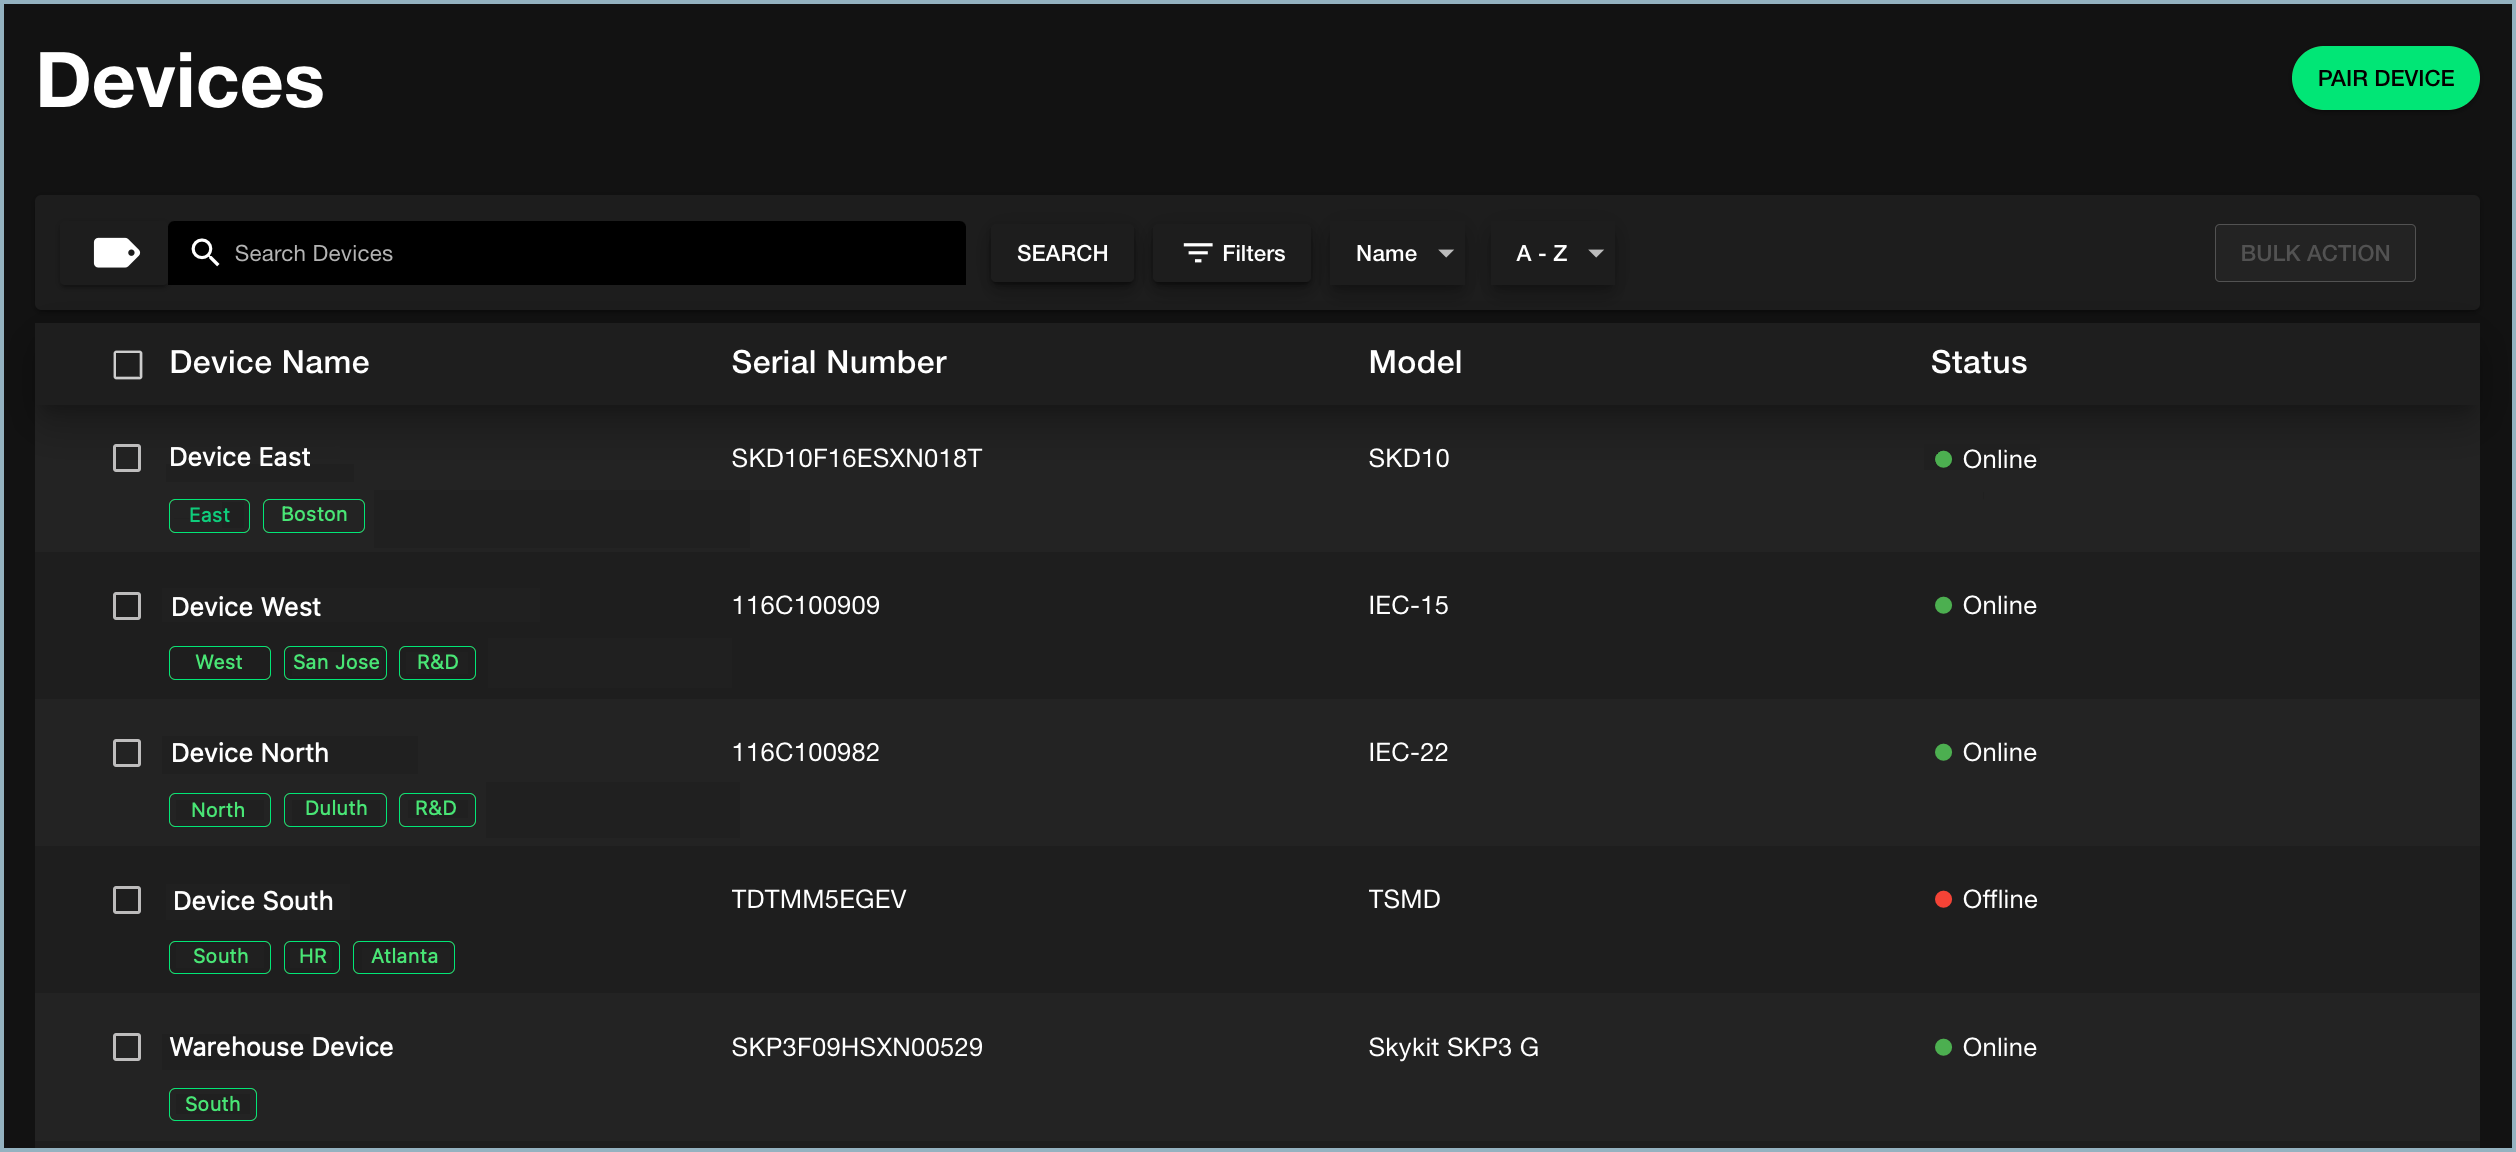
For each device listed, the window shows you:
- Device name
- Any labels that have been assigned to the device
- Serial number
- Model (for example, SKP3 or SKP10)
- Status (online or offline)
To learn how to create and assign labels to devices, see Creating Labels in {{variable.Skykit_Control}} and Assigning Labels to Devices.
To learn how to pair a device, see Getting Started with Skykit Control.
To learn how to send commands to one or more devices, see Sending Commands.
Device Details
When you select a device from the list in the Devices window, you open the device's detail window. This is where you can view device properties, configure settings such as volume, screen brightness, and time zone, set up Wi-Fi networks and peripherals, take screenshots of what's currently playing on the display, and send commands to your devices, among other tasks.
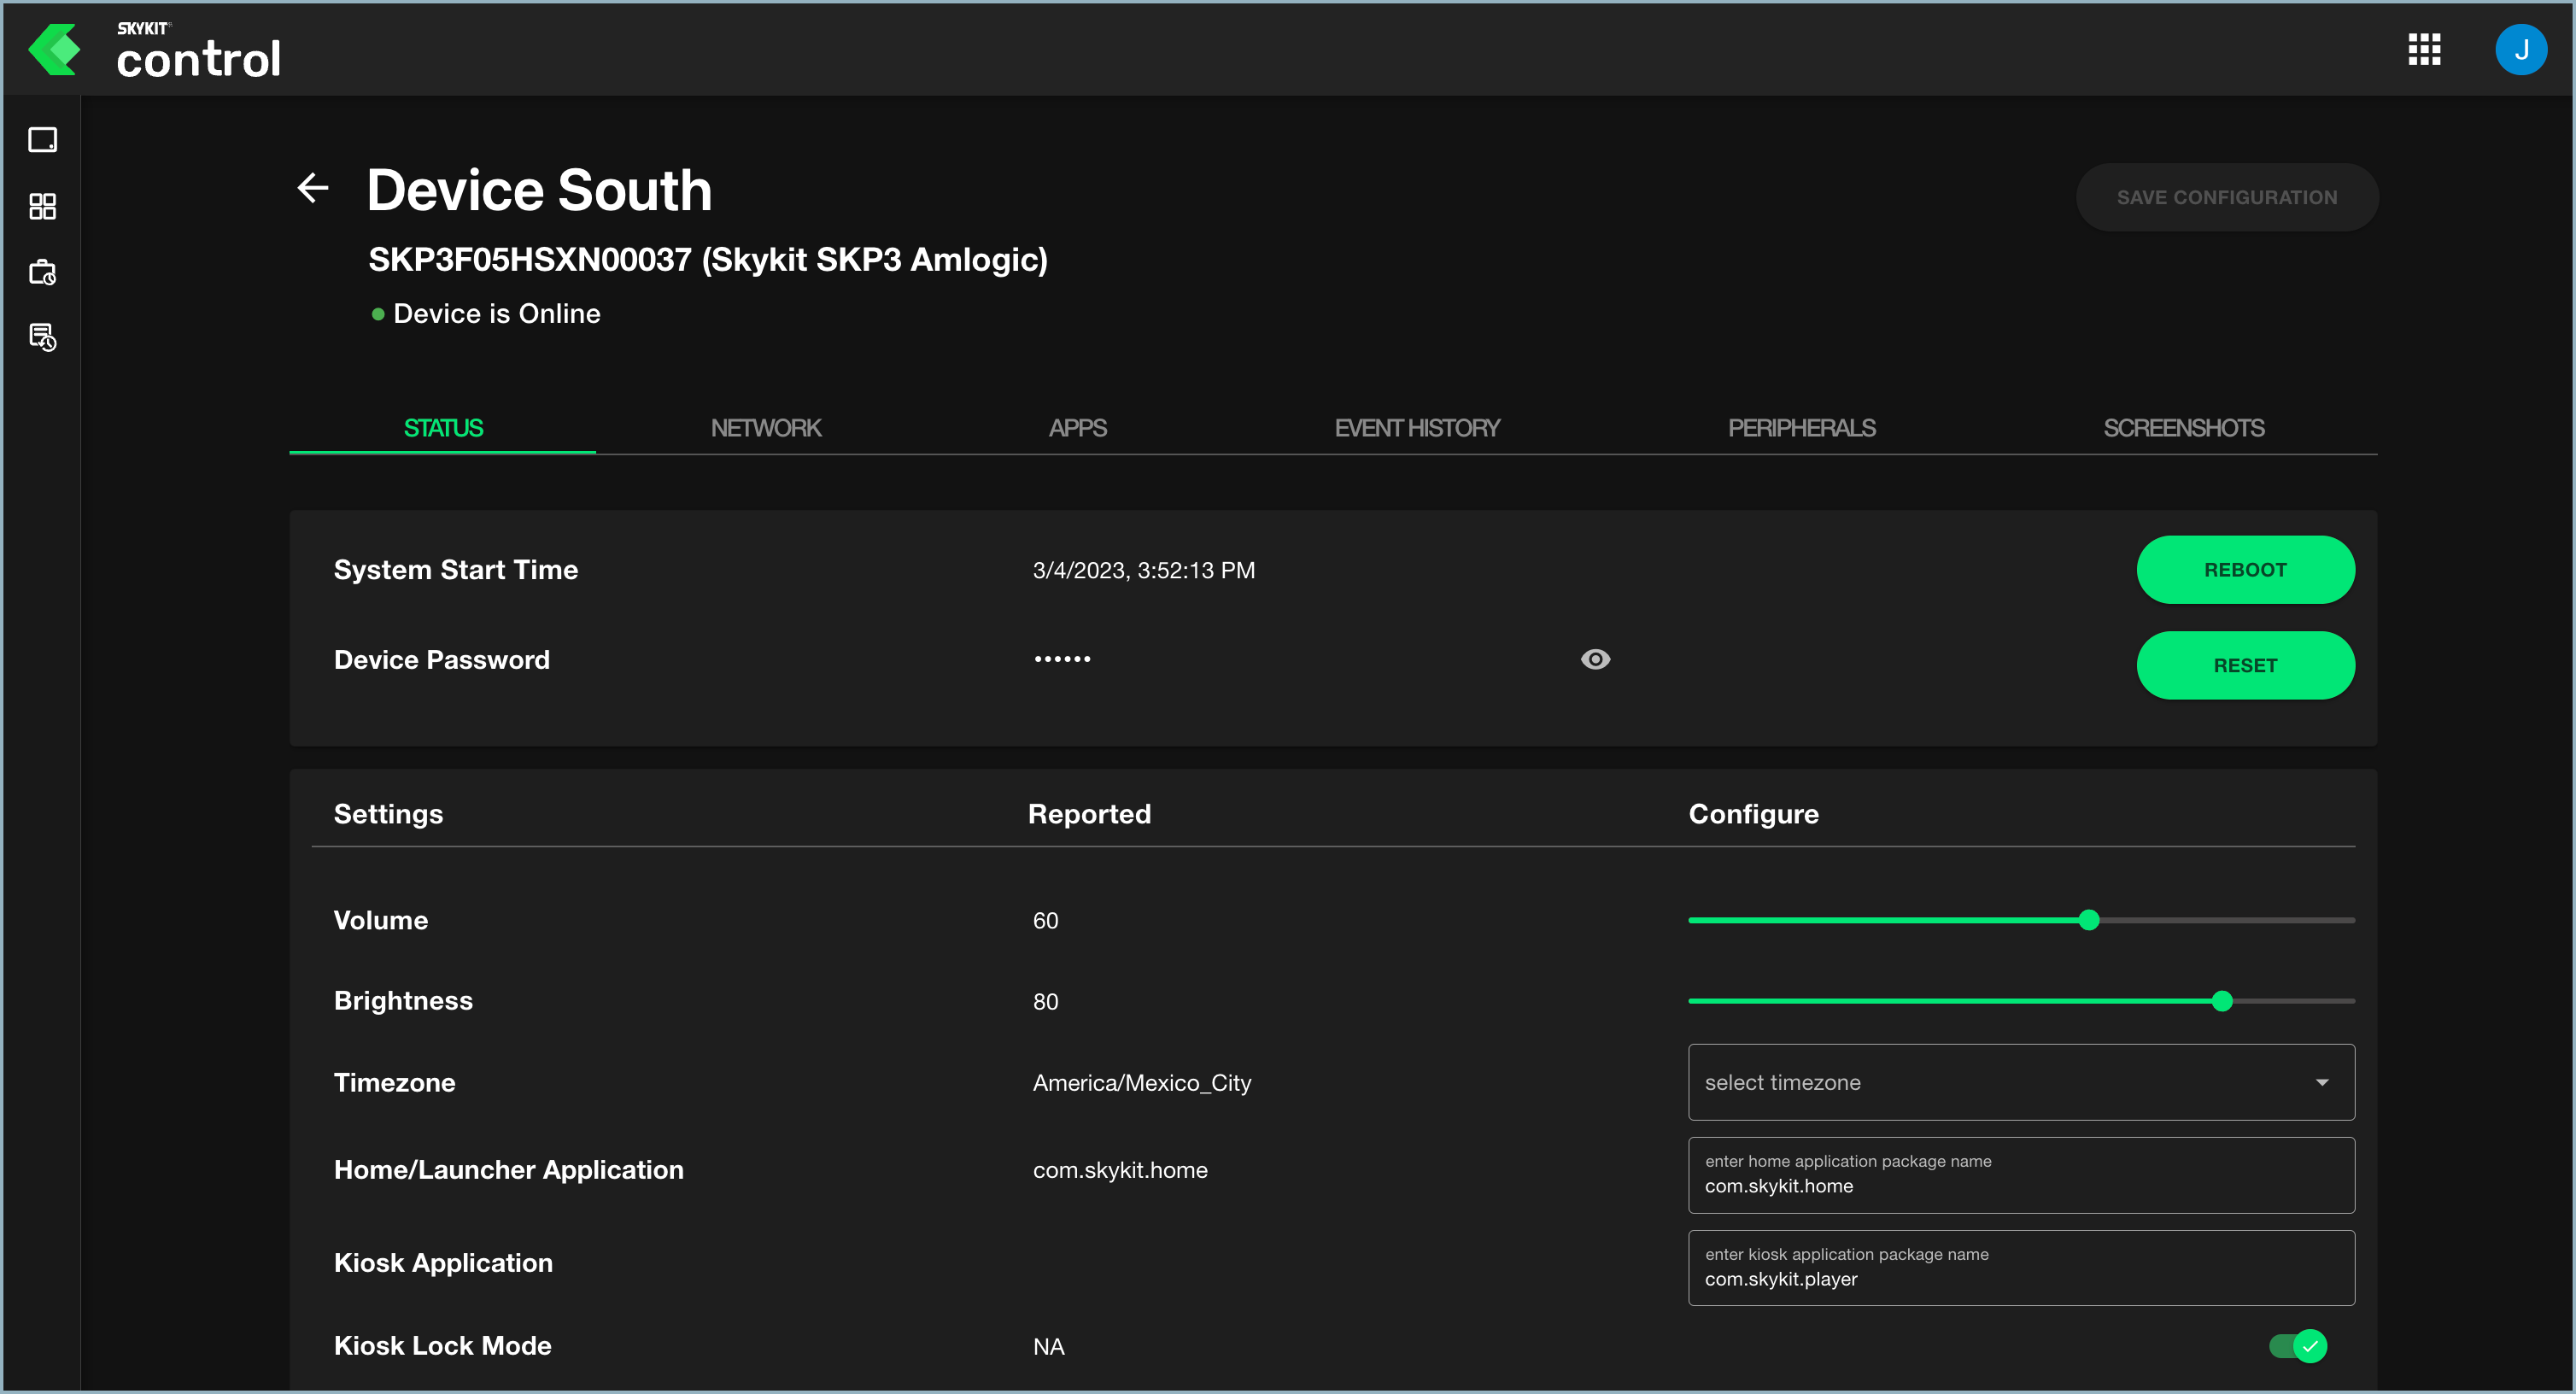
The detail window includes the following tabs:
- Status: Provides information about the current state of the device and allows you to reboot the display, reset the password, and configure settings such as volume, screen orientation, and brightness. See Status Tab for more information.
- Network: Shows you the device's current Wi-Fi settings and allows you to add networks, set up over-the-air (OTA) updates, and reset the modem remotely. See Network Tab for more information.
- Apps: Allows you to install additional managed and device apps on the device. See Apps Tab for more information.
- Event History: Allows you to view a history of device events, Beam events (if you have access to Skykit Beam, and device commands. See Event History Tab for more information.
- Peripherals: Provides information about any peripheral devices, such as TVs, that are connected to your device. You can also send supported commands to peripherals and add new peripherals from this tab. See Peripherals Tab for more information.
- Screenshots: Allows you to take screenshots of the content currently playing on the device. It also serves as a repository for the screenshots so you can view or download them as needed. See Screenshots Tab for more information.
Apps
In the Apps window you can see which apps are loaded and available to install on your devices, which ones are currently installed on your devices, and which release channel (Alpha, Beta, or Production) they are installed on. You can also upload apps from this window so they're available to install on your devices.
For information about uploading apps, see Getting Started with Skykit Control.
.png)
Apps Detail Window
When you select an app from the Apps window, that app's detail window opens. In this window you can replace an app if an update is available or promote an app from one release channel to the next.
.png)
The detail window provides the following information about the app:
- Which release channel the app is installed in
- File name
- Release date
- Date the app was uploaded into Control
- Version number
- Version code
- signature (a unique ID)
The different release channels allow you to test an app on a device before making it generally available. Alpha is the default channel, used for early testing. Beta is used for more widespread testing, while the Production channel is for general availability. All devices should be running in Production.
To learn how to promote an app to the next release channel, see Uploading and Installing Apps.
Job Status
Select Job Status from the navigation bar to open the Bulk Job View window. This is where you can find information about bulk jobs—commands you send to multiple devices at once.
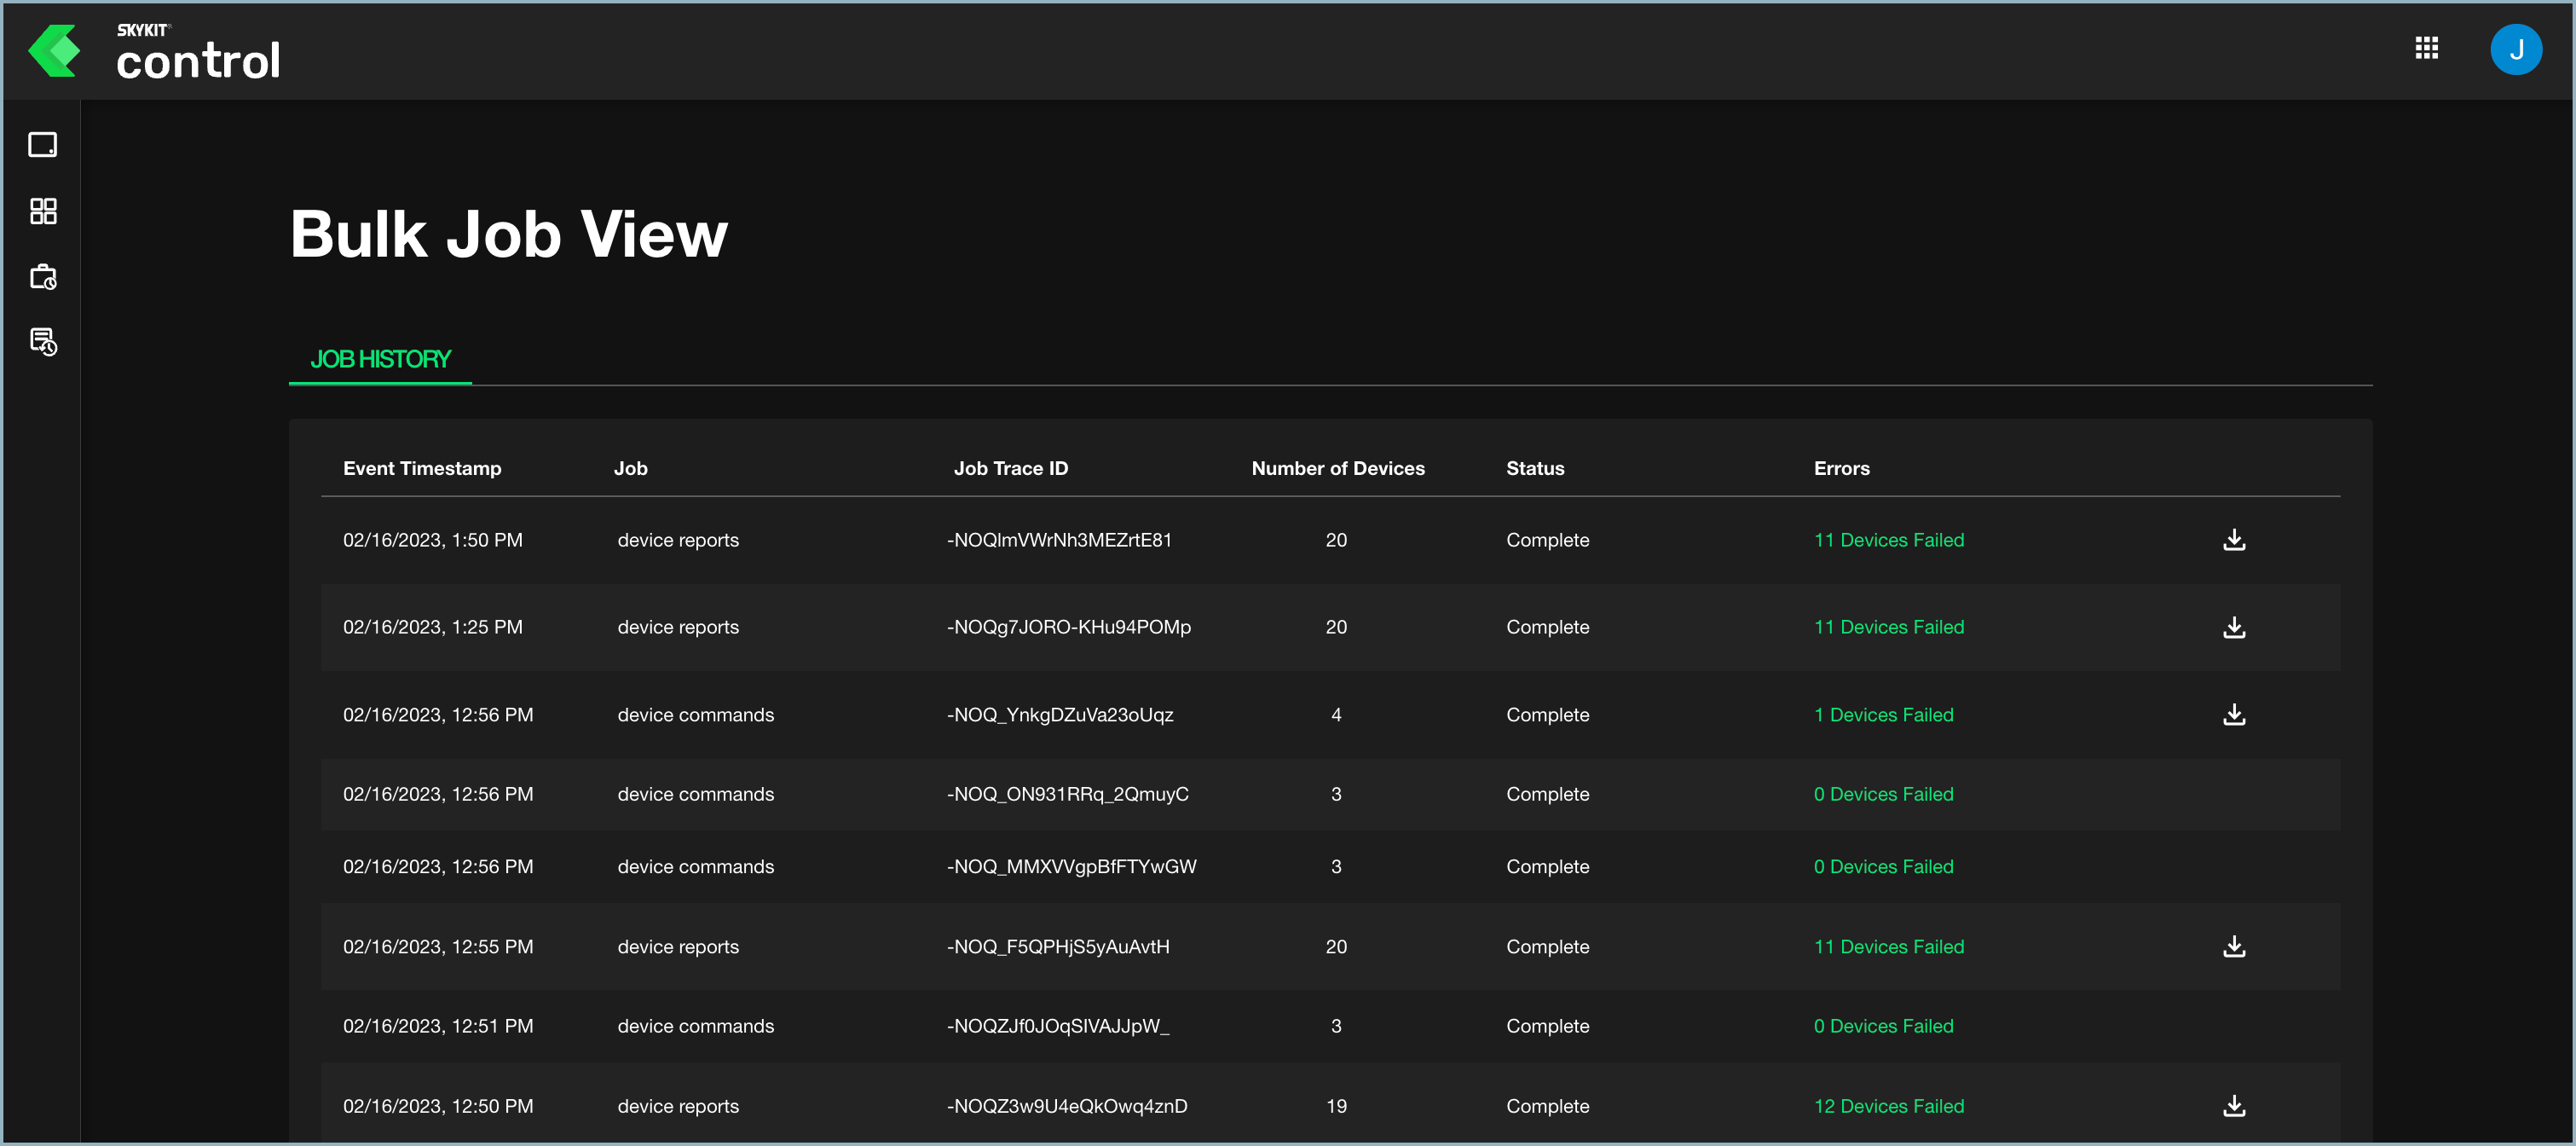
For each of the 25 most recent bulk jobs, you can see when the job took place, what kind of job it was, the number of devices included in the job, the status of the job (Complete, Failed, or In Progress), and how many devices failed to receive the command (if relevant). When you select the error message for any event that includes failed devices, you can select the error message to see additional details about which devices failed and why.
You can also download a .csv file that includes information about all the devices in a bulk job, not just those that failed. Simply select the download icon next to the event to open the file.
See Monitoring Bulk Job Status for more information.
Reports
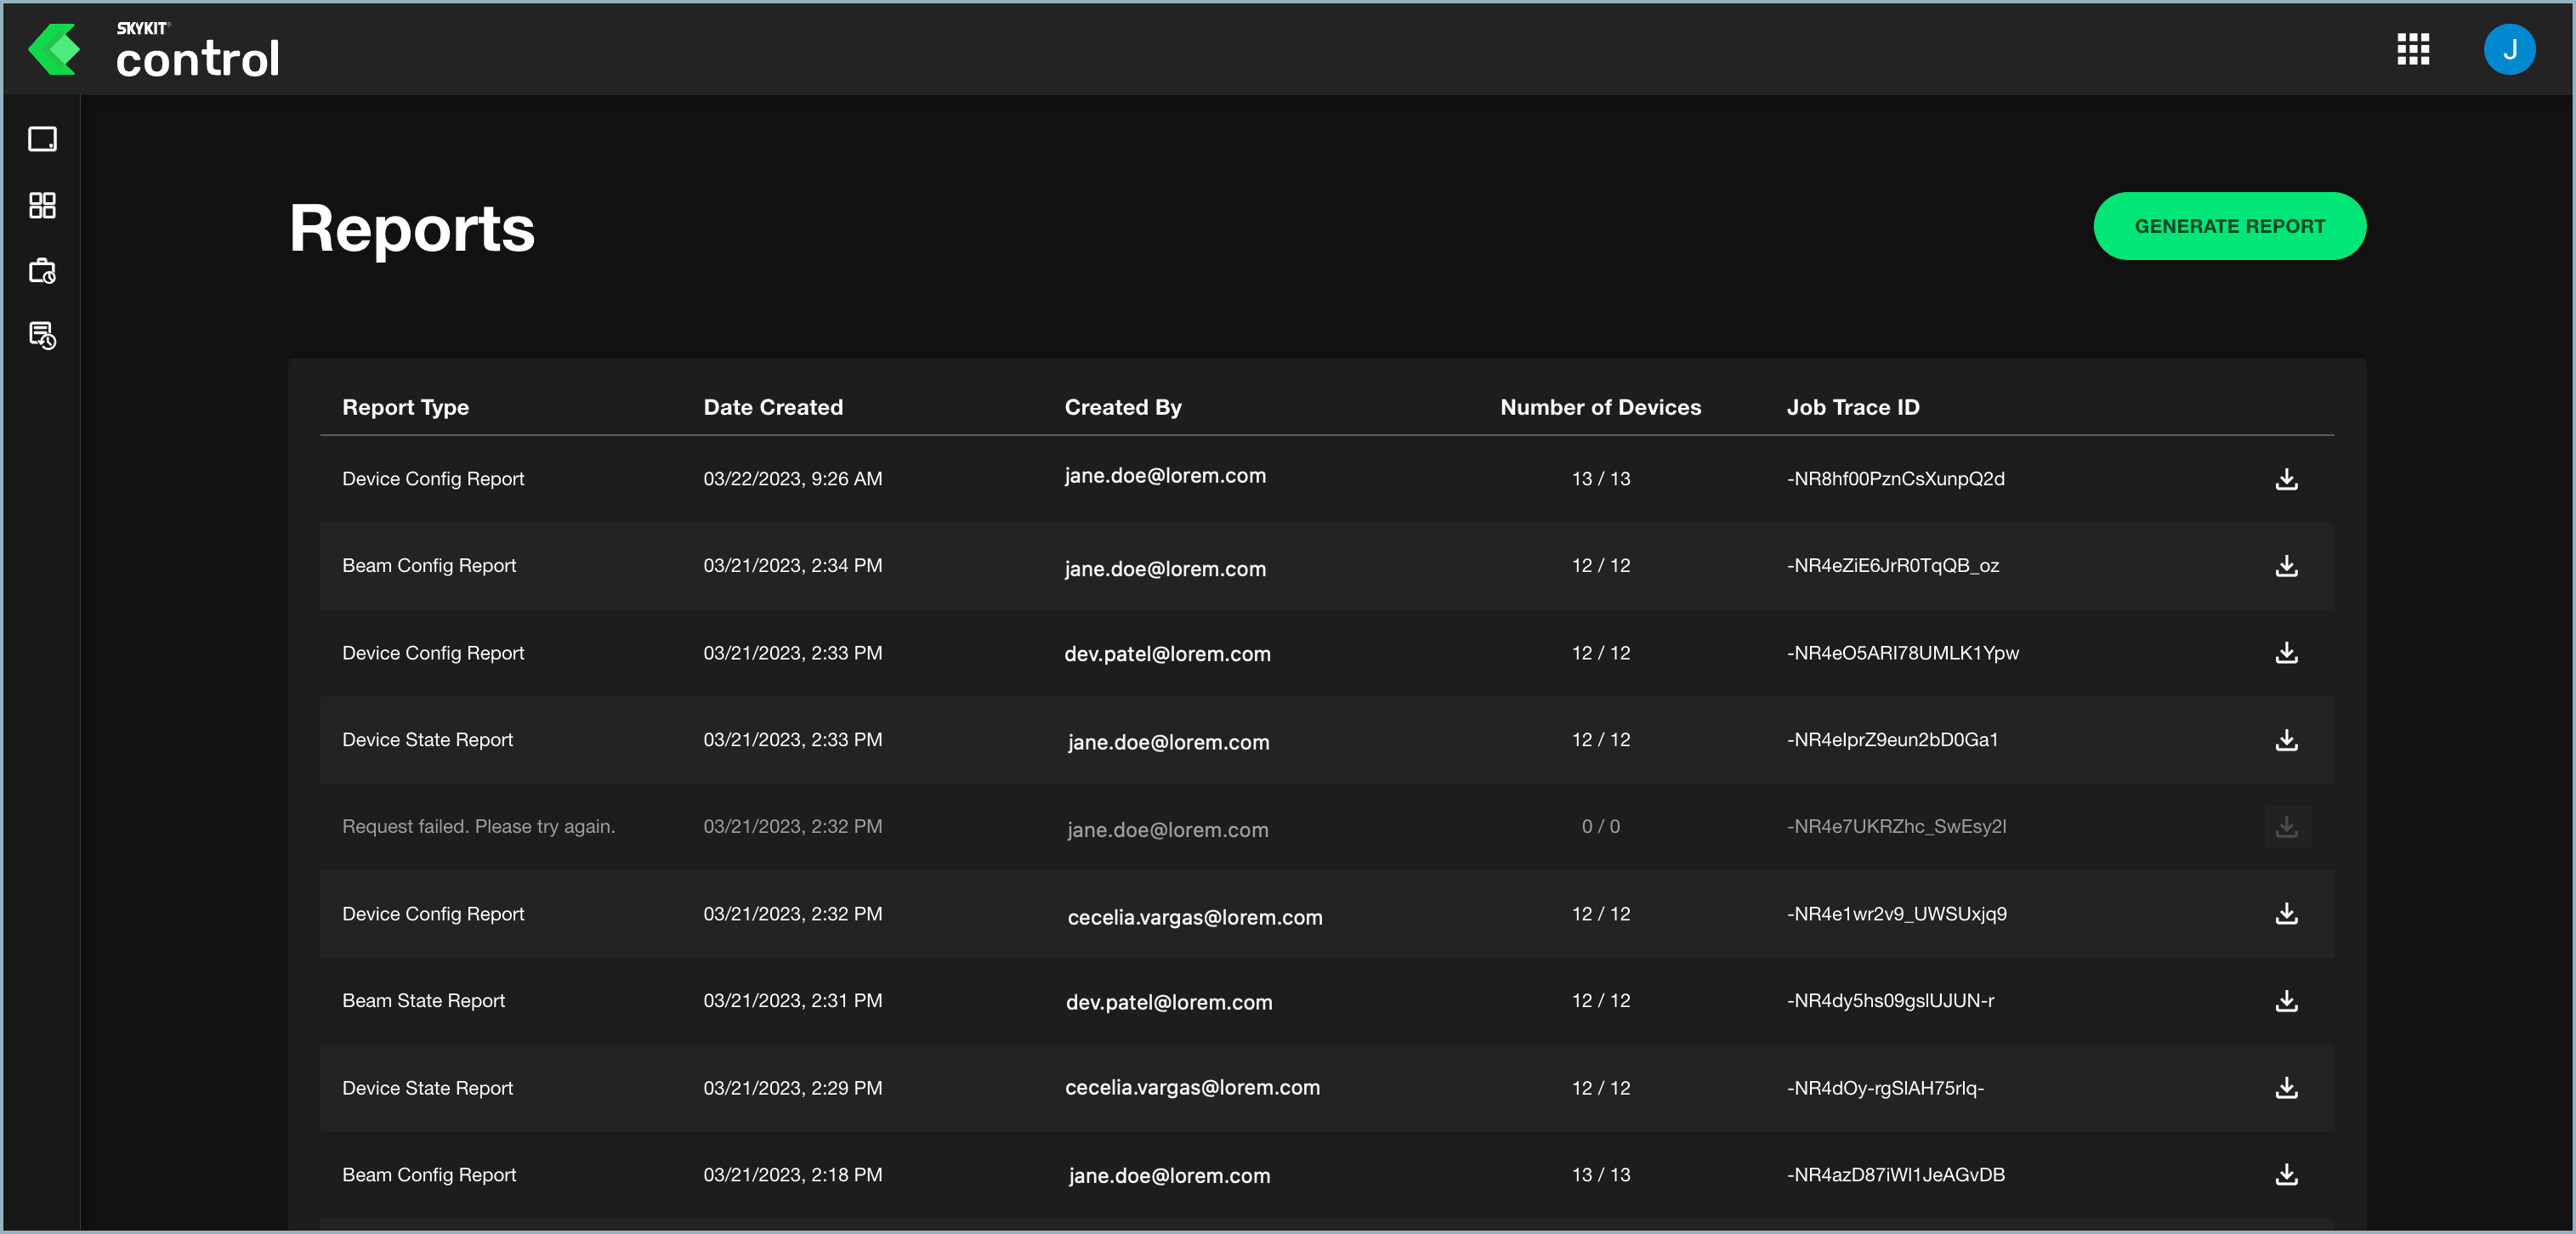
Select Reports from the navigation bar to generate and view reports about all the devices in the tenant.
You can generate four types of reports:
- Device State Report: Details the last heartbeat of each device in the tenant at the time the report was generated, as well as network and firmware information, when the device was last updated, and the last command sent.
- Device Config Report: Details the configurations for each device in the tenant at the time the report was generated. The report columns correspond to the configurations you set up in the Status tab of the device detail window.
- Beam State Report: Details the last heartbeat given back from Skykit Beam for all devices in the tenant, as well as information about the content playing on each device at the time of the heartbeat.
- Beam Config Report: Details the configurations set in Beam, such as the display ratio, fallback content, and the type of content playing, for each device in the tenant at the time the report was generated.
For each report generated, the window displays the type of report, when it was created, who created it, the number of devices included in the report, and the job trace ID (primarily used by Skykit support and developers to help diagnose issues).
To generate a report, select Generate Report, choose the type of report you want to run, and then select Generate. When the report is done processing, select the download icon to view it.
See Reports Overview for more information.