Setting Up Spaces
- 29 Aug 2023
- Print
- DarkLight
- PDF
Setting Up Spaces
- Updated on 29 Aug 2023
- Print
- DarkLight
- PDF
Article summary
Did you find this summary helpful?
Thank you for your feedback!
After you have integrated your calendars, you can set up your Room, Desk, and Check-In spaces in Turf.
Please ensure that you have completed the initial integration setup for your environment before you follow the steps below.
Creating Spaces
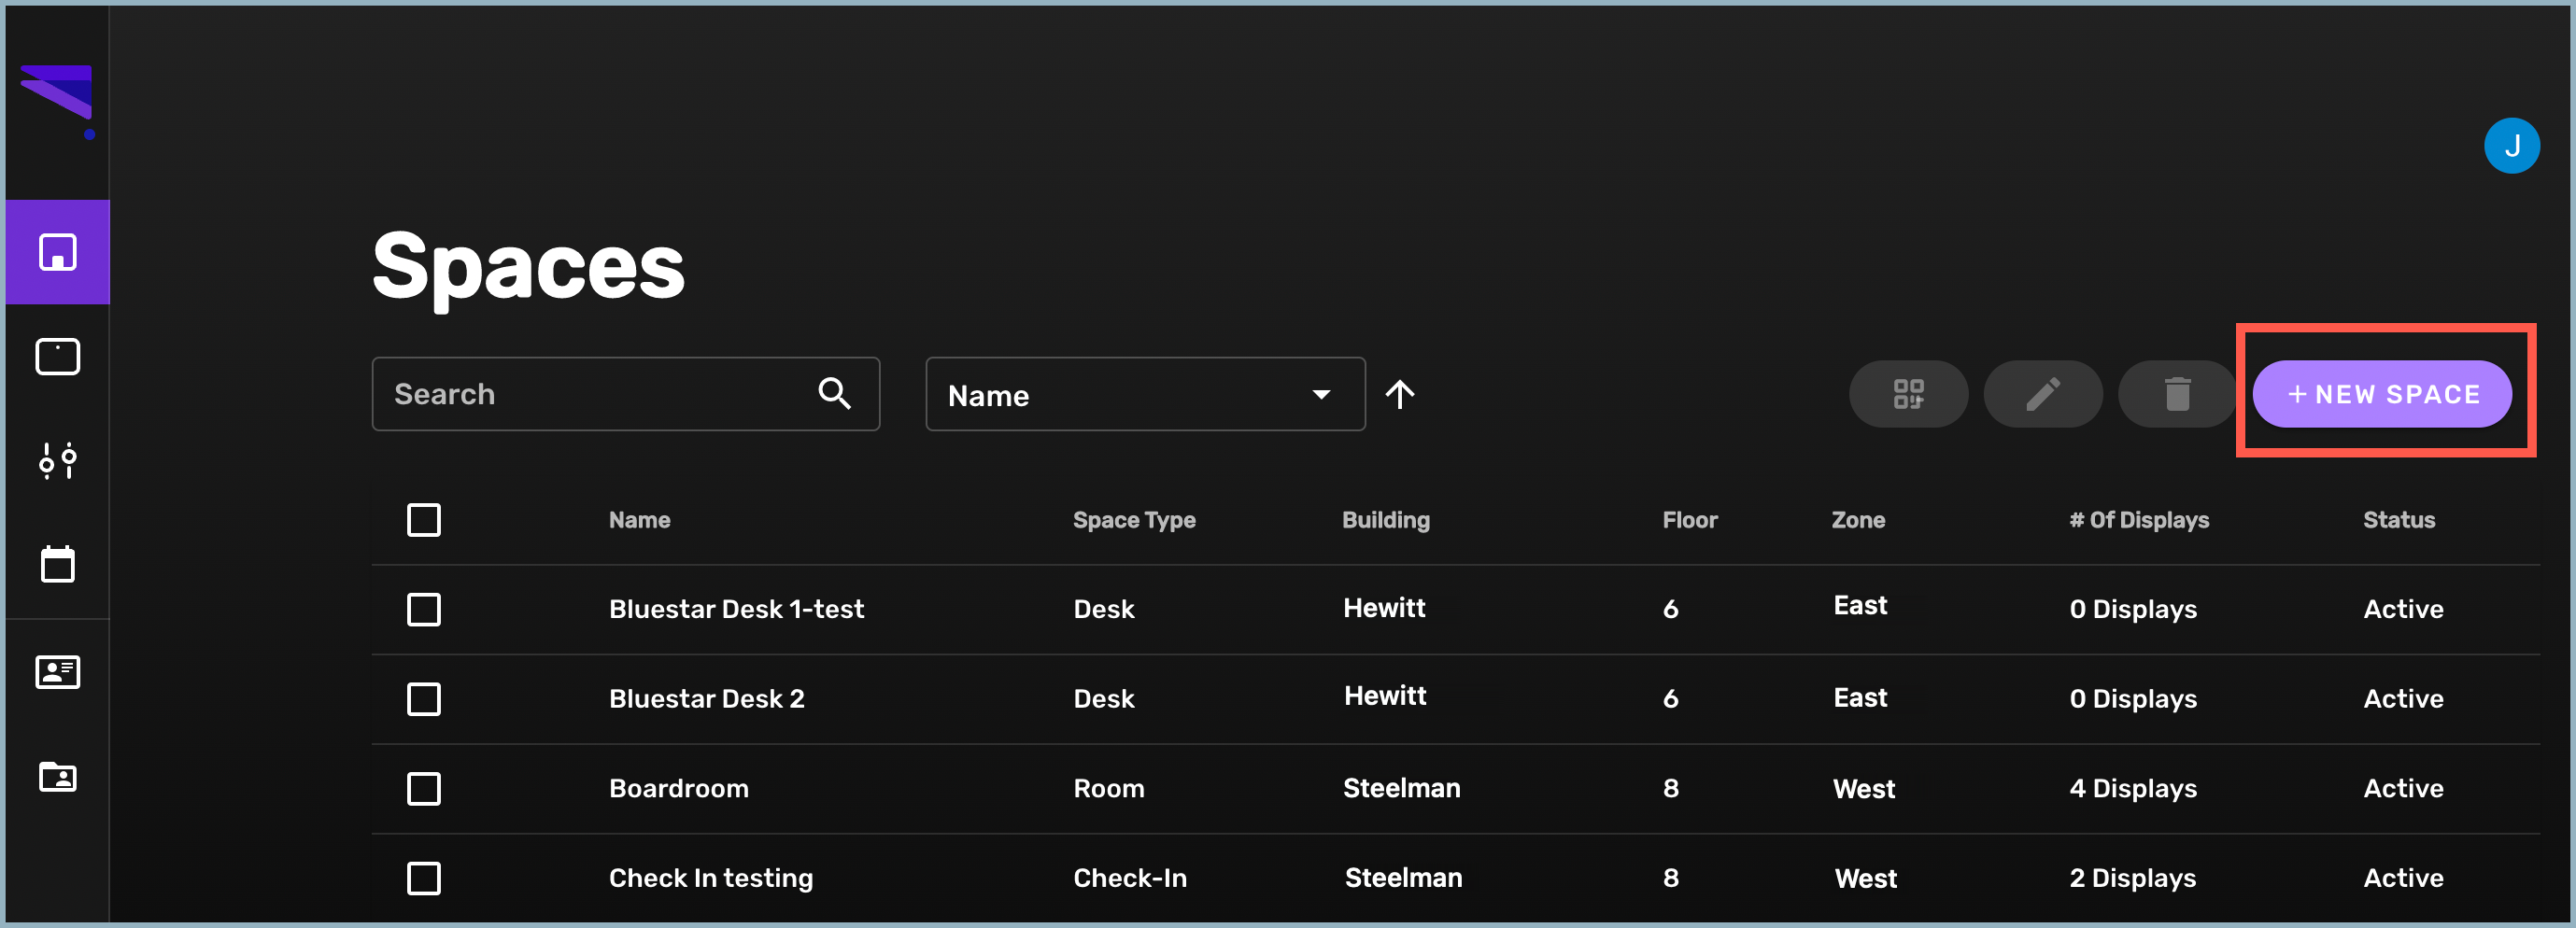
To create a space in Turf, you need to complete three steps:
- Create the space in Turf
- Associate calendar resources for Room and Desk space types
- Activate the space
Each type of space (room, desk, and check-in) has a slightly different configuration.
Creating a Room Space
- In the Spaces window, select +New Space.
The Add New Space window opens.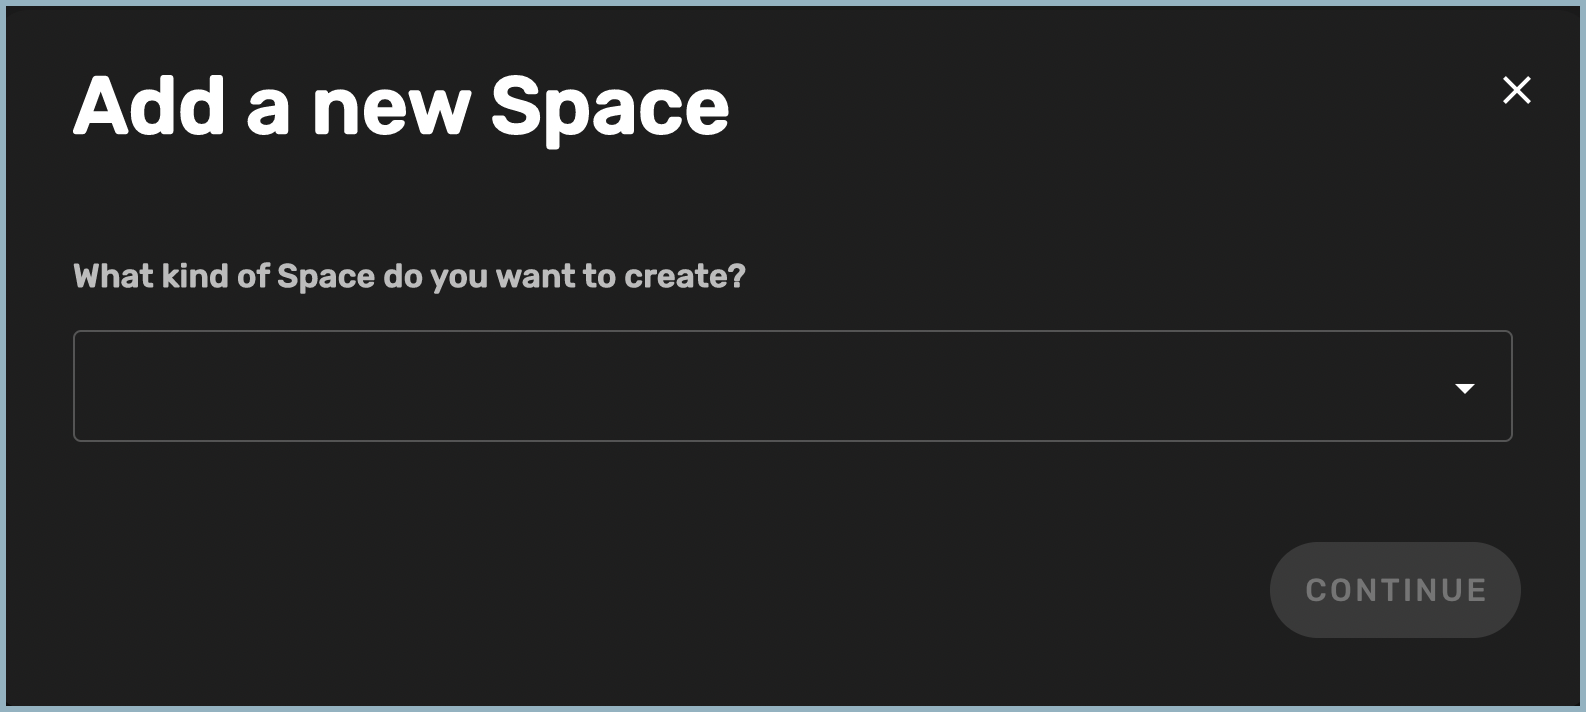
- From the drop-down list, select Room and then select Continue. The Add a new Space window opens.
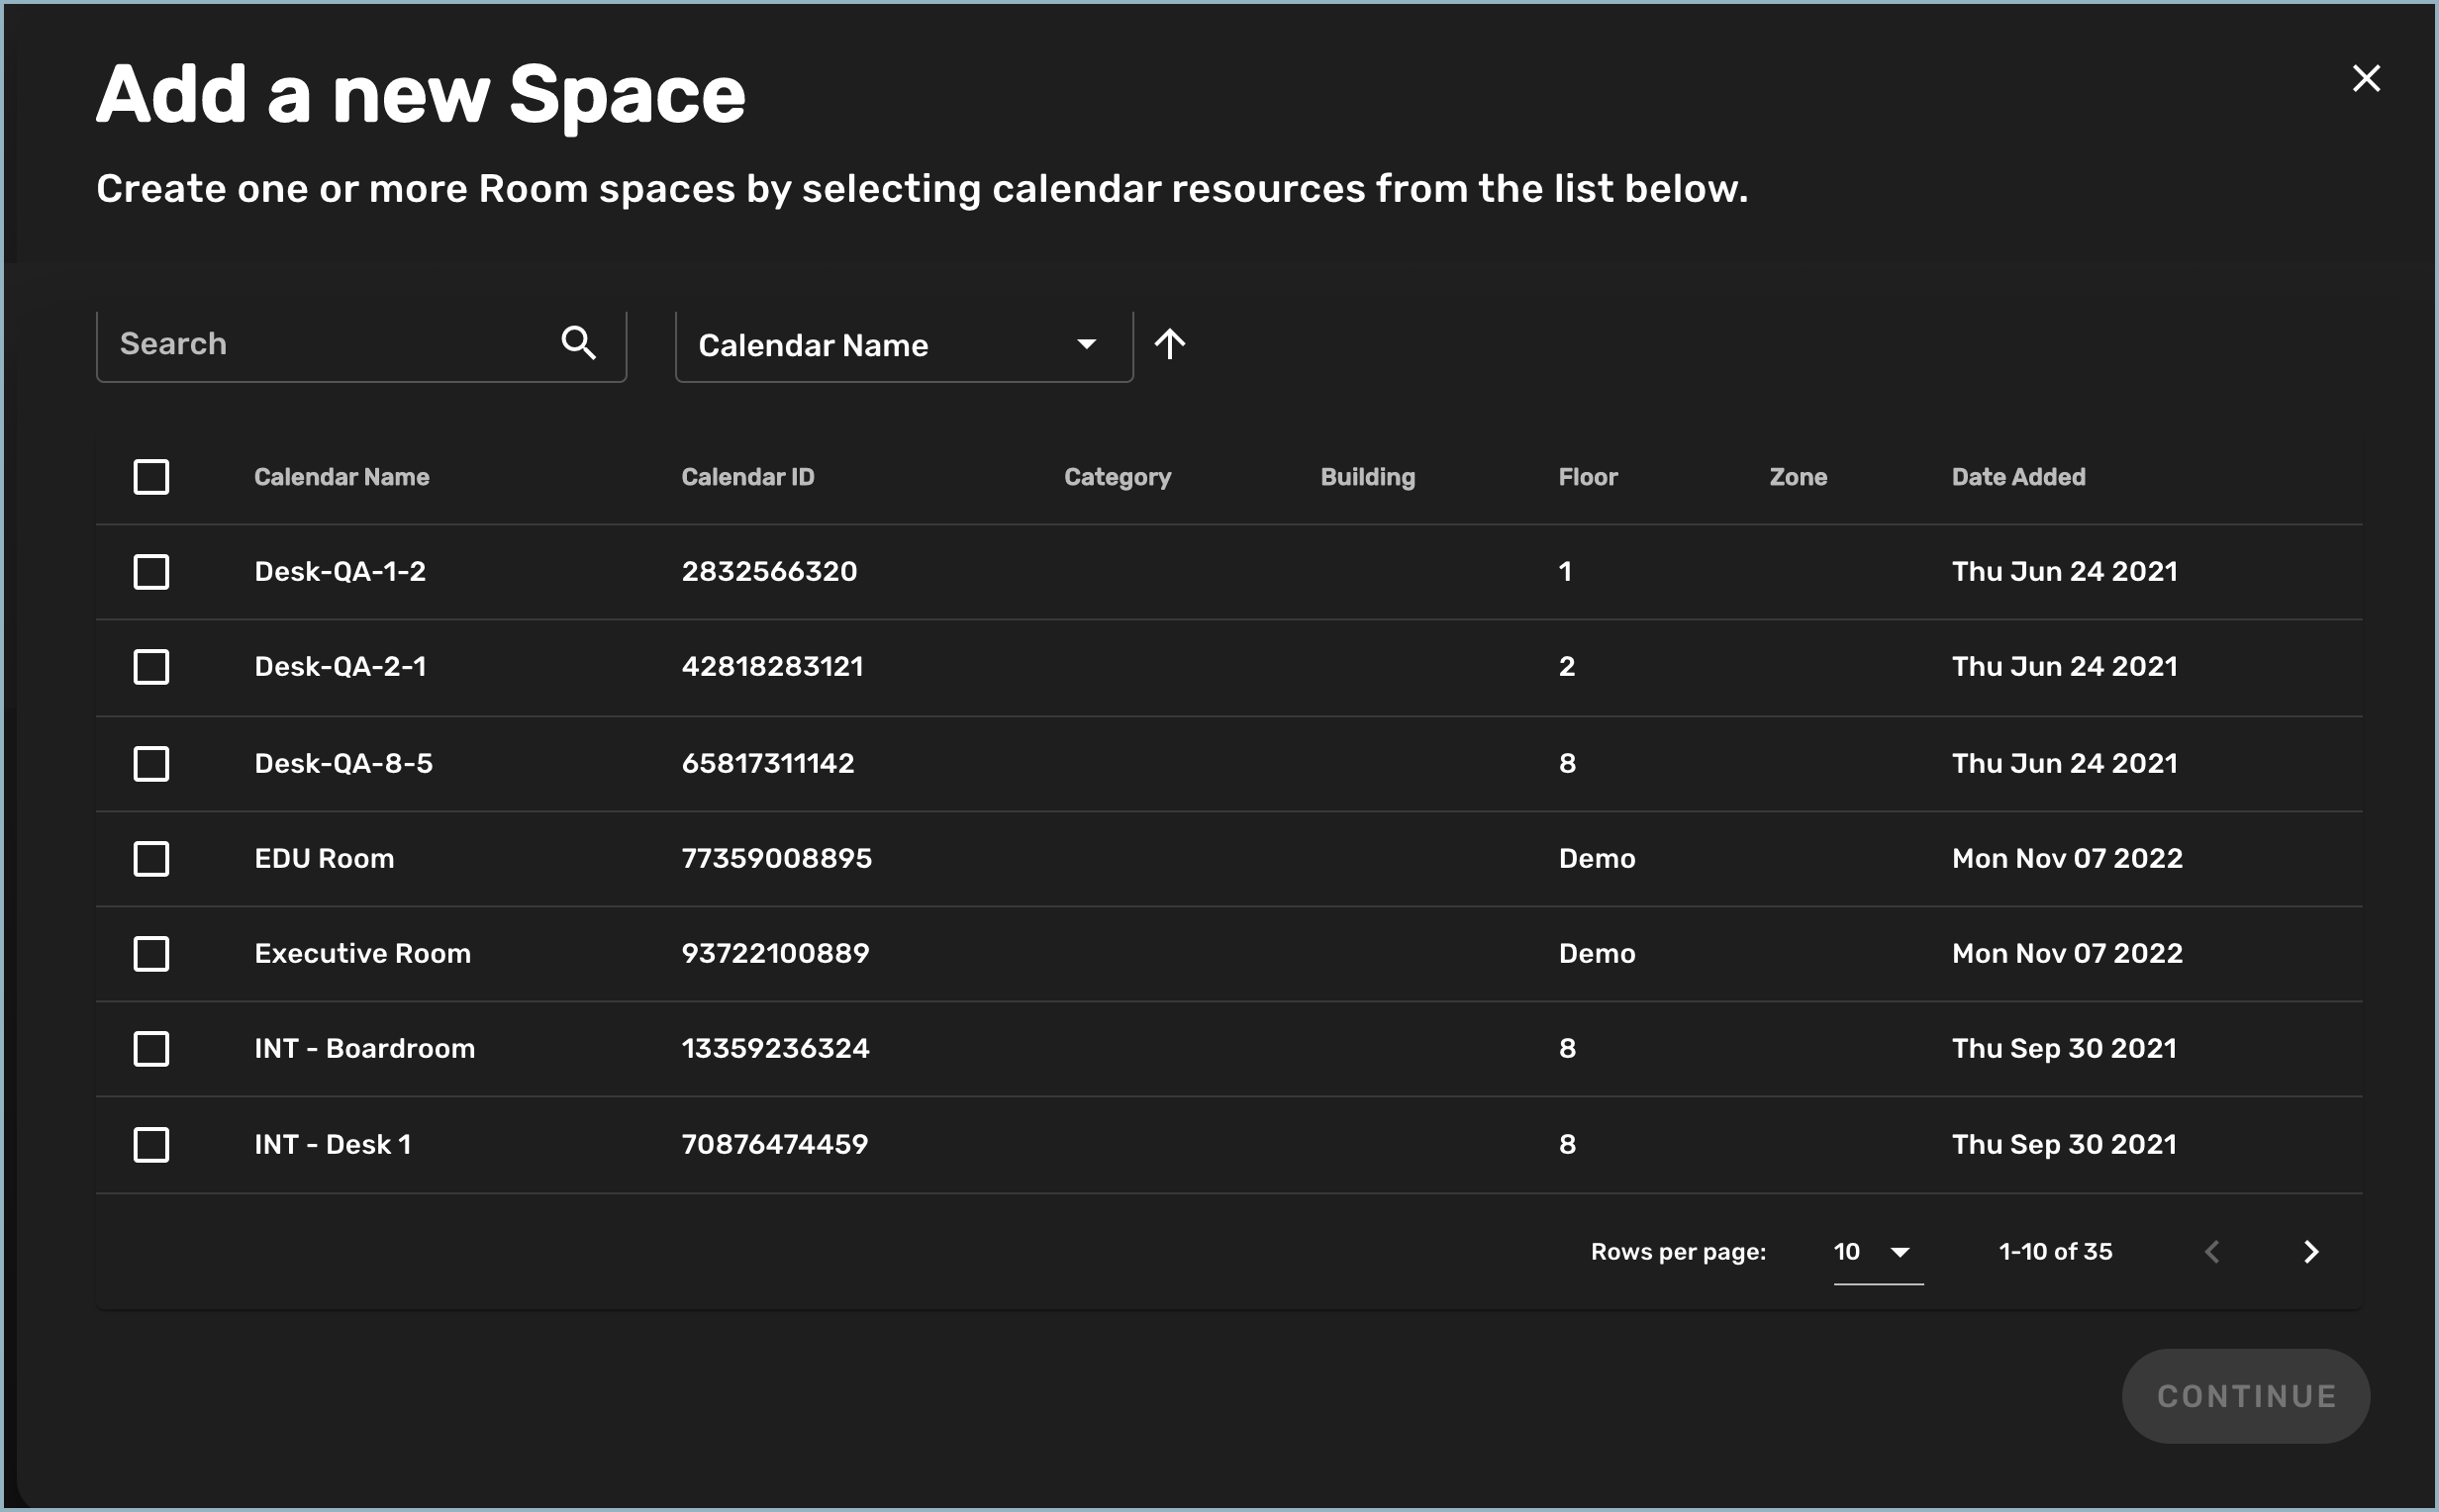
- Select the calendar resources you would like to configure (you can check more than one) and then select Continue.
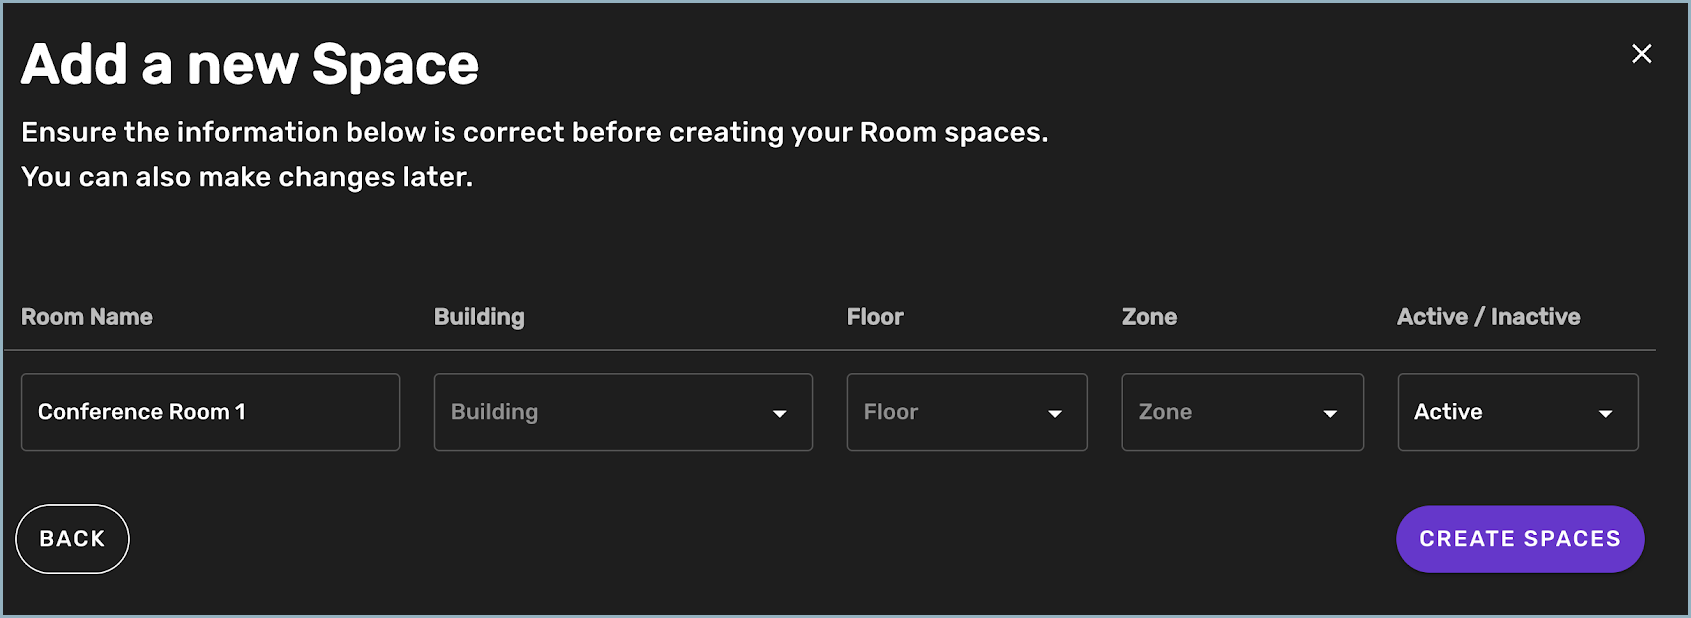
- Enter a new name for the room, if needed.
- From the drop-down lists, select the Building, Floor, and Zone. Turf will make a best effort to import these from your calendar resource settings. You can edit this information later if necessary.
- If you would like to activate the space right away, select Active from the Active/Inactive drop-down list. If you prefer to activate it later, select Inactive. You can activate or deactivate the space at any time.
- Select Create Spaces.
You have now successfully created your Room space.
Creating a Desk Space
Creating the Space
- From the Spaces window, select +New Space. The Add a new Space window opens.
- Select Desk from the drop-down list and then select Continue.
- Select a calendar resource from the list and then select Continue.
- Enter a new name for the desk space, if necessary.
- From the drop-down lists, select the Building, Floor, and Zone for the desk space. You can edit this information later if necessary.
- If you would like to activate the space right away, select Active from the Active/Inactive drop-down list. If you prefer to activate it later, select Inactive. You can activate or deactivate the space at any time.
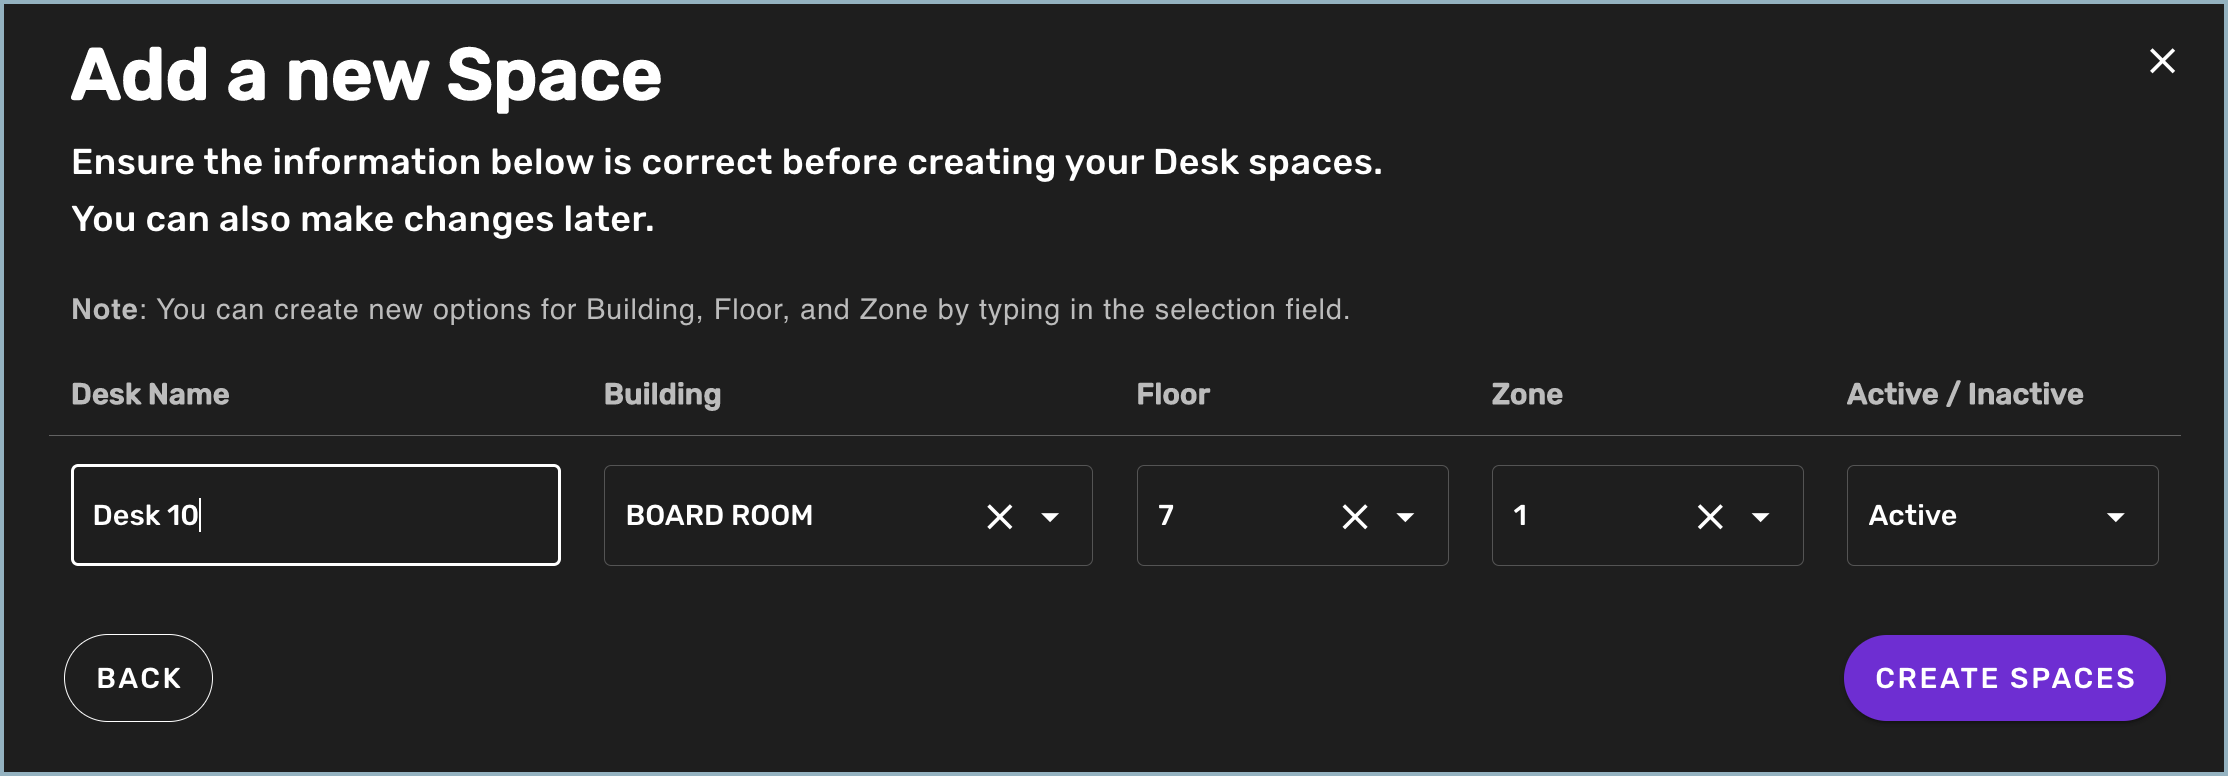
- When you have finished, select Create Spaces. The new desk space is now listed in the Spaces window.
Generating a QR Code for Employees
Employees can reserve the desk space from a check-in kiosk display or through the Turf Mobile Web App. If they are going to use the mobile app, you'll need to provide them with a QR code they can scan to install the app on their mobile device. You can either print a hard copy of the code and place it in the desk space or download the code as a .png file to include in an email or other message.
- Select the desk space for which you want to provide the QR code. The detail window for that space opens.
- Scroll down to find the desk booking QR code.
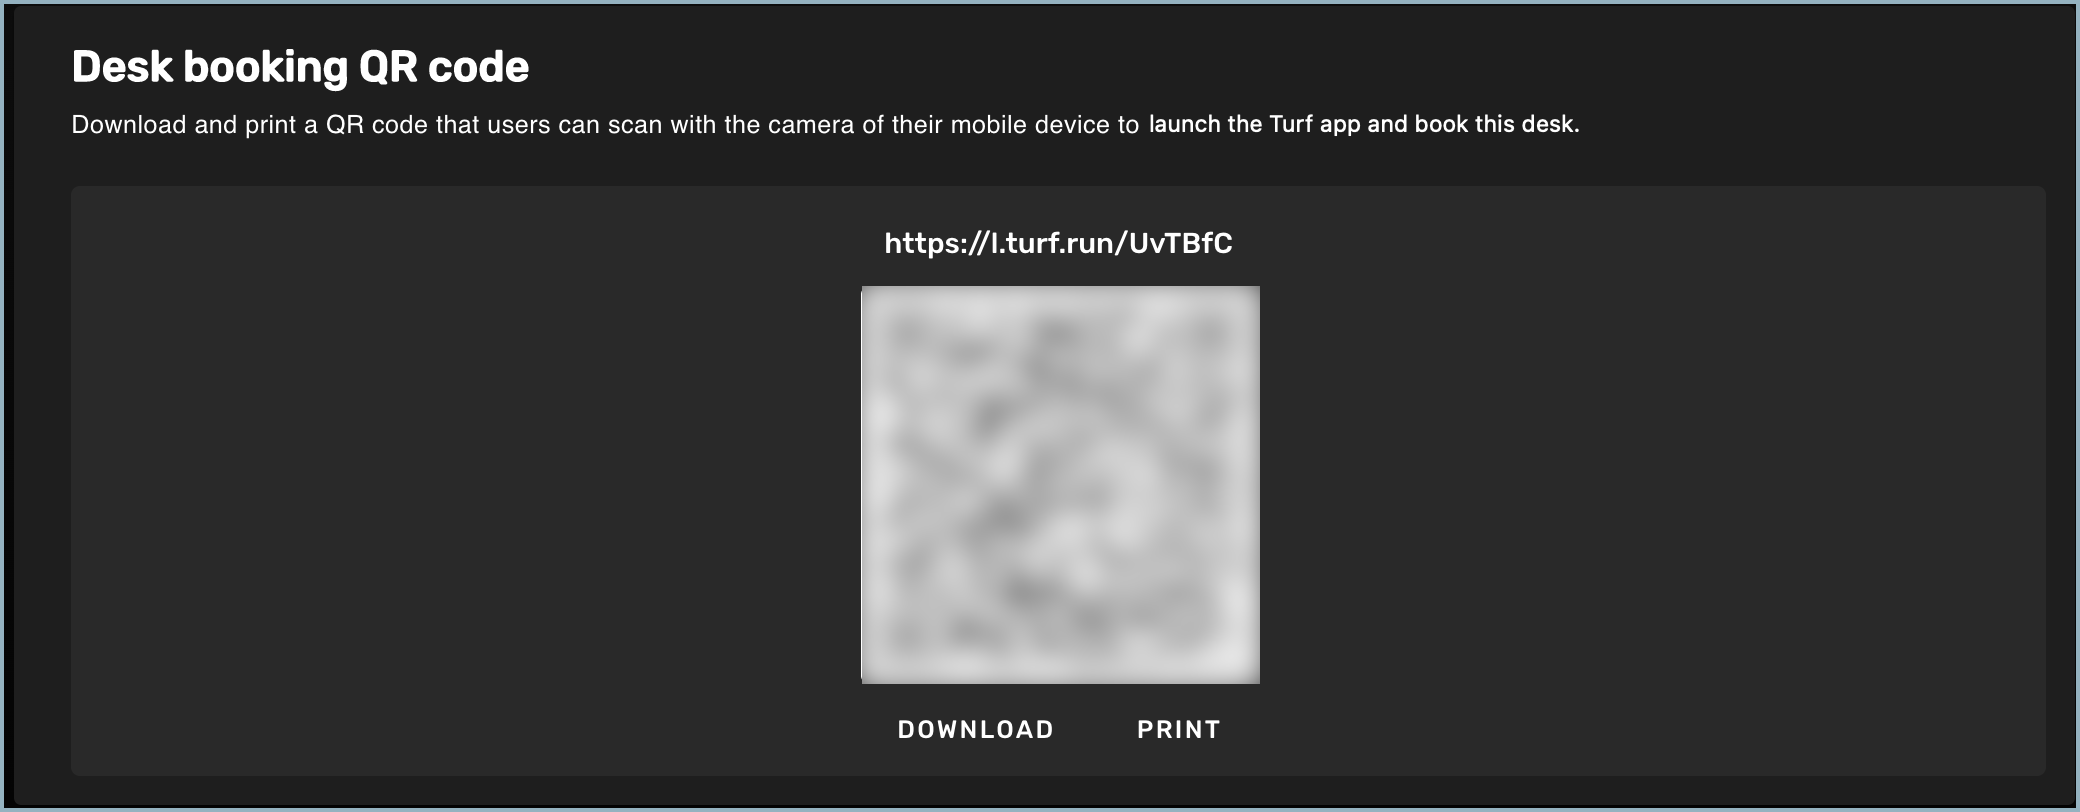
- Select Download to download the code as a .png file so you can add it to a shared drive or insert it in a message. Select Print if you want to place a hard copy in the desk space.
When an employee scans the QR code, the Turf app launches on their phone or tablet. They can then use the app to book the desk space.
Creating a Check-In Space
A check-in space allows employees and visitors to check in when they visit an office. Visitors can also identify a host, depending on how the check-in space is configured.
- In the Spaces window, select +New Space. The Add a new Space window opens.
- From the drop-down list, select Check-in.
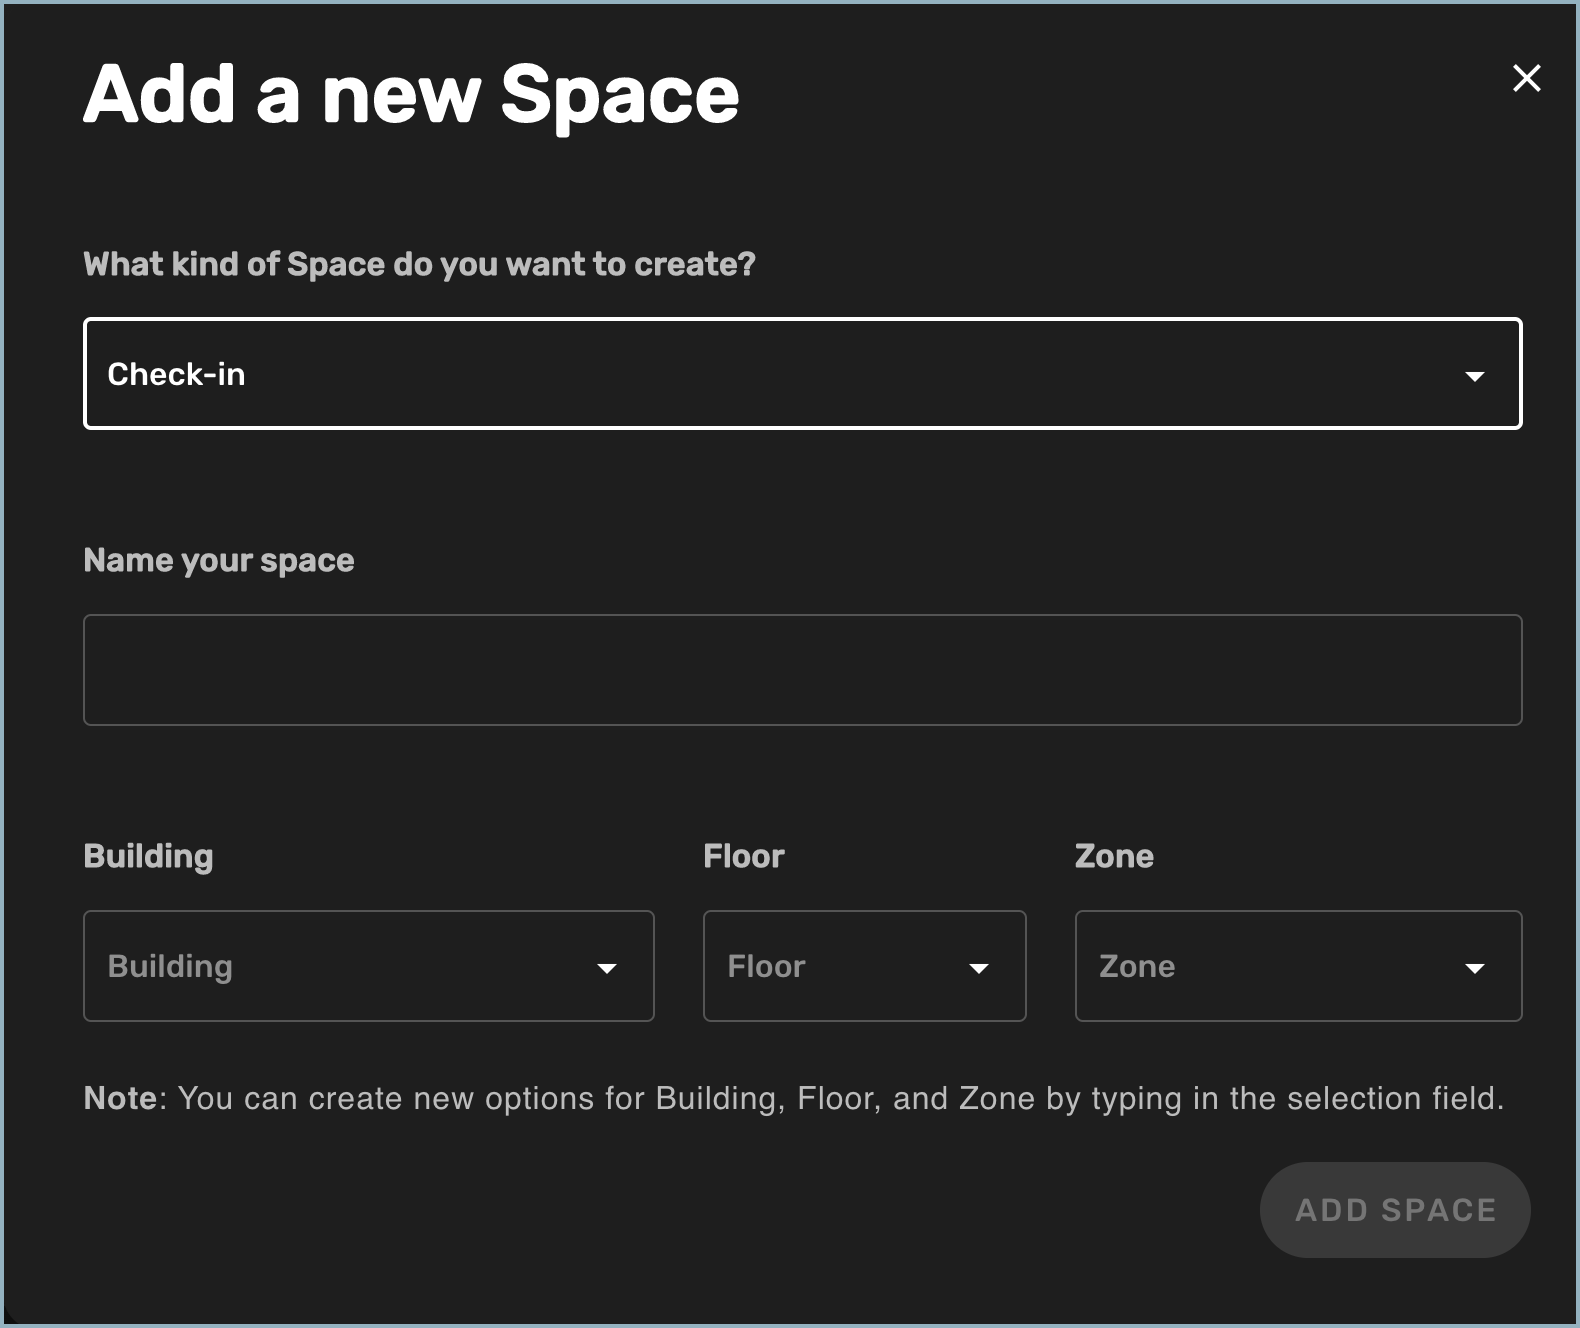
- Enter a name for the check-in space.
- Select a Building, Floor, and Zone from the drop-down lists. You can edit these fields at any time by typing in the fields.
- Select Add Space.
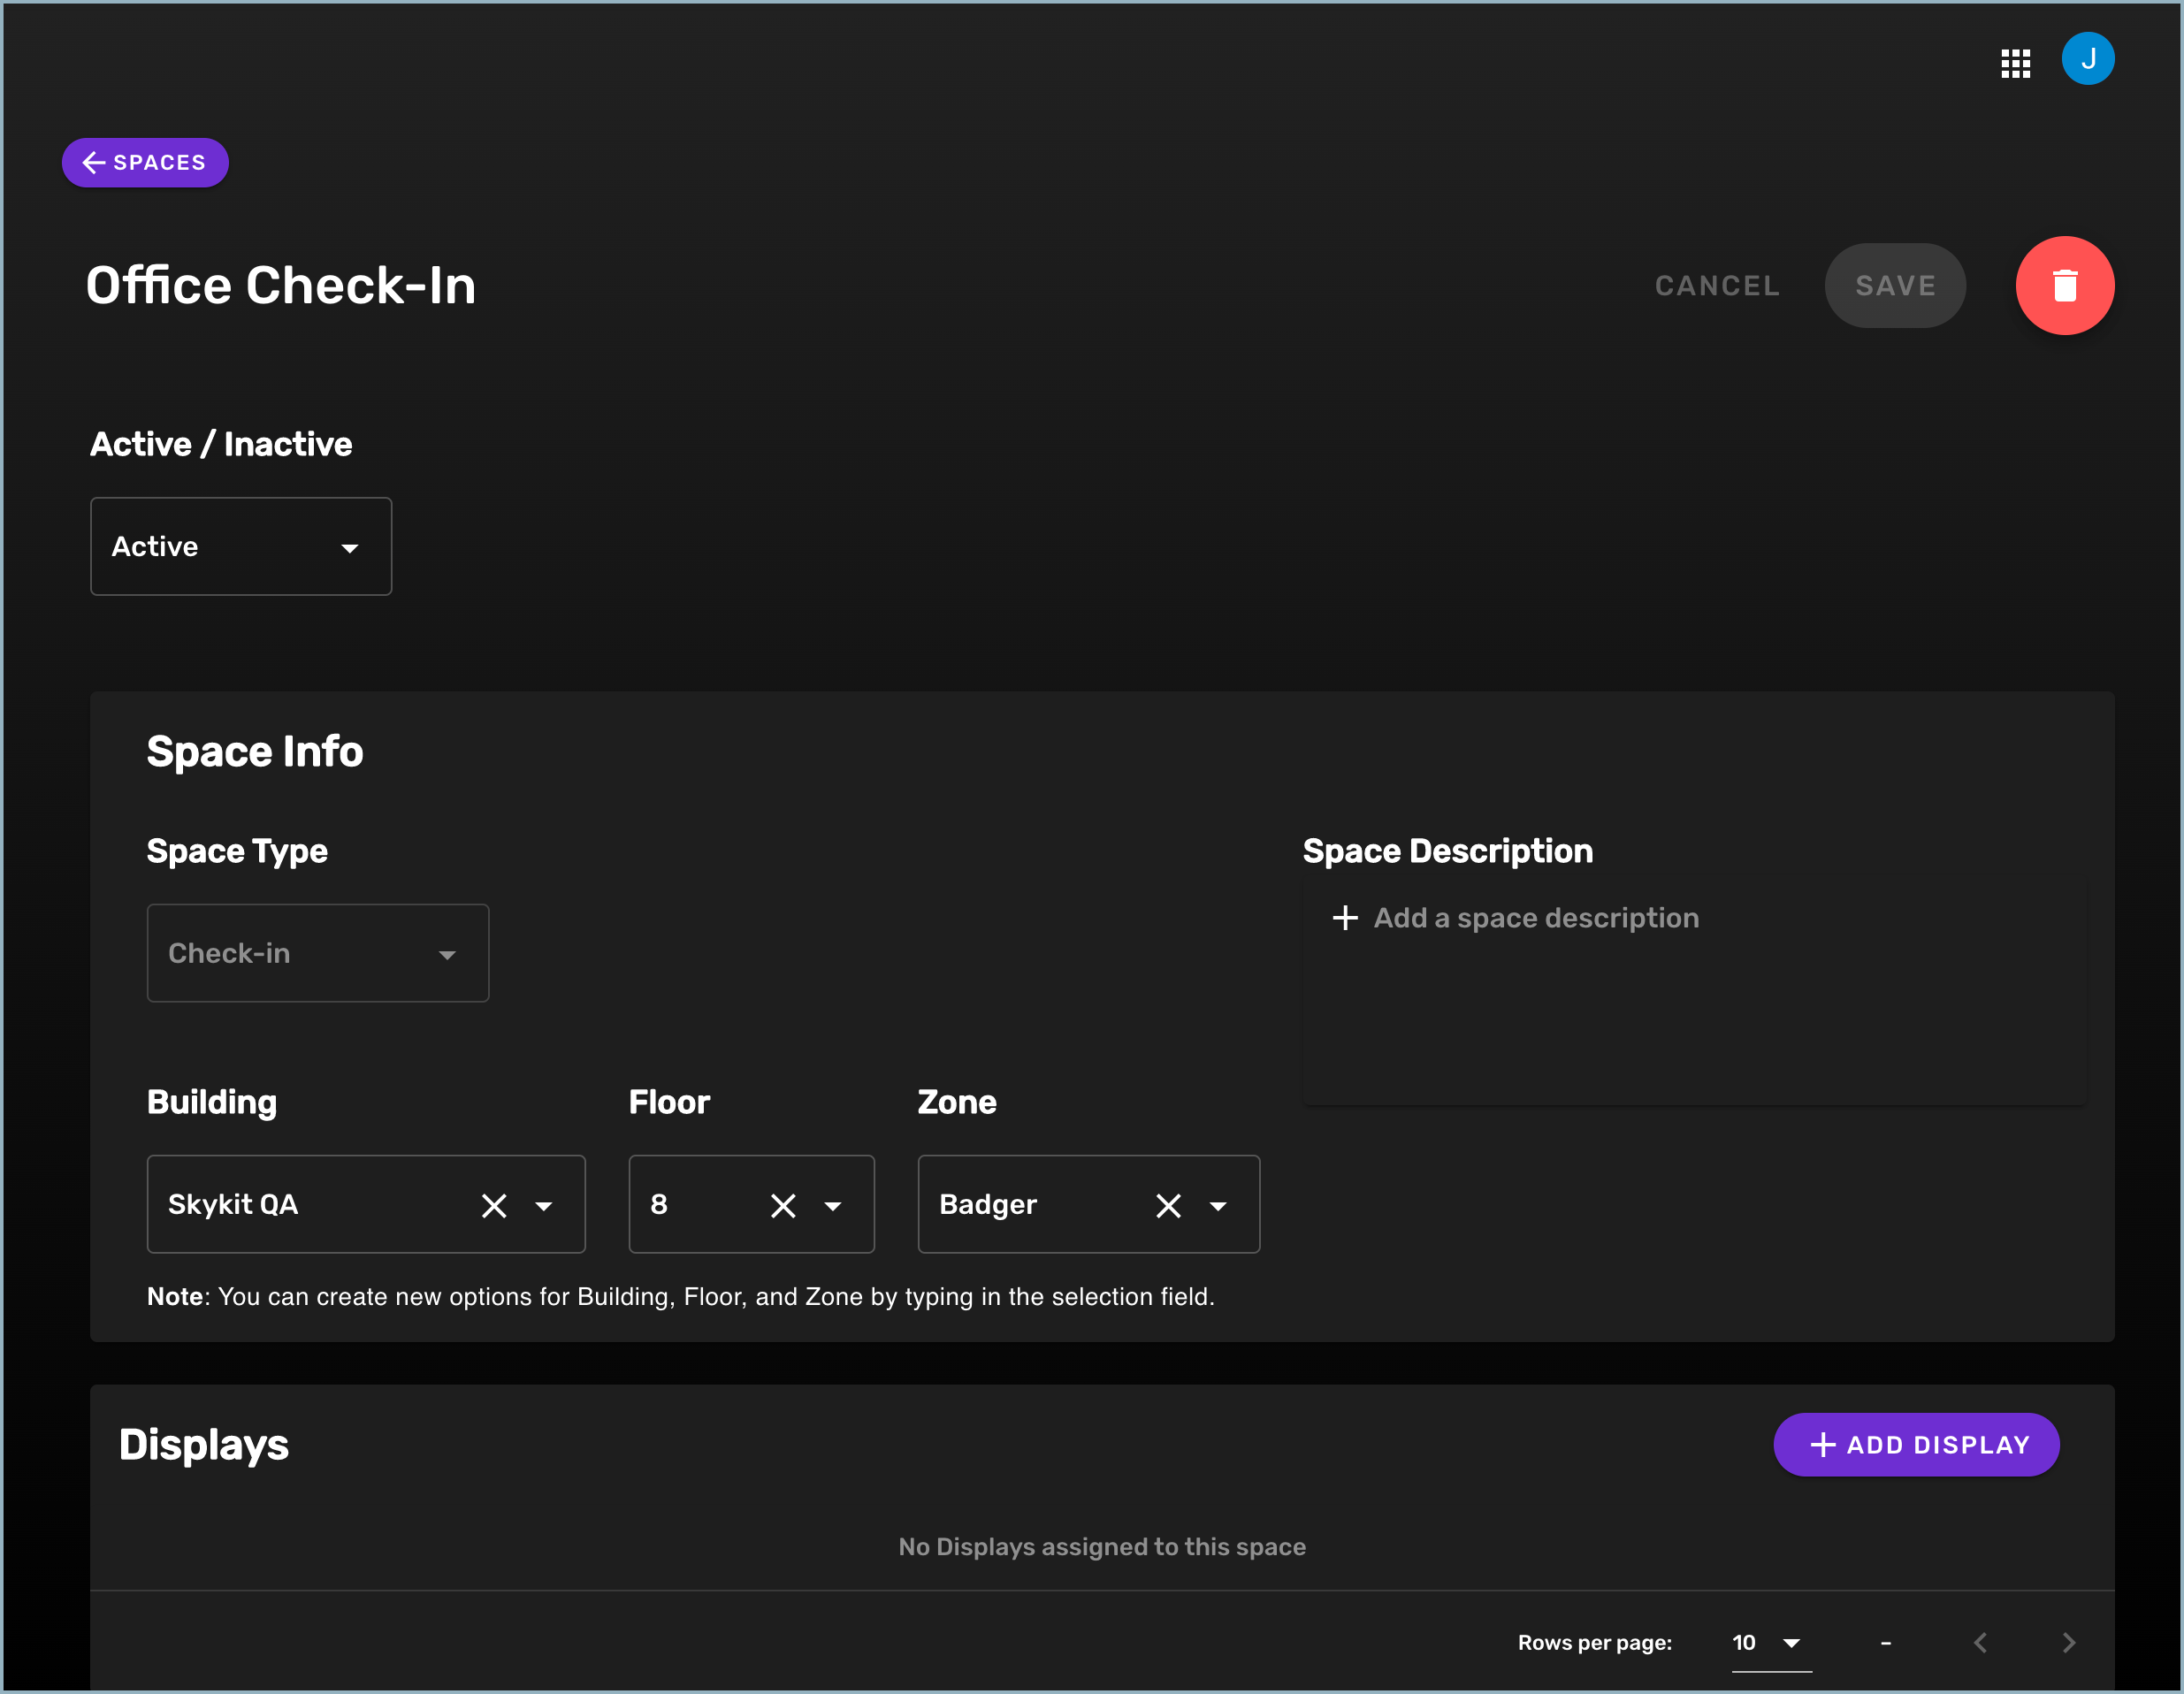
- If you want to activate the space right away, select Active from the Active/Inactive list. If you prefer to activate the space later, select Inactive. You can activate or deactivate a space at any time.
- To add a description of the space, type your text in the Space Description field. This field is optional.
- To assign a display to the space, select +Add Display, check the displays you want to assign, and select Add Display. See Assigning Displays to Your Spaces for more information.
- Select Save to save the new space.
Activating a Space
A space must be activated before users can start reserving it and calendar events start to sync with it. If you did not activate the space when you created it, you can do it at any time from the space's detail window.
- From the Spaces window, select the space you want to activate.
- Select Active from the Active/Inactive drop-down list.
- Select Save to activate the space.
The space is now available for users to reserve.
After you have activated a space, you can configure global settings that apply to all spaces in the tenant or configure settings for individual spaces. See Configuring Global Settings and Configuring Settings for Individual Spaces for more information.
Auto-Accepting Booking Settings
By default, Skykit Turf automatically accepts all events booked from the room space display, regardless of your resource calendar rules. If you want to maintain your calendar booking rules, you need to turn off the Auto Accept setting.
- From the Spaces window, select the space you want to edit. The detail window opens.
- Select Don't Allow Auto Accept from the Auto Accept drop-down list.
- Select Save to save the change.
Next Steps
Was this article helpful?