Getting Started with Skykit Control
  • 30 Mar 2023
  • Dark
    Light
  • PDF

Getting Started with Skykit Control

  • Dark
    Light
  • PDF

Article summary

To get started with Skykit Control, you need to pair your device and then upload and install apps on it.

Pairing a Device

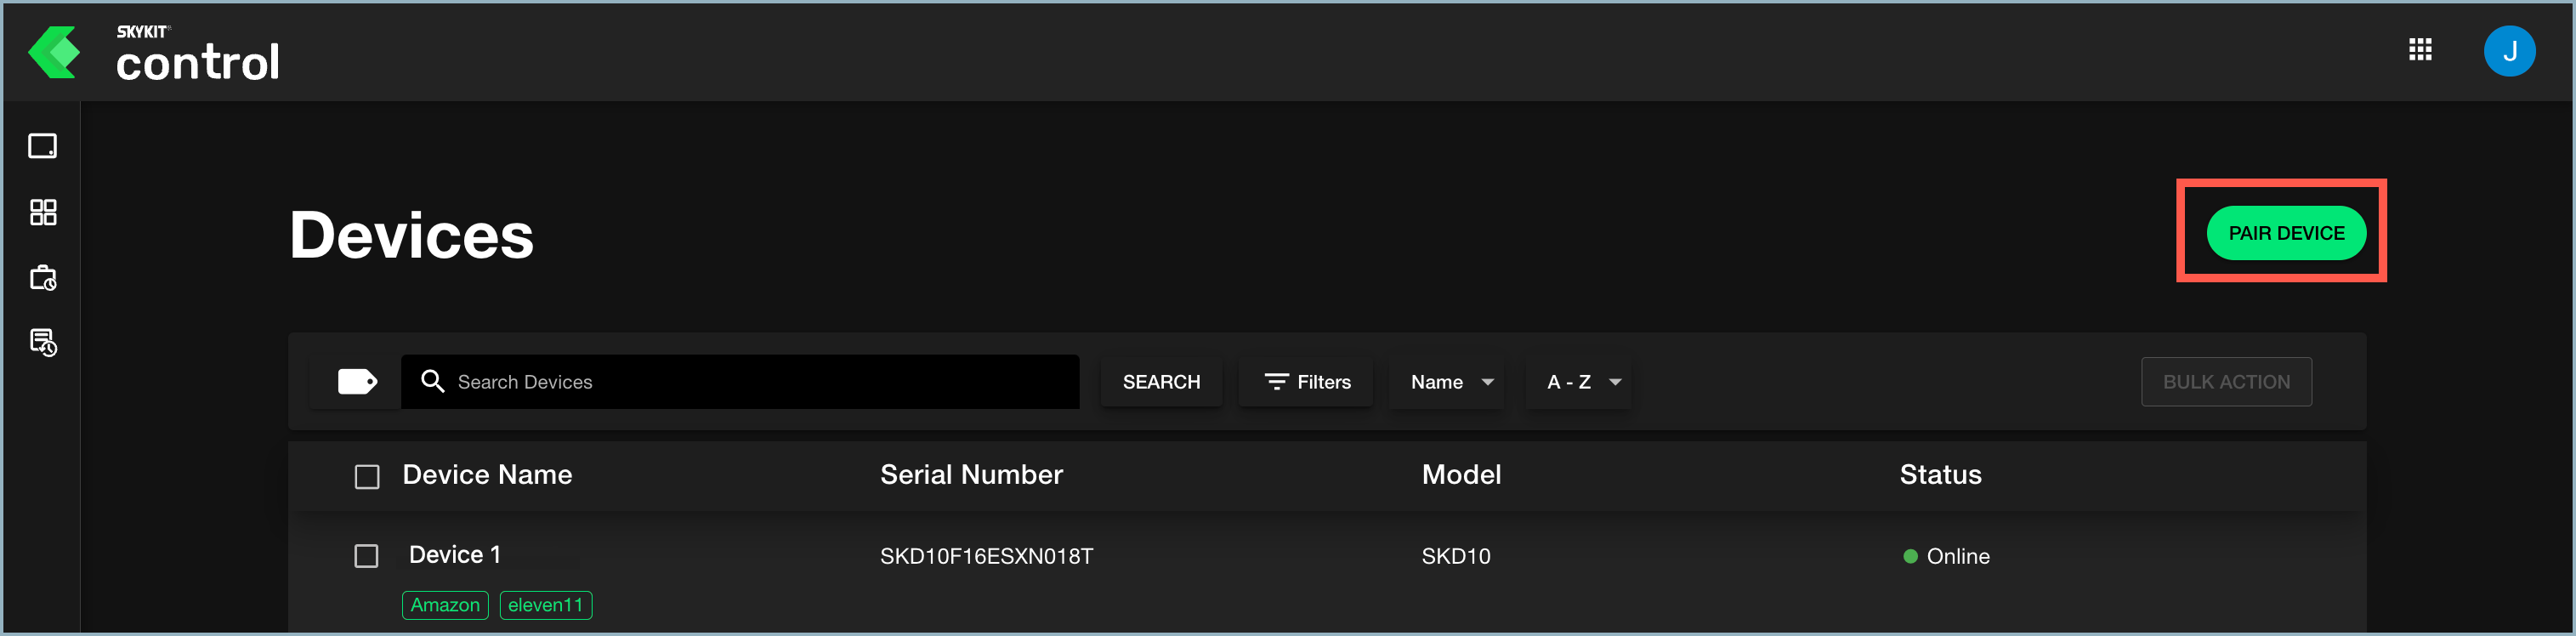
When you are setting up a new device in Skykit Control, you first need to pair it with Skykit. 

  1. In Control, select Devices from the navigation bar to open the Devices window.
  2. Select Pair Device.

    Devices window - Pair Device button highlighted
    The Pair Device window opens.

    Pair Device window
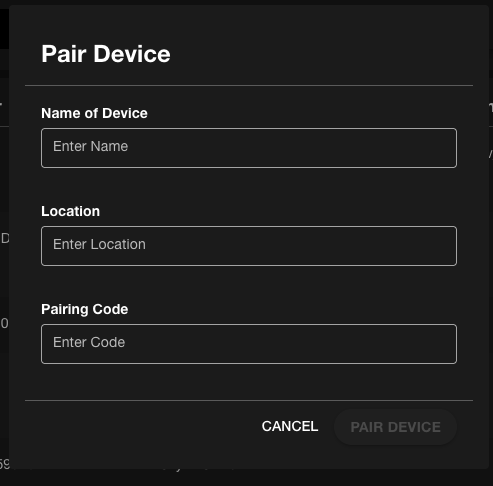
  3. In the Name of Device field, enter the name of the device you want to pair. This is the name that will appear in the Devices window in Skykit Control and on the Displays menu in Skykit Beam (if you have access to Beam).
  4. In the Pairing Code field, enter the pairing code you see when you first turn on your player.
  5. Select Pair Device to finish and return to the Devices window. The newly paired device is now listed in the window.

If Skykit has paired your devices in advance, you can skip this process.

After the device is paired, you can install apps, configure settings, and send bulk commands remotely.

Uploading and Installing Apps

After you've paired your device, you can upload apps so they are available to install on your devices.

Uploading an App

  1. Select Apps from the navigation bar to open the Apps window. In this window, you can see which apps are already loaded and available to install on your devices, what version of the app is available, and which release channel (Alpha, Beta, or Production) it is installed in.

    Apps window
  2. Select Upload App. The Upload App window opens.

    Upload App window
    You can either drag and drop the app files into the window or browse to locate them in your local storage or shared drive. After you've selected the file, it appears in the window.

    App files ready to upload
  3. Select Upload. When the process is complete, the app is listed in the Apps window.

    Apps window with newly uploaded app listed
  4. Select an app to open its detail window.

    App Details Window
    In the detail window, you can see which version of the app is installed on which channel (Alpha, Beta, or Production). You can also replace an app if an update is available or promote an app from one channel to the next.

    The detail window also provides the following information about the app:
  • File name
  • Release date
  • Date the app was uploaded into Control
  • Version number
  • Version code
  • signature (a unique ID)

Installing an App on a Device

Note: The device must be online when you install apps. Offline devices will not receive the commands to install or update apps.
  1. To install an app on a device, select Devices from the navigation bar to open the Devices window.
  2. Select the device for which you want to install the app. The device detail window opens. 
  3. Select the Apps tab. Apps that are available to install are highlighted in green and include an Install App button.
  4. Select Install App. The Install App window opens, asking you to confirm that you want to install the app.

    Install App window
  5. Select Yes to begin the installation process. A progress bar lets you monitor the progress of the installation.

    Installing app - progress bar highlighted

Once the app is installed, you can launch, reset, or uninstall it. See Uploading and Installing Apps for more information.


Was this article helpful?