Creating Your Dashboard Connection
- After you log in to Skykit Beam, select the tenant in which you want to create a dashboard connection. The tenant's Content menu opens.
- Select +Content. A drop-down list opens, showing the content types that are available to you.
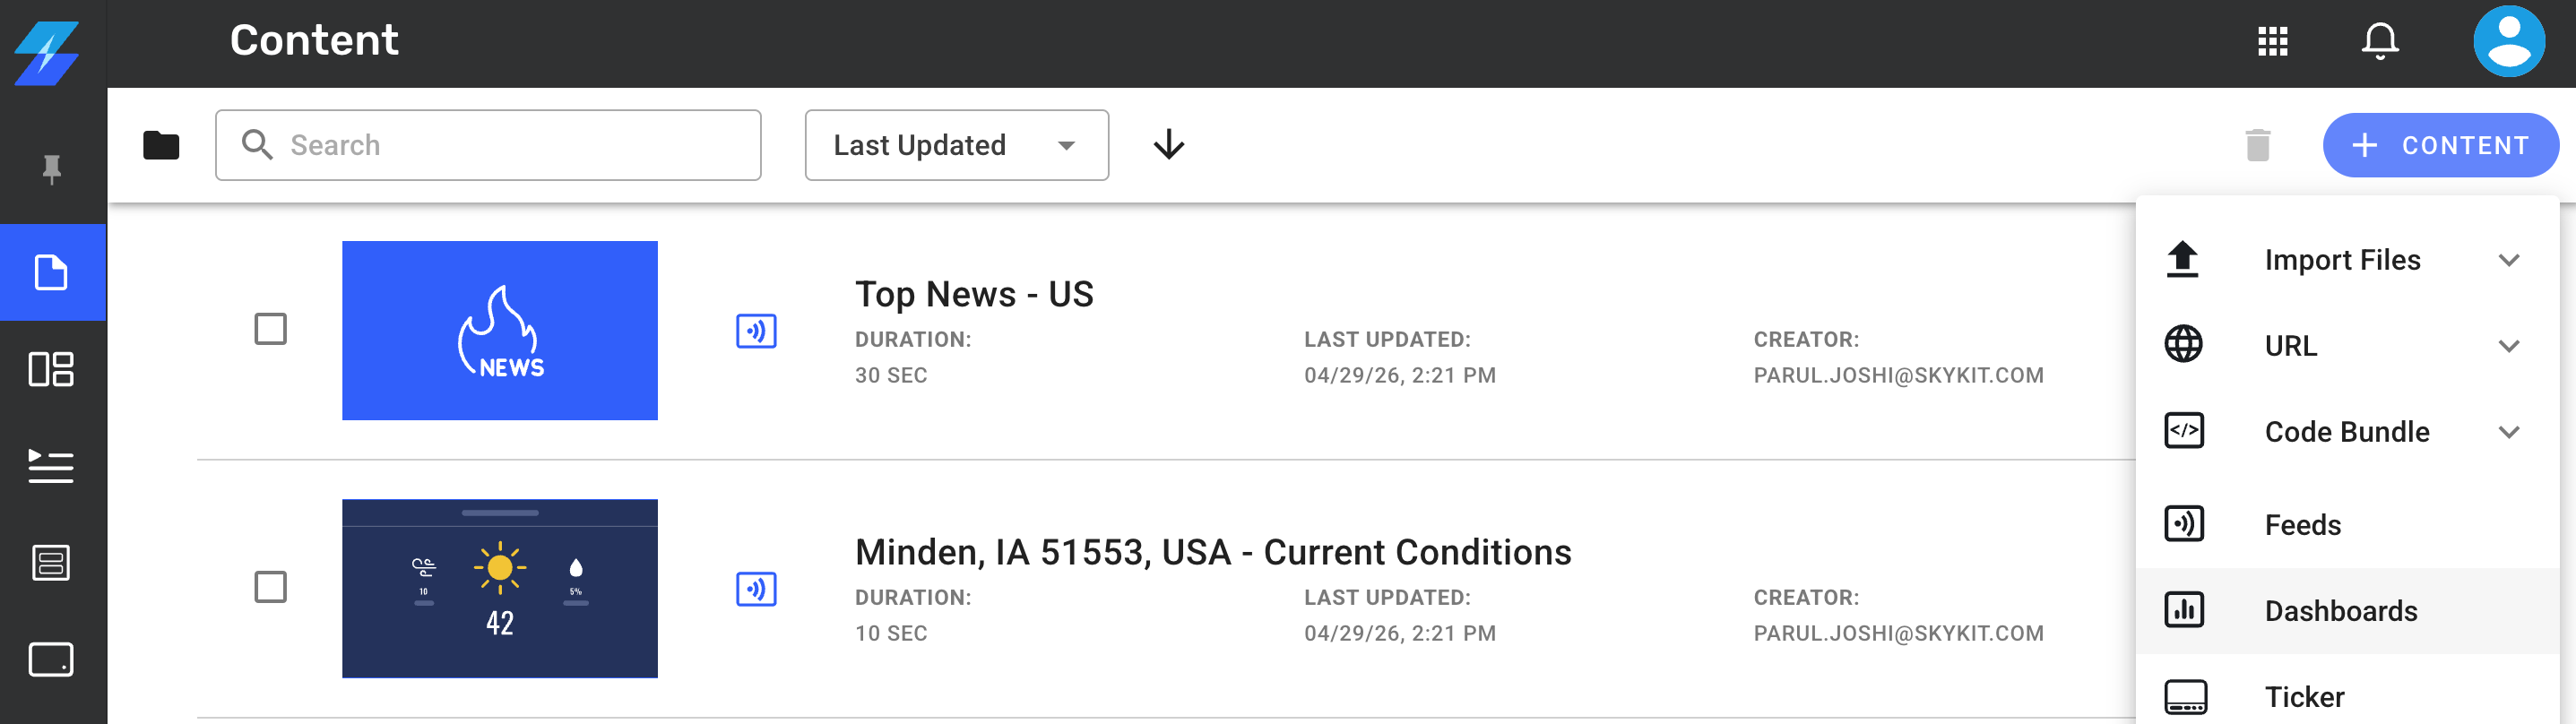
- Select Dashboards from the list to open the Dashboards settings window.
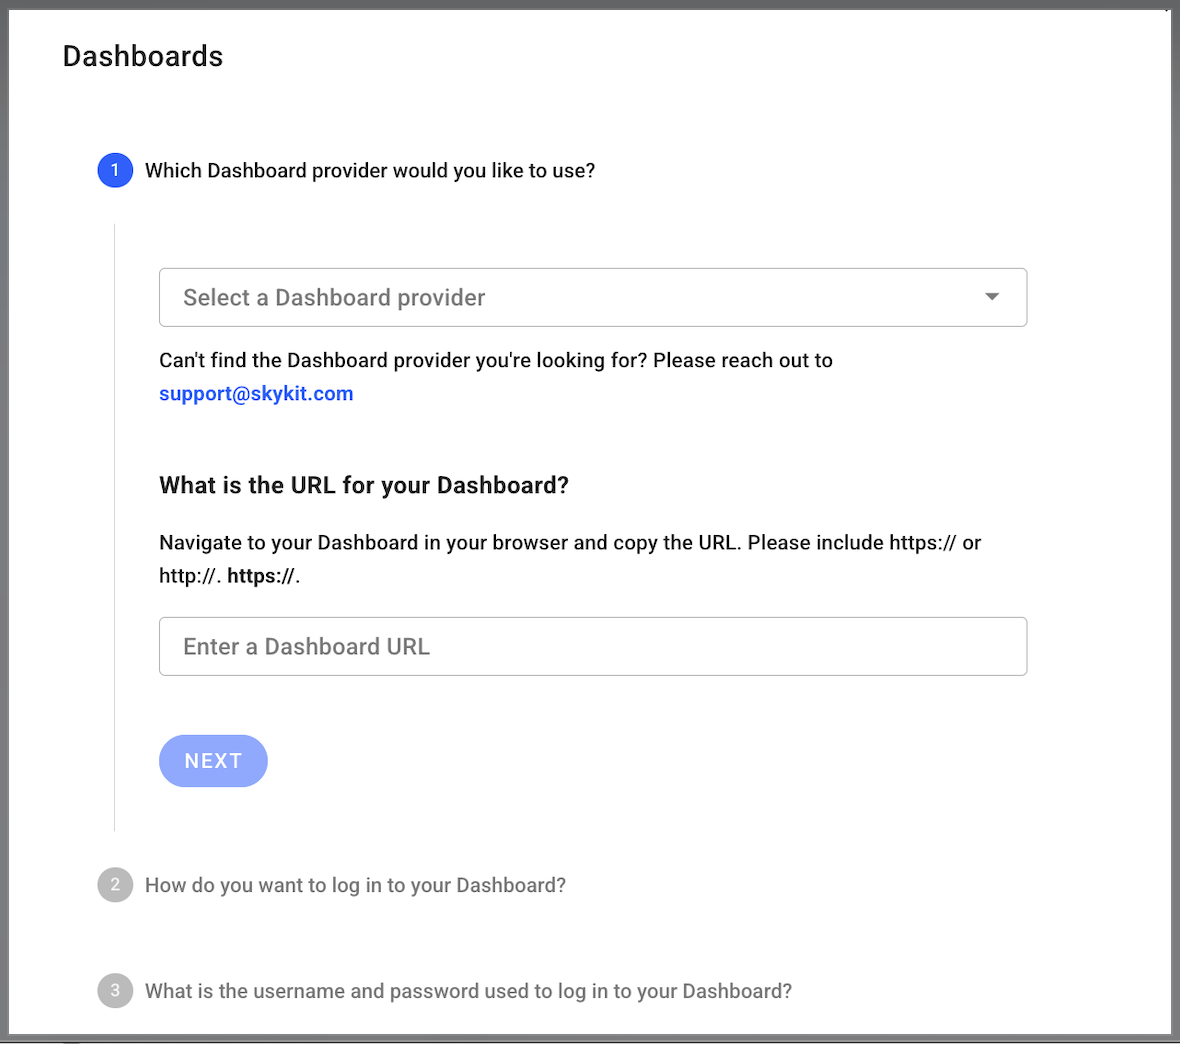
- From the provider list, select the dashboard provider you’re going to use. The list displays all dashboard providers you have access to based on your tenant permissions.
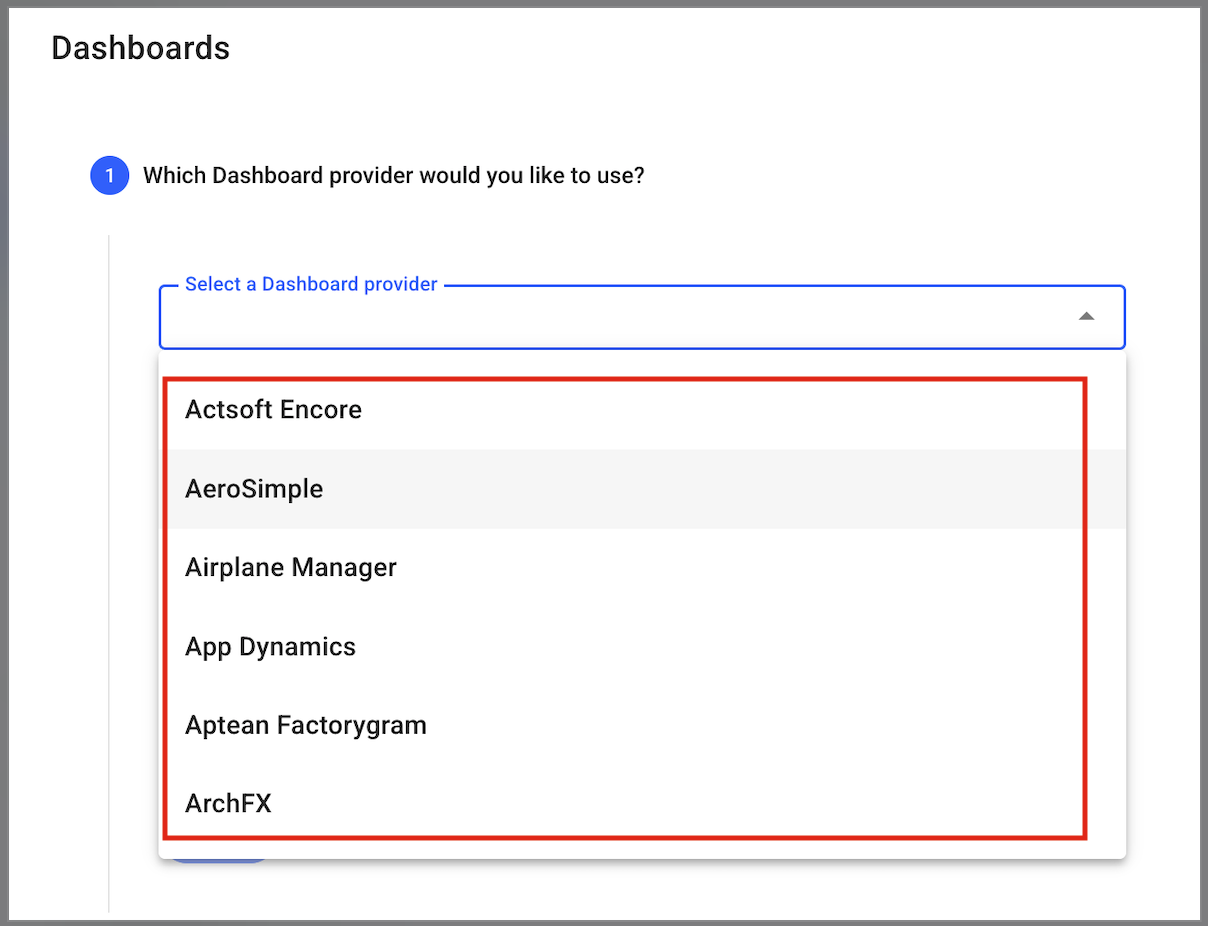
After you select the provider, you'll need a link to the dashboard that you want to display. In the following example, we're using an embedded link from Google Calendar.
You can see the complete library of dashboard connections on Skykit's website.
5. When you have the link to the dashboard, paste it into the URL field and then select Next.
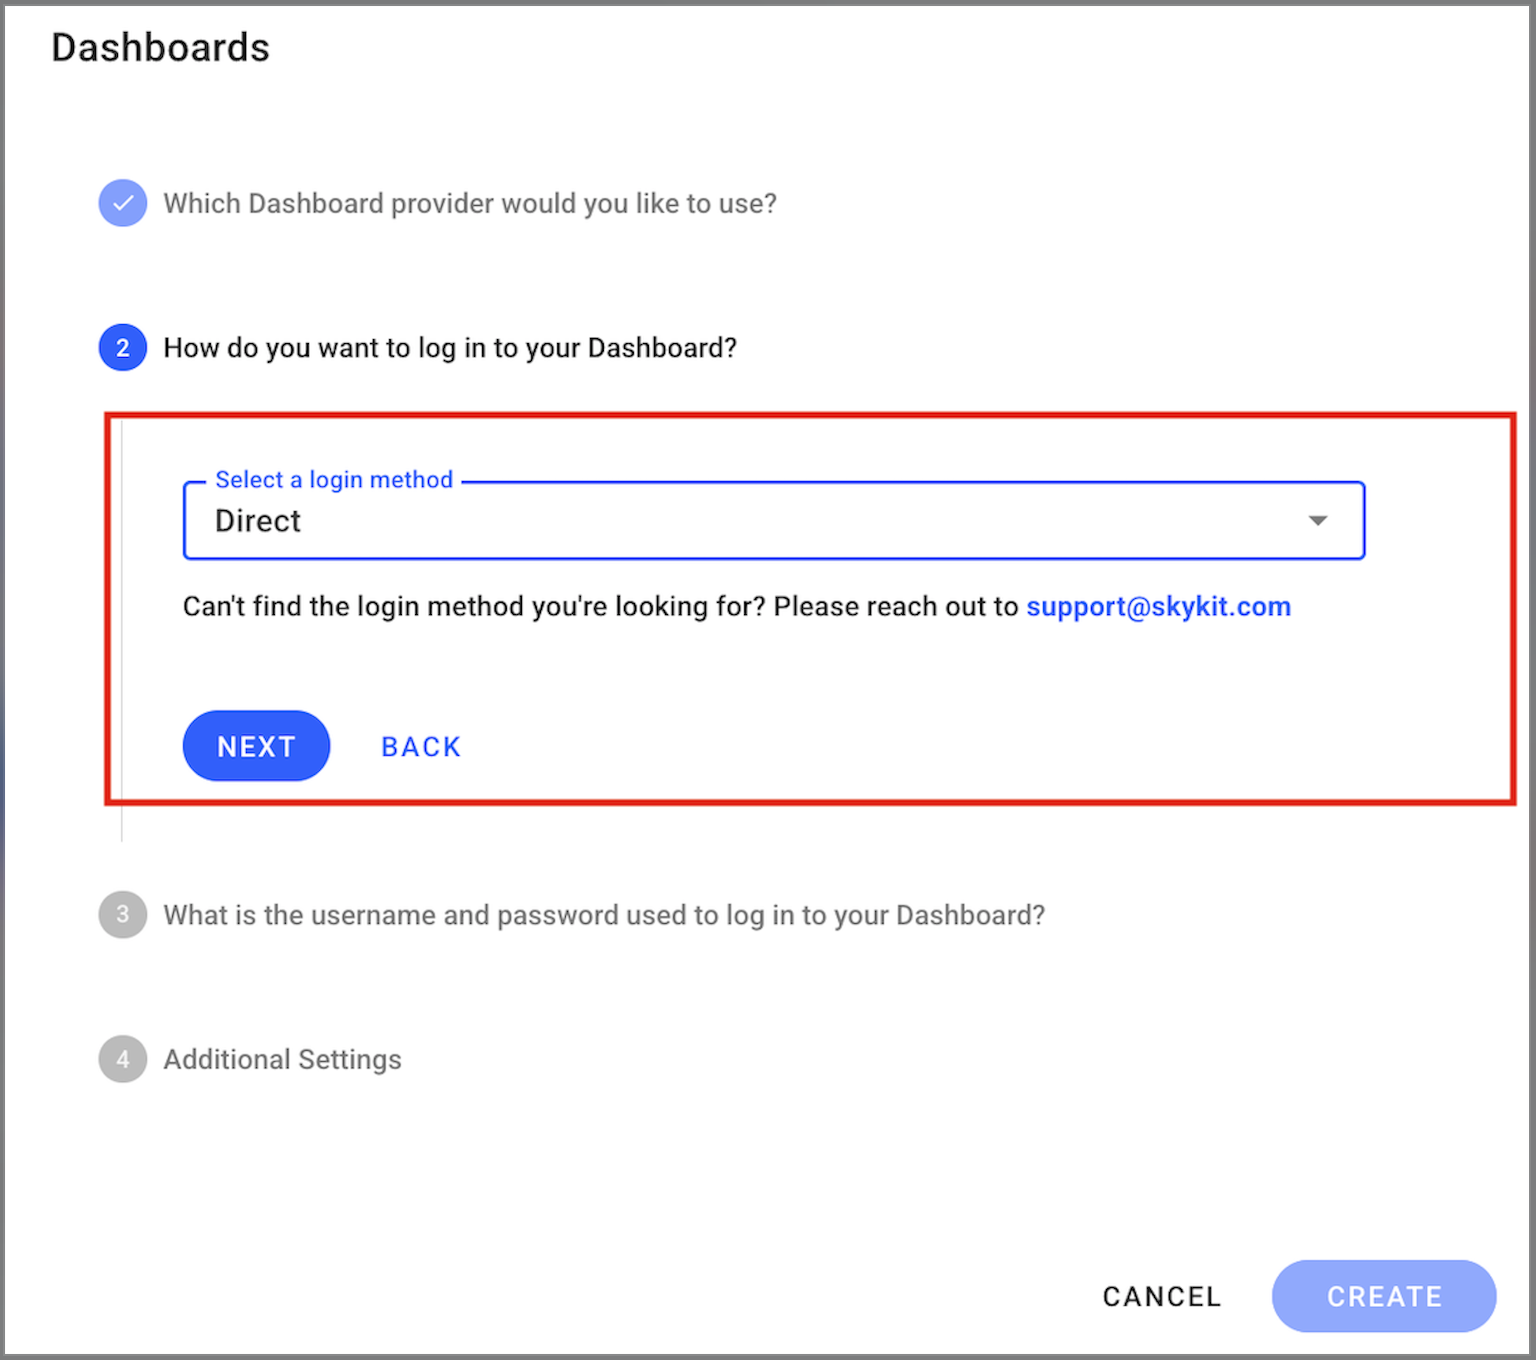
6. From the login drop-down list, select the method you want to use to log in to your dashboard and then select Next. The available methods will vary depending on the dashboard provider you selected.
7. If this is your first dashboard connection, you'll need to create a user name and password.
8. Select +Add a new dashboard username and password from the username list, then enter a user name and password for your dashboard software in the fields.
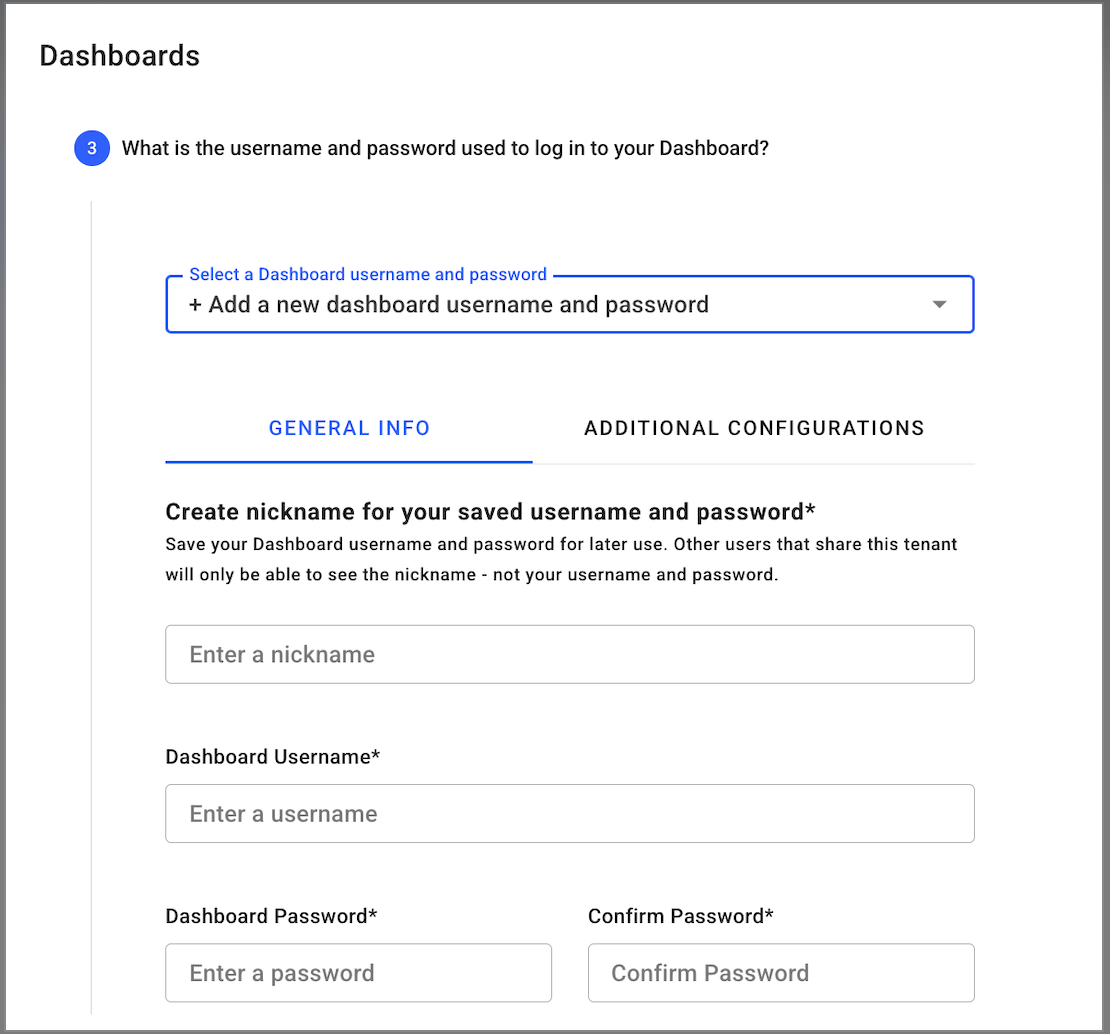
9. The Username and password created in the above step will remain saved in Dashboard Credentials for easier access in the future. Dashboard Credentials menu is available under the user profile menu in top right in Beam.
Please note that the name entered in the 'Nickname' field will automatically populate as the display name for your Dashboard Credentials(for example, Mary's Login).
10. Select Next to continue.
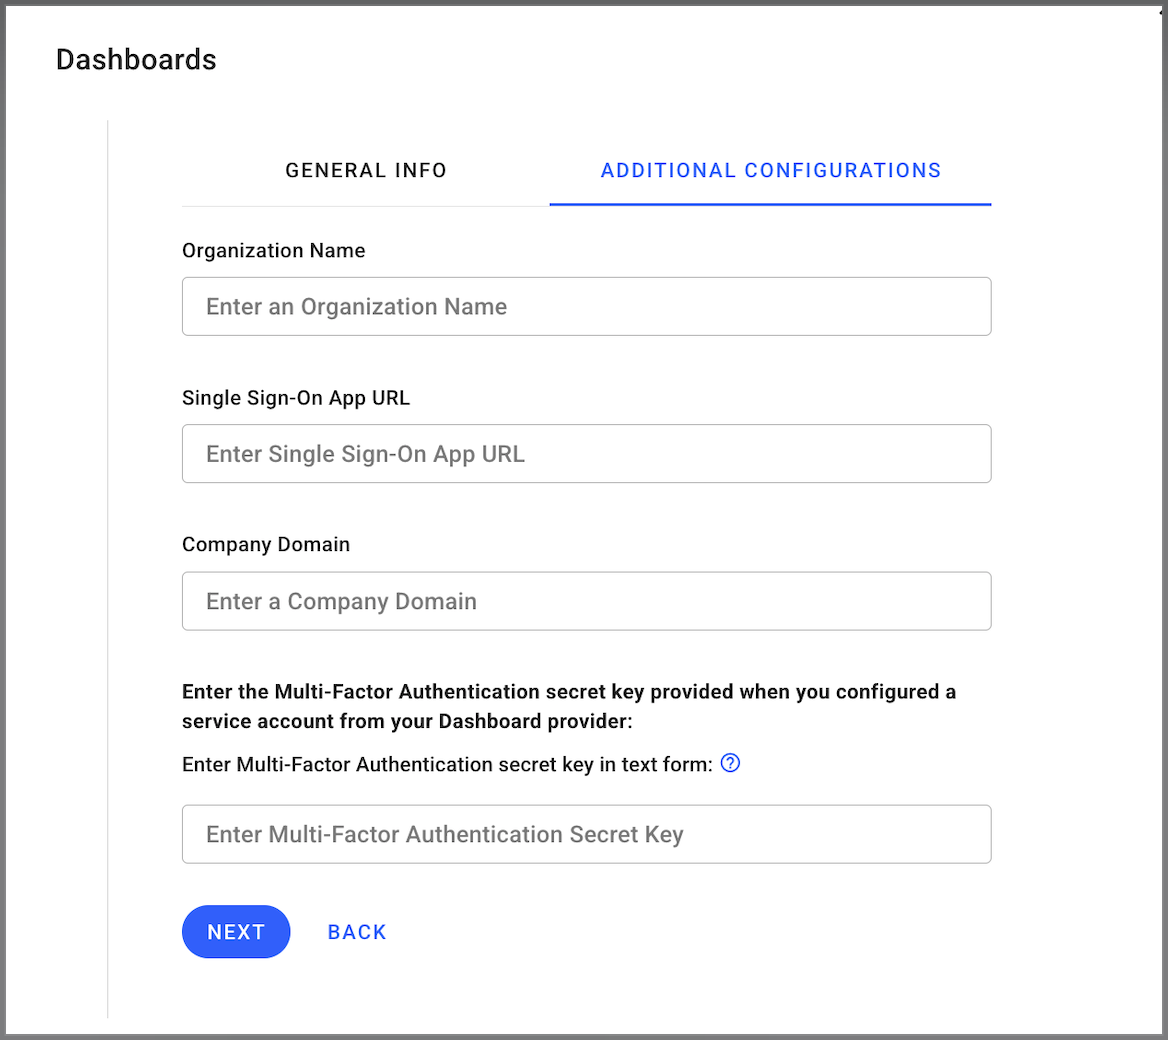
If you have multiple logins and want to add another, you might need to scroll to the bottom of the list to see the option to add another login.
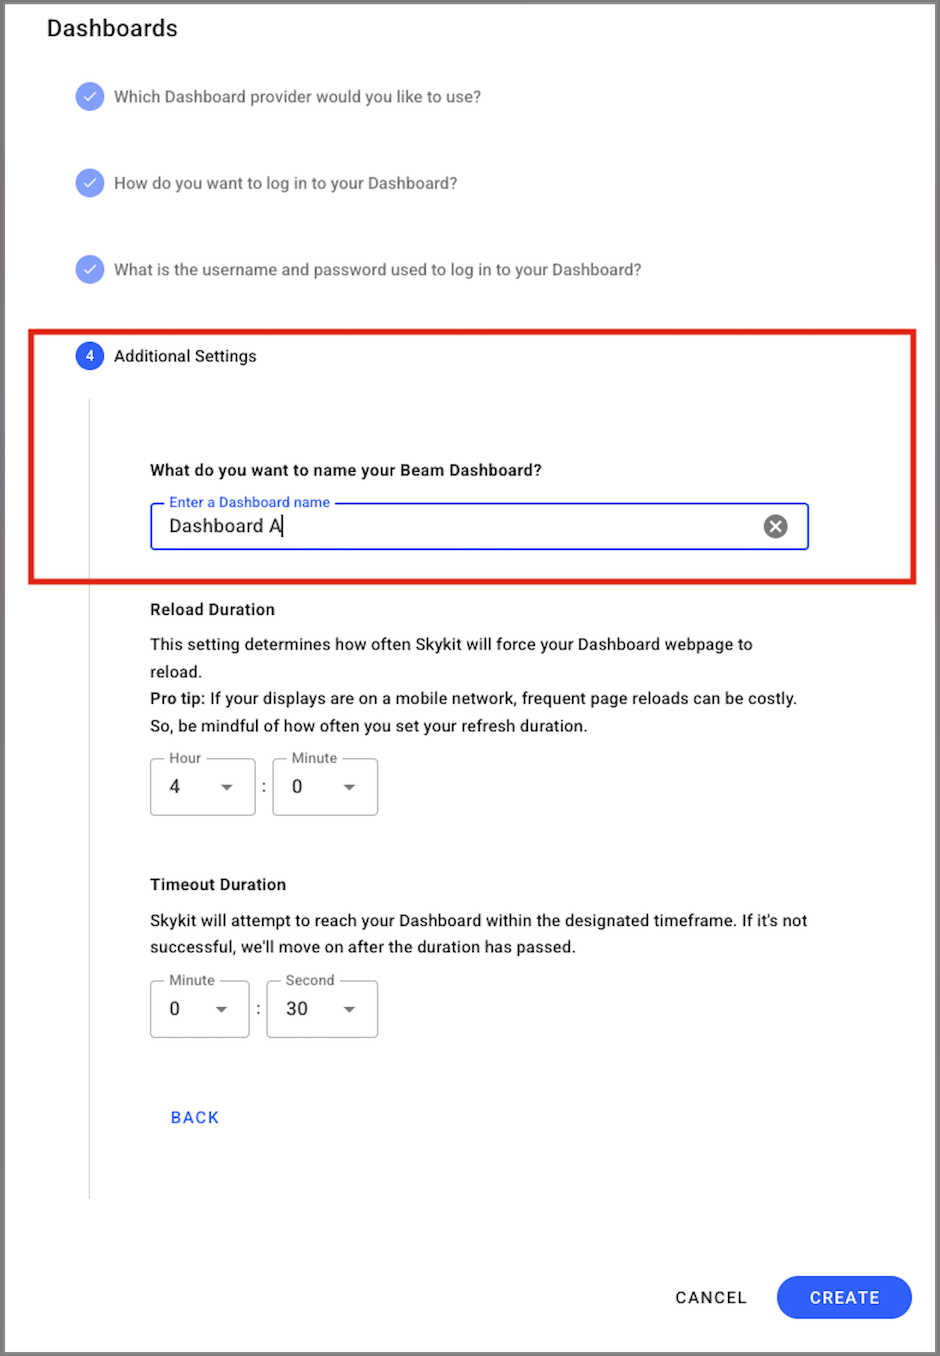
11. Additional Settings
Enter the name you want for the dashboard. This settings allows you to name your dashboard. The name entered here will be displayed in your content list in Beam.
Reload Duration
This value determines how often Skykit will force your Dashboard webpage to reload. It's recommended to mindfully set it when you are on the mobile network.
Timeout Duration
Skykit will attempt to sync with your Dashboard within the allotted window and if a connection is not established, the system will proceed to the next content set to play to maintain player efficiency.
12. Select Create Dashboard to create the dashboard connection and this content will now appear in your beam. Go ahead and Publish it to play it on your Skykit Display.
Next Steps
After you’ve created your dashboard connection, you're ready to manage it or add it to a playlist.