This content type is available in the following plans: | ||
| ✖ Base | ✔ Pro | ✔ Enterprise |
Best Practices for Uploading Videos
🎥 One video per layout
Keep just one video in any multi-panel layout. For ads in lobbies, employee comms in breakrooms, or waiting rooms, let video own the spotlight while using static images, data dashboards, or GIFs in other panels.✨ Keep it simple
Whether it’s a 10-second promo spot, an HR update, or a health tip in a doctor’s office, avoid cluttered visuals. Clean, clear movement captures attention without overwhelming.
✨ Keep it simple
Whether it’s a 10-second promo spot, an HR update, or a health tip in a doctor’s office, avoid cluttered visuals. Clean, clear movement captures attention without overwhelming.
🖥️ Test on screen
Preview in the real-world environment:
Advertising: Check that text and calls-to-action pop at a distance.
Employee comms: Make sure updates are readable quickly in passing.
Healthcare/Waiting rooms: Ensure the pacing feels calm and easy to follow.
🎯 Use strategically
Promos/Adverts: Drive attention to offers, events, or brand storytelling.
Employee Communications: Use short video explainers for HR initiatives, training, or culture moments.
Healthcare & Waiting Areas: Share looping wellness tips, service info, or light animations to ease perceived wait time.
⚡ Optimize file size
Keep videos in compressed formats (MP4, H.264) so playback is smooth whether it’s on a single breakroom screen or a 1,000-screen network.
🔄 Loop smartly
For environments with captive audiences (waiting rooms, cafeterias), shorter loops (15–30 seconds) keep content fresh without fatiguing. For adverts or quick comms, shorter bursts work best.
Video Compatibility and Optimization
Before you upload your videos into Beam, you need to confirm that the files meet the necessary compatibility and optimization requirements.
Skykit currently supports videos up to 500mb.
Skykit is compatible with the following video formats: 3G2, 3GPP, 3GPP2, MKV, MOV, MP4, MPEG, OGG, and WEBM.
Skykit is compatible with the following video resolutions: 1080p, 720p, and 4K.
Refer to Optimizing Videos for Skykit to see recommendations for additional video settings.
Uploading Videos
From the Content menu, select the +Content button.
.png)
A drop-down list opens showing the content options available to you..png)
Select Import Files to expand the menu and then select Local Storage or Microsoft OneDrive, depending on where your videos files are housed (currently, videos cannot be uploaded via Google Drive).
Select the video files you want to upload. You can select multiple files at once or upload videos one at a time.
After you select your files, the Review Upload Queue window opens. This is where you can review the files you want to upload. You can also add or remove videos before you upload them to Beam.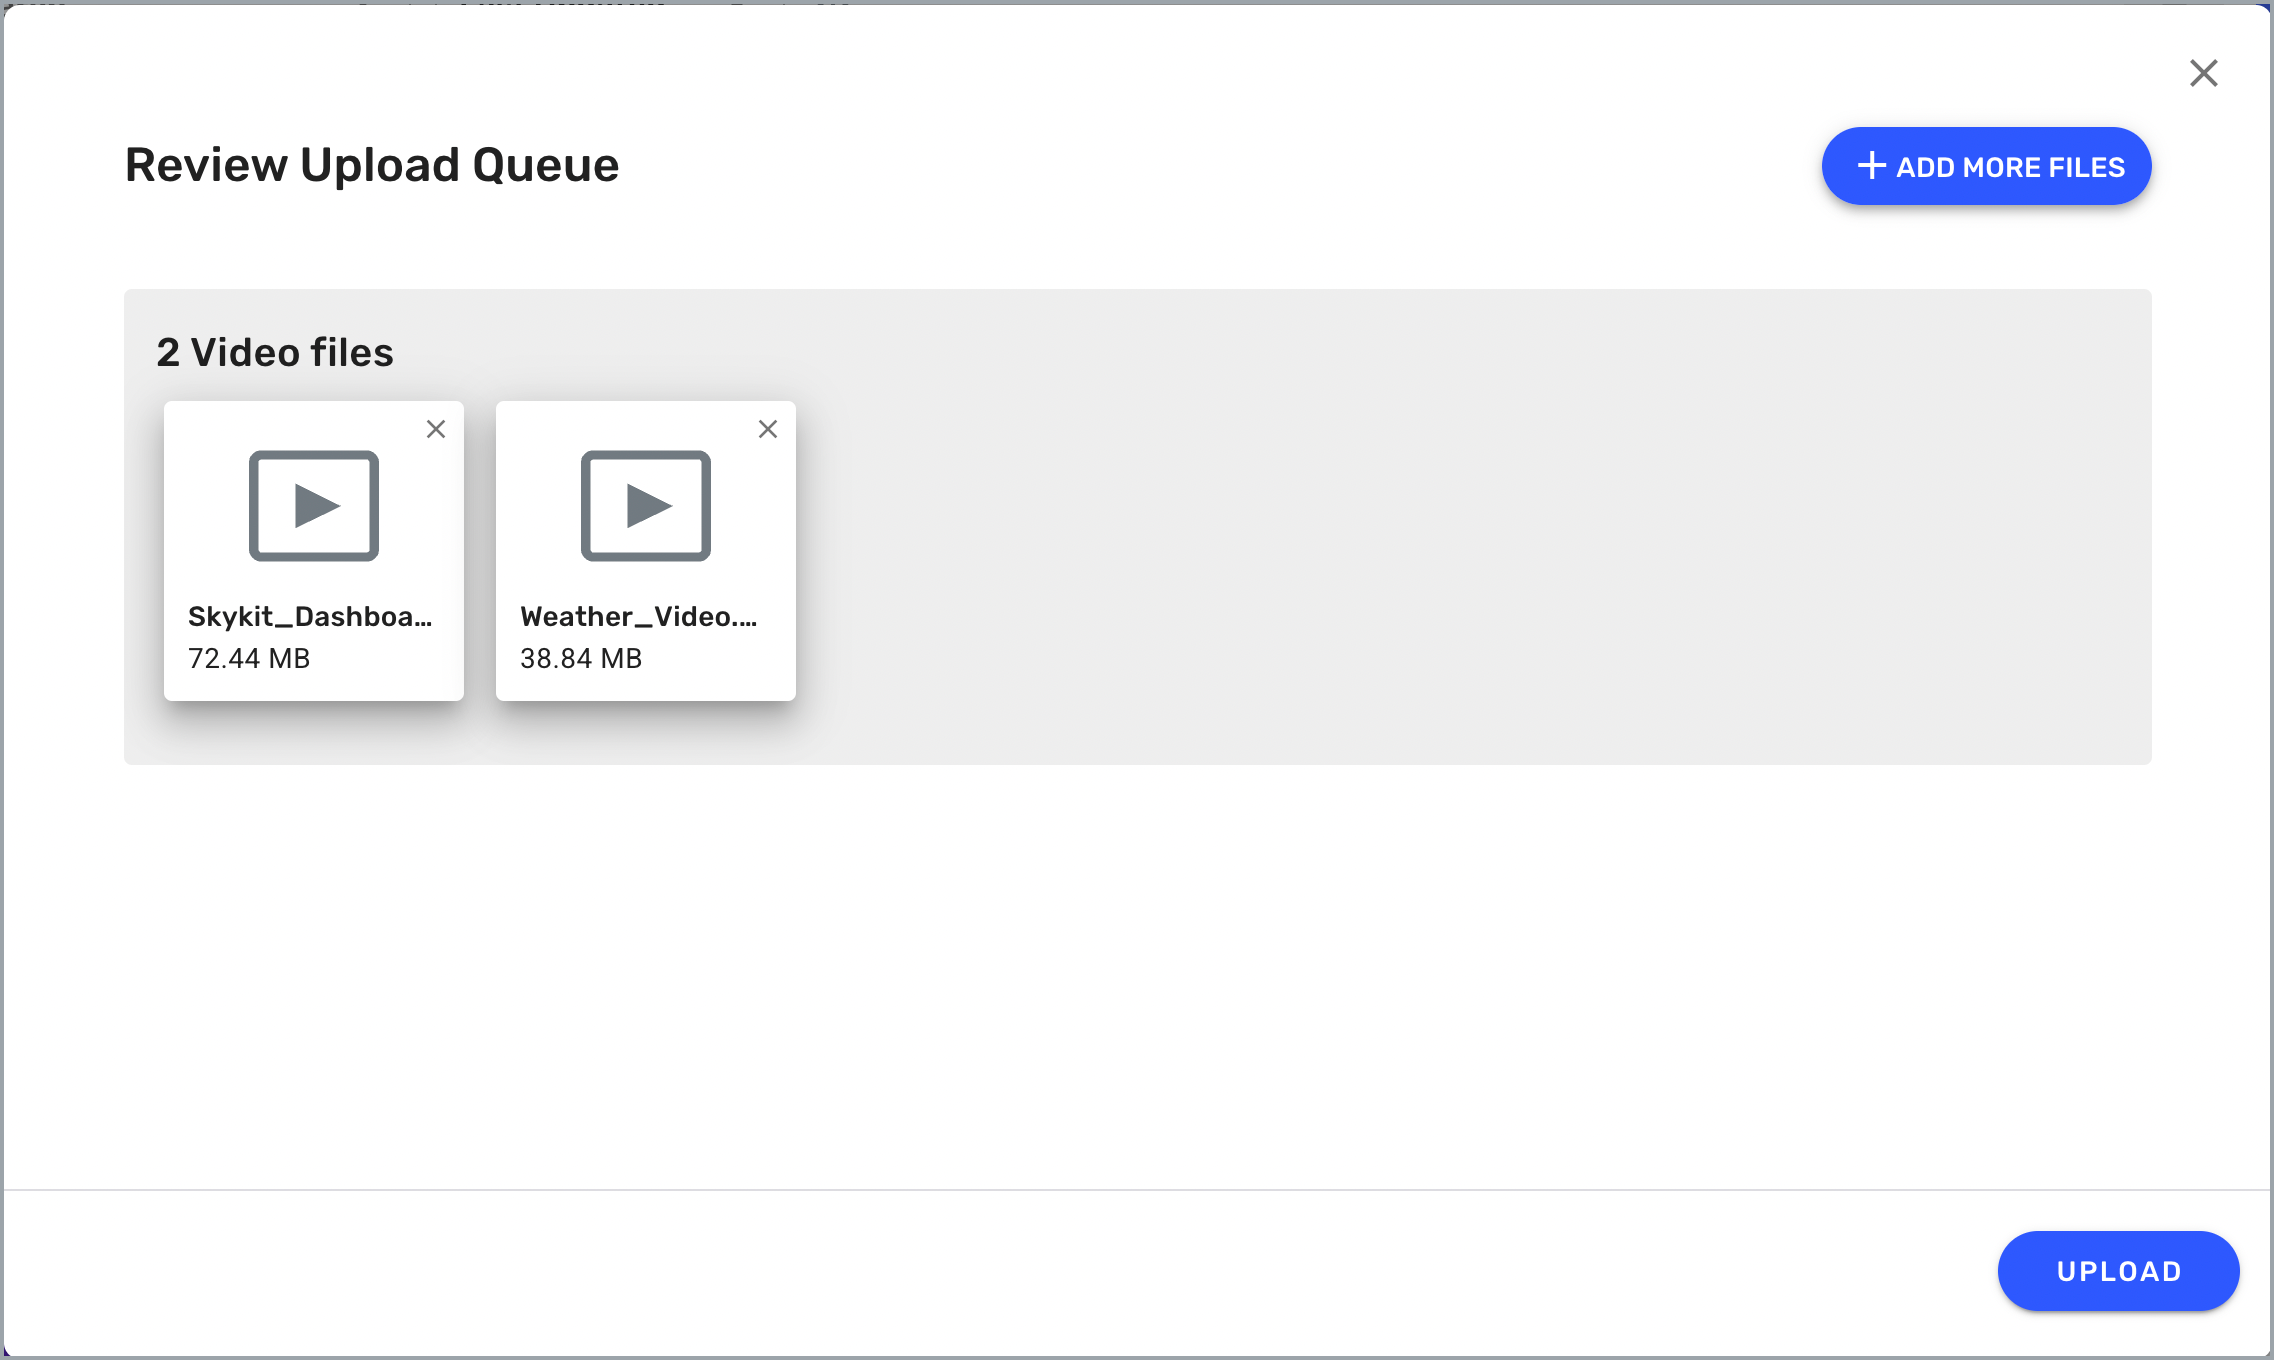
To add more files to the queue, select +Add More Files.
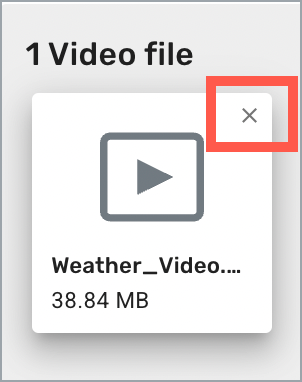
To remove a file from the queue, select the X in the corner of the file image.
After you've added your videos to the queue, select Upload to upload them into Skykit. The Notifications drawer opens automatically so you can monitor the progress of the upload.
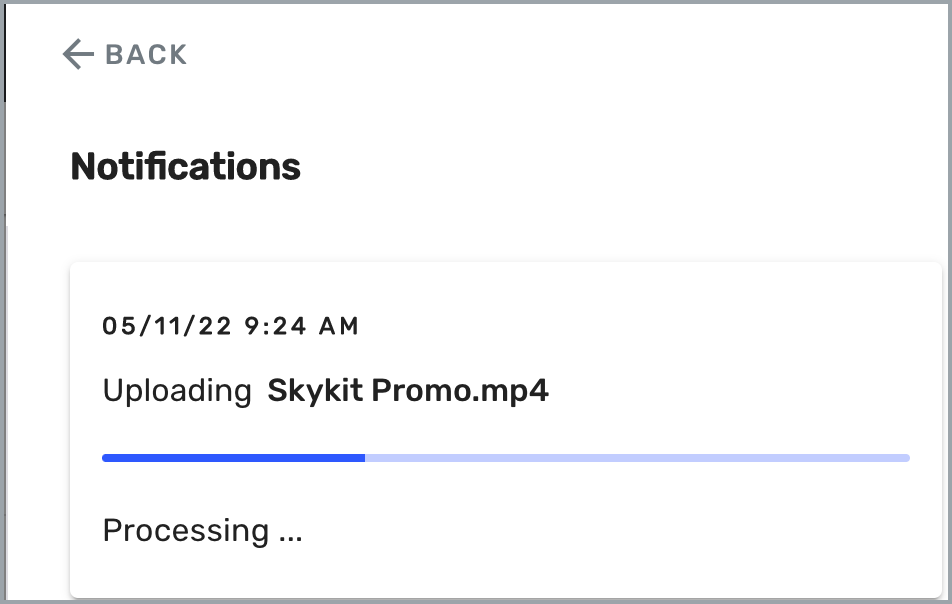
Note: After video files are uploaded, they go through a process called "transcoding," which converts a video file to a format that gives you the best video quality possible. See Video Transcoding to learn more about transcoding and why we do it.
The transcoding process can take some time, especially if your file is large. The Notifications drawer lets you know when the process is complete.
After your videos have been uploaded into Beam and have finished processing, you'll see them listed in the content menu.
.png)
Now your videos are available to publish directly to your displays or to insert into a playlist or program.
Next Steps
Now that you've uploaded your videos into Beam, learn how to manage them.